```
Make sure you have a [verified domain](/learn/domain) with receiving enabled.
## Closing the loop with webhooks
The `webhooks listen` command subscribes to [webhook events](/docs/webhooks) and streams them to your terminal:
```bash
reloop webhooks listen \
--url https://hostname.tailnet-name.ts.net \
--events email.delivered email.bounced email.received
```
Press `Ctrl+C` to stop listening. The webhook is automatically removed when you disconnect.
To forward webhooks to a local development server, use `--forward-to`:
```bash
reloop webhooks listen \
--url https://hostname.tailnet-name.ts.net \
--forward-to http://localhost:4321/api/webhook
```
The `--url` flag requires a publicly reachable URL. We recommend [Tailscale Funnel](https://tailscale.com/kb/1223/funnel), [ngrok](https://ngrok.com/), or [localtunnel](https://theboringtech.io/) for local development.
If you prefer to set up webhooks manually, use `reloop webhooks create`.
---
# integrations/ai-tools/mcp-server.mdx
Source: https://reloop.sh/docs/integrations/ai-tools/mcp-server
Markdown: https://reloop.sh/docs/integrations/ai-tools/mcp-server.md
## What is an MCP Server?
The Model Context Protocol (MCP) is an open standard that lets AI models connect to external tools and data sources. An MCP server acts as a bridge between your AI agent and the Reloop API, allowing the agent to send emails, manage contacts, handle domains, and more — all through natural language.
## What can Reloop's MCP Server do?
The [Reloop MCP Server](https://github.com/reloop-labs/reloop-mcp) exposes the full Reloop API as MCP tools:
- **Emails** — Send, list, get, cancel, update, and batch send emails. Supports HTML, plain text, attachments (local file, URL, or base64), CC/BCC, reply-to, scheduling, tags, and topic-based sending.
- **Received Emails** — List and read inbound emails. List and download received email attachments.
- **Contacts** — Create, list, get, update, and remove contacts. Manage segment memberships and topic subscriptions. Supports custom contact properties.
- **Broadcasts** — Create, send, list, get, update, and remove broadcast campaigns. Supports scheduling, personalization placeholders, and preview text.
- **Domains** — Create, list, get, update, remove, and verify sender domains. Configure tracking, TLS, and sending/receiving capabilities.
- **Segments** — Create, list, get, and remove audience segments.
- **Topics** — Create, list, get, update, and remove subscription topics.
- **Contact Properties** — Create, list, get, update, and remove custom contact attributes.
- **API Keys** — Create, list, and remove API keys.
- **Webhooks** — Create, list, get, update, and remove webhooks for event notifications.
- **Templates** — Create, list, get, update, and remove email templates.
## Prerequisites
You'll need a supported MCP client and `npx` installed on your machine.
- [Create an API key](https://app.reloop.sh/api-keys)
- [Verify your domain](https://app.reloop.sh/domains)
## How to use the MCP Server
Replace `rl_xxxxxxxxx` with your actual Reloop API key.
### Stdio Transport (Default)
```bash
claude mcp add reloop -e RELOOP_API_KEY=rl_xxxxxxxxx -- npx -y reloop-mcp
```
```bash
codex mcp add reloop \
--env RELOOP_API_KEY=rl_xxxxxxxxx \
-- npx -y reloop-mcp
```
```json
{
"mcpServers": {
"reloop": {
"command": "npx",
"args": ["-y", "reloop-mcp"],
"env": {
"RELOOP_API_KEY": "rl_xxxxxxxxx"
}
}
}
}
```
```json
{
"mcpServers": {
"reloop": {
"command": "npx",
"args": ["-y", "reloop-mcp"],
"env": {
"RELOOP_API_KEY": "rl_xxxxxxxxx"
}
}
}
}
```
Add the following to your VS Code `settings.json`:
```json
{
"mcp": {
"servers": {
"reloop": {
"command": "npx",
"args": ["-y", "reloop-mcp"],
"env": {
"RELOOP_API_KEY": "rl_xxxxxxxxx"
}
}
}
}
}
```
```json
{
"mcpServers": {
"reloop": {
"command": "npx",
"args": ["-y", "reloop-mcp"],
"env": {
"RELOOP_API_KEY": "rl_xxxxxxxxx"
}
}
}
}
```
Add to your `opencode.json`:
```json
{
"$schema": "https://opencode.ai/config.json",
"mcp": {
"reloop": {
"type": "local",
"command": ["npx", "-y", "reloop-mcp"],
"enabled": true,
"environment": {
"RELOOP_API_KEY": "rl_xxxxxxxxx"
}
}
}
}
```
```json
{
"mcpServers": {
"reloop": {
"command": "npx",
"args": ["-y", "reloop-mcp"],
"env": {
"RELOOP_API_KEY": "rl_xxxxxxxxx"
}
}
}
}
```
### HTTP Transport
For HTTP transport, the API key is passed via the `Authorization` header instead of an environment variable.
Start the server:
```bash
npx -y reloop-mcp --http --port 3000
```
The server will be available at `http://127.0.0.1:3000` with the MCP endpoint at `/mcp`.
```bash
claude mcp add reloop --transport http http://127.0.0.1:3000/mcp --header "Authorization: Bearer rl_xxxxxxxxx"
```
```json
{
"mcpServers": {
"reloop": {
"url": "http://127.0.0.1:3000/mcp",
"headers": {
"Authorization": "Bearer rl_xxxxxxxxx"
}
}
}
}
```
You can customize the port with the `MCP_PORT` environment variable:
```bash
MCP_PORT=3000 npx -y reloop-mcp --http
```
### Options
**CLI flags:**
- `--key`: Your Reloop API key (stdio mode only; HTTP mode uses the Bearer token from the client)
- `--sender`: Default sender email address from a verified domain
- `--reply-to`: Default reply-to email address (can be specified multiple times)
- `--http`: Use HTTP transport instead of stdio (default: stdio)
- `--port`: HTTP port when using `--http` (default: 3000, or `MCP_PORT` env var)
**Environment variables:**
- `RELOOP_API_KEY`: Your Reloop API key (required for stdio, optional for HTTP)
- `SENDER_EMAIL_ADDRESS`: Default sender email address from a verified domain (optional)
- `REPLY_TO_EMAIL_ADDRESSES`: Comma-separated reply-to email addresses (optional)
- `MCP_PORT`: HTTP port when using `--http` (optional)
## Local Development
```bash
git clone https://github.com/reloop-labs/reloop-mcp.git
pnpm install
pnpm run build
```
Replace `npx` commands above with direct `node` commands.
### Stdio
```bash
claude mcp add reloop -e RELOOP_API_KEY=rl_xxxxxxxxx -- node ABSOLUTE_PATH_TO_PROJECT/dist/index.js
```
```bash
codex mcp add reloop \
--env RELOOP_API_KEY=rl_xxxxxxxxx \
-- node ABSOLUTE_PATH_TO_PROJECT/dist/index.js
```
```json
{
"mcpServers": {
"reloop": {
"command": "node",
"args": ["ABSOLUTE_PATH_TO_PROJECT/dist/index.js"],
"env": {
"RELOOP_API_KEY": "rl_xxxxxxxxx"
}
}
}
}
```
### HTTP
```bash
node ABSOLUTE_PATH_TO_PROJECT/dist/index.js --http --port 3000
```
```bash
claude mcp add reloop --transport http http://127.0.0.1:3000/mcp --header "Authorization: Bearer rl_xxxxxxxxx"
```
```json
{
"mcpServers": {
"reloop": {
"url": "http://127.0.0.1:3000/mcp",
"headers": {
"Authorization": "Bearer rl_xxxxxxxxx"
}
}
}
}
```
## Testing with MCP Inspector
Follow the [Local Development](#local-development) steps above first.
### Using Stdio Transport
1. Set your API key:
```bash
```
2. Start the inspector:
```bash
pnpm inspector
```
3. Configure in the browser:
- Choose **stdio** (launch a process)
- Command: `node`
- Args: `dist/index.js` (or the full path to `dist/index.js`)
- Env: `RELOOP_API_KEY=rl_your_key_here`
- Click **Connect**, then use "List tools" to verify the server is working
### Using HTTP Transport
1. Start the HTTP server:
```bash
node dist/index.js --http --port 3000
```
2. Start the inspector:
```bash
pnpm inspector
```
3. Configure in the browser:
- Choose **Streamable HTTP** (connect to URL)
- URL: `http://127.0.0.1:3000/mcp`
- Add a custom header: `Authorization: Bearer rl_your_key_here` and activate the toggle
- Click **Connect**, then use "List tools" to verify the server is working
---
# integrations/ai-tools/openclaw-guide.mdx
Source: https://reloop.sh/docs/integrations/ai-tools/openclaw-guide
Markdown: https://reloop.sh/docs/integrations/ai-tools/openclaw-guide.md
Learn how to give your AI agent a dedicated email inbox using Reloop, so it can send and receive emails autonomously.
## Why should I give my agent an inbox?
An AI agent with its own email address can:
- Sign up for its own accounts to GitHub, hosting platforms, and more, so you don't need to share your own credentials.
- Process attachments (like receipts, invoices, etc.) and act accordingly
- Receive newsletters, parse them, and send the most important information to you
- Send you daily reports and digests
- Send and receive emails on your behalf
## How to set up an inbox for OpenClaw
### Step 1: Install the skill
Tell your agent:
```
Let's get you set up with an email inbox! Install the reloop-skills from https://github.com/reloop-labs/reloop-skills and review them before continuing.
```
Alternatively, you can install the skills using the [Reloop CLI](/sdk/cli):
```bash
npx skills add reloop/reloop-skills
```
### Step 2: Get an API key
1. Open the [API Keys](https://app.reloop.sh/api-keys) page
2. Choose a name and permission scope
3. Create the API key
Store the key securely:
1. SSH into your agent's machine and store the API key in an `.env` file.
2. Store the API key in a password manager like 1Password, and give your agent access to its own vault. This can be done using a [1Password Service Account](https://developer.1password.com/docs/service-accounts/) on team plans.
### Step 3: Verify a domain
We [strongly recommend](/learn/domain) using a subdomain like `agent.example.com` rather than your root `example.com` domain. This keeps your agent's email reputation separate.
You can set up a domain using the [Reloop CLI](/sdk/cli) or through the dashboard:
1. Go to the [Domains tab](https://app.reloop.sh/domains) and add a domain
2. Select a subdomain and region
3. Configure DNS:
- **Auto Configure**: Automatically configure DNS records if your provider supports it.
- **Go to (provider)**: Open your provider's website to add records manually.
- **I've added the records**: Manually add DNS records via your DNS provider.
4. Enable receiving on the domain
5. Add the DNS records and wait for verification
See our [guide on verifying a domain](/learn/domain) for detailed instructions.
### Step 4: Use webhooks to receive emails
**Ask your agent to set up a webhook server:**
```
I want you to be able to receive emails, too. Let's set up a webhook to receive emails at my domain using the agent email inbox agent skill.
```
**Set up a tunnel:**
Use [Tailscale Funnel](https://tailscale.com/kb/1223/funnel) to expose your agent's webhook server:
```bash
tailscale funnel 3000
```
This gives you a public URL like `https://hostname.tailnet-name.ts.net`.
**Give your agent access to secrets securely** (see [Step 2](#step-2-get-an-api-key)).
**Add the webhook to Reloop:**
```
Let's add a webhook to Reloop using the server you just built. Use the email.received event, as instructed by the reloop-skills agent skill, and securely save the returned webhook signing secret.
```
**Test receiving an email:**
```typescript
const reloop = new Reloop(process.env.RELOOP_API_KEY);
// Security: strict allowlist
const ALLOWED_SENDERS = ['your@email.com'];
async function handler(req) {
const payload = await req.text();
const id = req.headers.get('svix-id');
const timestamp = req.headers.get('svix-timestamp');
const signature = req.headers.get('svix-signature');
if (!id || !timestamp || !signature) {
return new Response('Missing headers', { status: 400 });
}
const event = reloop.webhooks.verify({
payload,
headers: { id, timestamp, signature },
webhookSecret: process.env.RELOOP_WEBHOOK_SECRET,
});
if (event.type === 'email.received') {
// Security check
if (!ALLOWED_SENDERS.includes(event.data.from.toLowerCase())) {
return new Response('OK', { status: 200 });
}
// Get full email
const { data: email } = await reloop.emails.receiving.get(
event.data.email_id,
);
// Notify user instantly
await notifyUser(email);
}
return new Response('OK', { status: 200 });
}
```
See our [guide on receiving emails with Reloop](/learn/receiving) for more details.
### Step 5: Hook into OpenClaw's APIs for instant notifications
**Ask your agent to hook into the Gateway API:**
```
Use the OpenClaw Gateway API to notify me instantly when you receive an email webhook call from Reloop. Use the reloop-skills agent skill for guidance.
```
**Test instant notifications** by sending an email to your agent's address and verifying it receives it.
## Security considerations
The [Agent Email Inbox skill](https://github.com/reloop-labs/reloop-skills/blob/main/skills/agent-email-inbox/SKILL.md#security-levels) includes security guidelines with five levels:
1. **Strict Allowlist**: Only allow emails from specific senders. Recommended for most use cases.
2. **Domain Allowlist**: Allow emails from any sender from a given domain (e.g. anyone from `example.com`).
3. **Content Filtering with Sanitization**: Accept emails from anyone, but sanitize content to remove potential injection attempts.
4. **Sandboxed Processing**: Process all emails but in a restricted context where the agent has limited capabilities.
5. **Human-in-the-Loop**: Process all emails but require human approval for each email.
Review the [Reloop Skill](https://github.com/reloop-labs/reloop-skills/blob/main/skills/agent-email-inbox/SKILL.md#security-levels) for detailed security guidance. If you have questions, [contact support](https://reloop.sh/help).
---
# integrations/agent-skills/agent-email-inbox.mdx
Source: https://reloop.sh/docs/integrations/agent-skills/agent-email-inbox
Markdown: https://reloop.sh/docs/integrations/agent-skills/agent-email-inbox.md
Give your AI agent a secure email inbox to receive and act on inbound emails. This skill provides your agent with the knowledge to set up, secure, and manage an email inbox for receiving messages.
## Installation
The Agent Email Inbox skill is part of the [reloop-skills](https://github.com/reloop-labs/reloop-skills) collection:
```bash
npx skills add reloop/reloop-skills
```
## Features
- **Webhook-based receiving**: Set up webhooks to receive inbound emails in real-time
- **Email parsing**: Extract structured data from incoming emails (sender, subject, body, attachments)
- **Attachment handling**: Download and process email attachments securely
- **Security guidelines**: Built-in security levels from strict allowlists to sandboxed processing
- **Event-driven architecture**: React to incoming emails with automated workflows
## Security Levels
The skill includes five security levels you can implement based on your needs:
1. **Strict Allowlist** — Only process emails from pre-approved senders. Recommended for most use cases.
2. **Domain Allowlist** — Allow emails from any sender at approved domains.
3. **Content Filtering** — Accept all emails but sanitize content before processing.
4. **Sandboxed Processing** — Process in a restricted context with limited agent capabilities.
5. **Human-in-the-Loop** — Queue all emails for human approval before agent processing.
## How it works
Your agent needs a verified domain with receiving enabled. See [Domains](/learn/domain).
Your agent creates an HTTP endpoint to receive webhook events from Reloop.
Subscribe to `email.received` events via the Reloop API or CLI.
When an email arrives, Reloop sends a webhook to your endpoint. Your agent verifies the signature, fetches the full email, and processes it.
## Learn More
- [OpenClaw Guide](/integrations/openclaw-guide) — Step-by-step guide for setting up an agent inbox
- [Receiving Emails](/learn/receiving) — General guide on receiving emails with Reloop
- [Webhooks](/docs/webhooks) — Webhook setup and event types
- [View on GitHub](https://github.com/reloop-labs/reloop-skills/tree/main/skills/agent-email-inbox)
---
# integrations/agent-skills/email-best-practices.mdx
Source: https://reloop.sh/docs/integrations/agent-skills/email-best-practices
Markdown: https://reloop.sh/docs/integrations/agent-skills/email-best-practices.md
A comprehensive skill that teaches your AI agent best practices for building production-ready email systems. This skill covers deliverability, authentication, content guidelines, and compliance.
## Installation
```bash
npx skills add reloop/email-best-practices
```
## What's covered
### Deliverability
- SPF, DKIM, and DMARC authentication setup
- Domain warmup strategies for new sending domains
- Reputation management and monitoring
- Bounce handling and suppression lists
- Throttling and rate limiting best practices
### Content Guidelines
- Subject line optimization for engagement
- Plain text vs HTML email best practices
- Image-to-text ratio recommendations
- Call-to-action (CTA) best practices
- Mobile-responsive email design
### Compliance
- CAN-SPAM Act requirements
- GDPR considerations for email
- Unsubscribe link requirements
- Physical address requirements
- Consent management (opt-in/opt-out)
### Transactional vs Marketing
- When to use transactional emails vs marketing emails
- Separate sending domains and IP pools
- Appropriate content for each type
- Legal distinctions and requirements
### Error Handling
- Retry strategies for failed sends
- Handling bounces (hard vs soft)
- Managing complaint feedback loops
- Monitoring delivery rates and engagement metrics
## Rules
The skill provides your agent with actionable rules such as:
- Always include a plain text version alongside HTML
- Never use a no-reply sender address for marketing emails
- Always verify your sending domain before sending at scale
- Use dedicated subdomains for transactional and marketing email
- Implement exponential backoff for API retries
- Always include an unsubscribe mechanism in marketing emails
## Learn More
- [Sending Emails](/learn/sending) — Guide to sending emails with Reloop
- [Domains](/learn/domain) — Domain verification and DNS configuration
- [View on GitHub](https://github.com/reloop-labs/reloop-skills/tree/main/skills/email-best-practices)
---
# integrations/agent-skills/reloop-skill.mdx
Source: https://reloop.sh/docs/integrations/agent-skills/reloop-skill
Markdown: https://reloop.sh/docs/integrations/agent-skills/reloop-skill.md
Send emails through the Reloop API with AI agents. This skill gives your agent comprehensive knowledge of the Reloop API, including sending, receiving, and managing emails.
## Installation
The Reloop skill is part of the [reloop-skills](https://github.com/reloop-labs/reloop-skills) collection. It also includes the [Agent Email Inbox](/integrations/agent-email-inbox) skill.
```bash
npx skills add reloop/reloop-skills
```
## Advantages
- **Single and batch email sending**: Send individual emails or batch up to 100 emails per request.
- **Built-in error handling and retry logic**: Automatic retries with exponential backoff for transient failures.
- **Idempotency key support**: Prevent duplicate sends with idempotency keys for safe retries.
- **Multi-language SDK support**: Works with Node.js, Python, Ruby, Go, and other supported SDKs.
- **Automatic activation for email tasks**: AI agents automatically use this skill when email sending is needed.
## What's included
The skill teaches your agent:
- How to authenticate with the Reloop API
- Sending emails (single and batch)
- Managing contacts and audiences
- Working with templates
- Handling webhooks and events
- Domain verification and configuration
- Best practices for deliverability
## Learn More
- [Reloop API Reference](/api)
- [SDKs](/resources/sdks)
- [View on GitHub](https://github.com/reloop-labs/reloop-skills/tree/main/skills/reloop)
---
# resources/cli.mdx
Source: https://reloop.sh/docs/resources/cli
Markdown: https://reloop.sh/docs/resources/cli.md
# CLI
Coming soon.
---
# resources/sdks.mdx
Source: https://reloop.sh/docs/resources/sdks
Markdown: https://reloop.sh/docs/resources/sdks.md
Official Node.js SDK for server-side JavaScript and TypeScript.
Official Python client library for the Reloop API.
Official Go client library for the Reloop API.
Official Java SDK for JVM-based applications.
Official PHP library for integrating with Reloop.
Official Ruby gem for integrating with Reloop.
Official Rust crate for integrating with Reloop.
Official Elixir library for integrating with Reloop.
Official .NET library for C# and other JVM/.NET applications.
## Missing your language?
We're actively expanding our SDK coverage. If your language or framework isn't listed above, you can:
Integrate directly with our raw REST API endpoints.
Open an issue on GitHub to request or upvote a new SDK.
All SDKs are open-source and contributions are welcome.
---
# resources/security.mdx
Source: https://reloop.sh/docs/resources/security
Markdown: https://reloop.sh/docs/resources/security.md
# Security
Coming soon.
---
# examples/go/gin.mdx
Source: https://reloop.sh/docs/examples/go/gin
Markdown: https://reloop.sh/docs/examples/go/gin.md
# Gin Integration
Integrate Reloop into your Go web application using the Gin framework.
## Installation
Install the official Go SDK:
```bash
go get github.com/reloop-labs/reloop-go
```
## Sending an Email
```go
package main
"context"
"net/http"
"os"
"github.com/gin-gonic/gin"
"github.com/reloop-labs/reloop-go"
)
func main() {
r := gin.Default()
client := reloop.NewClient(os.Getenv("RELOOP_API_KEY"))
r.POST("/send-email", func(c *gin.Context) {
params := &reloop.SendEmailParams{
From: "onboarding@reloop.sh",
To: []string{"delivered@resend.dev"},
Subject: "Hello from Gin",
HTML: "Congrats on sending your first email via Reloop from Go Gin!
",
}
res, err := client.Emails.Send(context.Background(), params)
if err != nil {
c.JSON(http.StatusInternalServerError, gin.H{"error": err.Error()})
return
}
c.JSON(http.StatusOK, res)
})
r.Run(":8080")
}
```
---
# examples/index.mdx
Source: https://reloop.sh/docs/examples
Markdown: https://reloop.sh/docs/examples.md
# Examples
Explore code examples and integration guides to connect Reloop using your favorite language, framework, or SMTP.
## Node.js
Integrate Reloop into Node.js applications.
Send emails in Next.js Server Actions and Route Handlers.
Connect Reloop to an Express REST API backend.
## Python
Integrate Reloop into Python applications.
Asynchronous email sending with FastAPI.
Configure email sending using Django's backend.
Simple email templates in Flask.
## Go
Integrate Reloop into Go applications.
Send emails through a Go Gin web server.
## Ruby
Integrate Reloop into Ruby applications.
Configure Rails Action Mailer to send via Reloop.
## PHP
Integrate Reloop into PHP applications.
Configure Laravel Mail driver to route through Reloop.
## Rust
Integrate Reloop into Rust applications.
Asynchronous email dispatch inside an Axum web framework.
## SMTP Relay
Configure standard SMTP library examples.
Standard Node SMTP using Nodemailer.
Built-in smtplib Python SMTP.
Built-in net/smtp Go implementation.
Standard PHP SMTP connection.
Standard Ruby Net::SMTP integration.
Lettre SMTP library for Rust.
---
# examples/nodejs/express.mdx
Source: https://reloop.sh/docs/examples/nodejs/express
Markdown: https://reloop.sh/docs/examples/nodejs/express.md
# Express Integration
Reloop can be easily integrated into any Express application.
## Installation
Install the official Node.js SDK:
```bash
npm install reloop-email
```
## Setup Environment Variables
Add your Reloop API key to your environment variables or a `.env` file:
```env
RELOOP_API_KEY=re_your_api_key_here
```
## Sending an Email
Here is an example of an Express route that sends an email:
```typescript
const app = express();
const reloop = new Reloop(process.env.RELOOP_API_KEY);
app.post('/send-email', async (req, res) => {
try {
const data = await reloop.mail.send({
from: 'onboarding@reloop.sh',
to: 'delivered@resend.dev',
subject: 'Hello from Express',
html: 'Congrats on sending your first email via Reloop from an Express app!
',
});
res.json(data);
} catch (error) {
res.status(500).json({ error });
}
});
app.listen(3000, () => {
console.log('App listening on port 3000');
});
```
---
# examples/nodejs/nextjs.mdx
Source: https://reloop.sh/docs/examples/nodejs/nextjs
Markdown: https://reloop.sh/docs/examples/nodejs/nextjs.md
# Next.js Integration
Reloop is easy to integrate with Next.js, whether you are using the App Router or Pages Router.
## Installation
First, install the official Node.js SDK:
```bash
npm install reloop-email
```
## Setup Environment Variables
Add your Reloop API key to your `.env.local` file:
```env
RELOOP_API_KEY=re_your_api_key_here
```
## Sending an Email
You can send emails from a Next.js Server Action or Route Handler. Here is an example of a Route Handler:
```typescript
const reloop = new Reloop(process.env.RELOOP_API_KEY);
try {
const data = await reloop.mail.send({
from: 'onboarding@reloop.sh',
to: 'delivered@resend.dev',
subject: 'Hello World',
html: 'Congrats on sending your first email via Reloop!
',
});
return NextResponse.json(data);
} catch (error) {
return NextResponse.json({ error }, { status: 500 });
}
}
```
---
# examples/php/laravel.mdx
Source: https://reloop.sh/docs/examples/php/laravel
Markdown: https://reloop.sh/docs/examples/php/laravel.md
# Laravel Integration
Integrate Reloop into your Laravel application.
## Installation
Install the official PHP SDK via Composer:
```bash
composer require reloop-labs/reloop-php
```
## Setup Configuration
Add the API key to your `.env` file:
```env
RELOOP_API_KEY=re_your_api_key_here
```
## Sending an Email
Here is an example of sending an email from a controller:
```php
mail->send([
'from' => 'onboarding@reloop.sh',
'to' => 'delivered@resend.dev',
'subject' => 'Hello from Laravel',
'html' => 'Congrats on sending your first email via Reloop from Laravel!
',
]);
return response()->json($response);
} catch (\Exception $e) {
return response()->json(['error' => $e->getMessage()], 500);
}
}
}
```
---
# examples/python/django.mdx
Source: https://reloop.sh/docs/examples/python/django
Markdown: https://reloop.sh/docs/examples/python/django.md
# Django Integration
Integrate Reloop into your Django application using the Python SDK.
## Installation
```bash
pip install reloop-email
```
## Setup settings.py
Add your API key to your settings:
```python
# settings.py
RELOOP_API_KEY = os.environ.get("RELOOP_API_KEY", "re_your_api_key_here")
```
## Sending an Email
Use the client within your Django views:
```python
from django.http import JsonResponse
from django.conf import settings
from reloop_email import Reloop
reloop = Reloop(api_key=settings.RELOOP_API_KEY)
def send_email_view(request):
if request.method == 'POST':
try:
result = reloop.mail.send({
"from": "onboarding@reloop.sh",
"to": "delivered@resend.dev",
"subject": "Hello from Django",
"html": "Congrats on sending your first email via Reloop from Django!
",
})
if result.email_error:
raise result.email_error
return JsonResponse(result.response)
except Exception as e:
return JsonResponse({"error": str(e)}, status=500)
```
---
# examples/python/fastapi.mdx
Source: https://reloop.sh/docs/examples/python/fastapi
Markdown: https://reloop.sh/docs/examples/python/fastapi.md
# FastAPI Integration
Reloop can be easily integrated into any FastAPI application.
## Installation
Install the official Python SDK:
```bash
pip install reloop-email
```
## Setup Environment Variables
Add your API key to your environment:
```bash
```
## Sending an Email
Here is a simple FastAPI route that sends an email:
```python
from fastapi import FastAPI, HTTPException
from reloop_email import Reloop
app = FastAPI()
reloop = Reloop(api_key=os.environ.get("RELOOP_API_KEY"))
@app.post("/send-email")
async def send_email():
try:
result = reloop.mail.send({
"from": "onboarding@reloop.sh",
"to": "delivered@resend.dev",
"subject": "Hello from FastAPI",
"html": "Congrats on sending your first email via Reloop from FastAPI!
",
})
if result.email_error:
raise result.email_error
return result.response
except Exception as e:
raise HTTPException(status_code=500, detail=str(e))
```
---
# examples/python/flask.mdx
Source: https://reloop.sh/docs/examples/python/flask
Markdown: https://reloop.sh/docs/examples/python/flask.md
# Flask Integration
Integrate Reloop into your Flask application.
## Installation
```bash
pip install reloop-email
```
## Sending an Email
```python
from flask import Flask, jsonify
from reloop_email import Reloop
app = Flask(__name__)
reloop = Reloop(api_key=os.environ.get("RELOOP_API_KEY"))
@app.route("/send-email", methods=["POST"])
def send_email():
try:
result = reloop.mail.send({
"from": "onboarding@reloop.sh",
"to": "delivered@resend.dev",
"subject": "Hello from Flask",
"html": "Congrats on sending your first email via Reloop from Flask!
",
})
if result.email_error:
raise result.email_error
return jsonify(result.response)
except Exception as e:
return jsonify({"error": str(e)}), 500
if __name__ == "__main__":
app.run(port=5000)
```
---
# examples/ruby/rails.mdx
Source: https://reloop.sh/docs/examples/ruby/rails
Markdown: https://reloop.sh/docs/examples/ruby/rails.md
# Rails Integration
Integrate Reloop into your Ruby on Rails application.
## Installation
Add the official Ruby SDK to your Gemfile:
```ruby
gem 'reloop-ruby'
```
And run:
```bash
bundle install
```
## Setup Credentials
Set your API key in your environment variables:
```bash
```
## Sending an Email
Define a controller or a mailer to send emails:
```ruby
class EmailsController < ApplicationController
def create
reloop = Reloop::Client.new(api_key: ENV['RELOOP_API_KEY'])
begin
response = reloop.mail.send(
from: 'onboarding@reloop.sh',
to: 'delivered@resend.dev',
subject: 'Hello from Rails',
html: 'Congrats on sending your first email via Reloop from Ruby on Rails!
'
)
render json: response
rescue => e
render json: { error: e.message }, status: :internal_server_error
end
end
end
```
---
# examples/rust/axum.mdx
Source: https://reloop.sh/docs/examples/rust/axum
Markdown: https://reloop.sh/docs/examples/rust/axum.md
# Axum Integration
Integrate Reloop into your Rust application using the Axum web framework.
## Installation
Add the official Rust SDK and standard tokio dependencies to your `Cargo.toml`:
```toml
[dependencies]
axum = "0.7"
tokio = { version = "1", features = ["full"] }
reloop = "0.1"
serde_json = "1"
```
## Sending an Email
```rust
use axum::{routing::post, Json, Router};
use reloop::ReloopClient;
use serde_json::json;
use std::env;
#[tokio::main]
async fn main() {
let app = Router::new().route("/send-email", post(send_email));
let listener = tokio::net::TcpListener::bind("127.0.0.1:3000").await.unwrap();
axum::serve(listener, app).await.unwrap();
}
async fn send_email() -> Result, (axum::http::StatusCode, String)> {
let api_key = env::var("RELOOP_API_KEY").map_err(|_| {
(axum::http::StatusCode::INTERNAL_SERVER_ERROR, "Missing API Key".to_string())
})?;
let client = ReloopClient::new(api_key, None);
match client.mail().send(json!({
"from": "onboarding@reloop.sh",
"to": "delivered@resend.dev",
"subject": "Hello from Axum",
"html": "Congrats on sending your first email via Reloop from Rust Axum!
",
})).await {
Ok(res) => Ok(Json(res)),
Err(e) => Err((axum::http::StatusCode::INTERNAL_SERVER_ERROR, e.to_string())),
}
}
```
---
# examples/smtp/go.mdx
Source: https://reloop.sh/docs/examples/smtp/go
Markdown: https://reloop.sh/docs/examples/smtp/go.md
# Go SMTP Integration
Use Go's standard library `net/smtp` package to send emails.
[View complete runnable example on GitHub ↗](https://github.com/reloop-labs/reloop-examples/tree/main/smtp-go)
## Code Example
```go
package main
"crypto/tls"
"fmt"
"net/smtp"
"os"
)
func main() {
apiKey := os.Getenv("RELOOP_API_KEY")
// SMTP server configuration
smtpHost := "smtp.reloop.sh"
smtpPort := "587"
auth := smtp.PlainAuth("", apiKey, apiKey, smtpHost)
to := []string{"delivered@resend.dev"}
msg := []byte("To: delivered@resend.dev\r\n" +
"Subject: Hello from Go net/smtp\r\n" +
"Content-Type: text/html; charset=UTF-8\r\n" +
"\r\n" +
"Congrats on sending your first email via Reloop SMTP using net/smtp!
\r\n")
err := smtp.SendMail(smtpHost+":"+smtpPort, auth, "onboarding@reloop.sh", to, msg)
if err != nil {
fmt.Println("Error connecting:", err)
return
}
defer conn.Close()
client, err := smtp.NewClient(conn, host)
if err != nil {
fmt.Println("Error creating client:", err)
return
}
defer client.Close()
if err = client.Auth(auth); err != nil {
fmt.Println("Auth failed:", err)
return
}
if err = client.Mail(from); err != nil {
fmt.Println("MAIL FROM failed:", err)
return
}
for _, addr := range to {
if err = client.Rcpt(addr); err != nil {
fmt.Println("RCPT TO failed:", err)
return
}
}
w, err := client.Data()
if err != nil {
fmt.Println("DATA failed:", err)
return
}
if _, err = w.Write(msg); err != nil {
fmt.Println("Write failed:", err)
return
}
if err = w.Close(); err != nil {
fmt.Println("Close failed:", err)
return
}
_ = client.Quit()
fmt.Println("Email sent successfully!")
}
```
---
# examples/smtp/introduction.mdx
Source: https://reloop.sh/docs/examples/smtp/introduction
Markdown: https://reloop.sh/docs/examples/smtp/introduction.md
# SMTP Integration
Reloop provides a high-performance SMTP relay that allows you to send emails from any application, mail client, or framework that supports SMTP.
## SMTP Credentials
To connect to the Reloop SMTP server, use the following configuration settings:
| Setting | Value |
| :--- | :--- |
| **Host** | `smtp.reloop.sh` |
| **Port** | `587` (TLS) or `2525` / `25` |
| **Username** | Your Reloop API Key |
| **Password** | Your Reloop API Key |
| **Encryption** | SSL/TLS (`465`) or STARTTLS (`587`) |
## Code Examples
Configure standard SMTP library examples or explore step-by-step guides for your language:
Standard Node SMTP using Nodemailer.
Built-in smtplib Python SMTP.
Built-in net/smtp Go implementation.
Standard PHP SMTP connection.
Standard Ruby Net::SMTP integration.
Lettre SMTP library for Rust.
---
# examples/smtp/nodemailer.mdx
Source: https://reloop.sh/docs/examples/smtp/nodemailer
Markdown: https://reloop.sh/docs/examples/smtp/nodemailer.md
# Nodemailer SMTP Integration
You can send emails through Reloop using **Nodemailer** in a Node.js environment.
[View complete runnable example on GitHub ↗](https://github.com/reloop-labs/reloop-examples/tree/main/smtp-nodemailer)
## Installation
Install Nodemailer:
```bash
npm install nodemailer
```
## Code Example
```javascript
const nodemailer = require('nodemailer');
const transporter = nodemailer.createTransport({
host: 'smtp.reloop.sh',
port: 587,
secure: false, // true for port 465, false for other ports
auth: {
user: 'reloop',
pass: process.env.RELOOP_API_KEY,
},
});
async function main() {
const info = await transporter.sendMail({
from: '"Onboarding" ',
to: 'delivered@resend.dev',
subject: 'Hello from Nodemailer',
html: 'Congrats on sending your first email via Reloop SMTP using Nodemailer!
',
});
console.log('Message sent: %s', info.messageId);
}
main().catch(console.error);
```
---
# examples/smtp/php.mdx
Source: https://reloop.sh/docs/examples/smtp/php
Markdown: https://reloop.sh/docs/examples/smtp/php.md
# PHPMailer SMTP Integration
Use the popular **PHPMailer** library to send transactional emails via Reloop.
[View complete runnable example on GitHub ↗](https://github.com/reloop-labs/reloop-examples/tree/main/smtp-php)
## Installation
Install PHPMailer via Composer:
```bash
composer require phpmailer/phpmailer
```
## Code Example
```php
isSMTP();
$mail->Host = 'smtp.reloop.sh';
$mail->SMTPAuth = true;
$mail->Username = 'reloop';
$mail->Password = getenv('RELOOP_API_KEY');
$mail->SMTPSecure = PHPMailer::ENCRYPTION_SMTPS;
$mail->Port = 465;
// Recipients
$mail->setFrom('onboarding@reloop.sh', 'Onboarding');
$mail->addAddress('delivered@resend.dev');
// Content
$mail->isHTML(true);
$mail->Subject = 'Hello from PHPMailer';
$mail->Body = 'Congrats on sending your first email via Reloop SMTP using PHPMailer!
';
$mail->send();
echo 'Message has been sent';
} catch (Exception $e) {
echo "Message could not be sent. Mailer Error: {$mail->ErrorInfo}";
}
```
---
# examples/smtp/python.mdx
Source: https://reloop.sh/docs/examples/smtp/python
Markdown: https://reloop.sh/docs/examples/smtp/python.md
# Python SMTP Integration
Python's built-in `smtplib` and `email` packages can be used to send emails through Reloop SMTP.
[View complete runnable example on GitHub ↗](https://github.com/reloop-labs/reloop-examples/tree/main/smtp-python)
## Code Example
```python
from email.mime.multipart import MIMEMultipart
from email.mime.text import MIMEText
api_key = os.environ.get("RELOOP_API_KEY")
# Create message
msg = MIMEMultipart()
msg['From'] = 'onboarding@reloop.sh'
msg['To'] = 'delivered@resend.dev'
msg['Subject'] = 'Hello from Python smtplib'
body = 'Congrats on sending your first email via Reloop SMTP using smtplib!
'
msg.attach(MIMEText(body, 'html'))
try:
# Connect to the server
server = smtplib.SMTP('smtp.reloop.sh', 587)
server.starttls() # Upgrade connection to secure
server.login(api_key, api_key)
# Send email
server.sendmail(msg['From'], msg['To'], msg.as_string())
server.quit()
print("Email sent successfully!")
except Exception as e:
print(f"Error: {e}")
```
---
# examples/smtp/ruby.mdx
Source: https://reloop.sh/docs/examples/smtp/ruby
Markdown: https://reloop.sh/docs/examples/smtp/ruby.md
# Ruby SMTP Integration
You can send emails through Reloop using Ruby's standard `net/smtp` library.
[View complete runnable example on GitHub ↗](https://github.com/reloop-labs/reloop-examples/tree/main/smtp-ruby)
## Code Example
```ruby
require 'net/smtp'
require 'openssl'
api_key = ENV['RELOOP_API_KEY']
message = <Congrats on sending your first email via Reloop SMTP using net/smtp!
MESSAGE_END
begin
Net::SMTP.start('smtp.reloop.sh', 587, 'localhost', api_key, api_key, :plain) do |smtp|
smtp.send_message message, 'onboarding@reloop.sh', 'delivered@resend.dev'
end
puts "Email sent successfully!"
rescue => e
puts "Error: #{e.message}"
end
```
---
# examples/smtp/rust.mdx
Source: https://reloop.sh/docs/examples/smtp/rust
Markdown: https://reloop.sh/docs/examples/smtp/rust.md
# Rust SMTP Integration
Send emails in Rust using the high-performance **Lettre** crate.
[View complete runnable example on GitHub ↗](https://github.com/reloop-labs/reloop-examples/tree/main/smtp-rust)
## Installation
Add `lettre` to your `Cargo.toml`:
```toml
[dependencies]
lettre = "0.11"
```
## Code Example
```rust
use lettre::transport::smtp::authentication::Credentials;
use lettre::{Message, SmtpTransport, Transport};
use std::env;
fn main() -> Result<(), Box> {
let api_key = env::var("RELOOP_API_KEY")?;
let email = Message::builder()
.from("onboarding@reloop.sh".parse()?)
.to("delivered@resend.dev".parse()?)
.subject("Hello from Lettre")
.header(lettre::message::header::ContentType::TEXT_HTML)
.body(String::from("Congrats on sending your first email via Reloop SMTP using Lettre!
"))?;
let creds = Credentials::new("reloop".to_string(), api_key);
// Open a local connection on port 587
let mailer = SmtpTransport::starttls_relay("smtp.reloop.sh")?
.credentials(creds)
.build();
// Send the email
match mailer.send(&email) {
Ok(_) => println!("Email sent successfully!"),
Err(e) => panic!("Could not send email: {:?}", e),
}
Ok(())
}
```
---
# guides/account-quotas-limits.mdx
Source: https://reloop.sh/docs/guides/account-quotas-limits
Markdown: https://reloop.sh/docs/guides/account-quotas-limits.md
Understanding Reloop sending quotas and rate limits.
## Overview
This guide helps you understand and configure this sending feature in Reloop.
## Details
Understanding your sending configuration is key to successful email delivery. Review the [Reloop dashboard](https://app.reloop.sh) for your current settings and limits.
## Configuration
Check your current plan and usage in the [Reloop dashboard](https://app.reloop.sh/settings).
Adjust your sending configuration based on your requirements and plan limits.
Keep track of your sending volume and adjust as needed to stay within limits.
## Learn More
- [Account Quotas and Limits](/docs/guides/account-quotas-limits)
- [Sending Emails](/docs/learn/sending)
- [Email Best Practices](/docs/integrations/email-best-practices)
---
# guides/apple-branded-mail.mdx
Source: https://reloop.sh/docs/guides/apple-branded-mail
Markdown: https://reloop.sh/docs/guides/apple-branded-mail.md
Apple Mail supports Brand Indicators for Message Identification (BIMI), which lets you display your brand logo next to your emails in the recipient's inbox.
## Prerequisites
- A verified domain with DMARC set to `quarantine` or `reject`
- A square SVG logo in Tiny PS format
- A VMC (Verified Mark Certificate) from a trusted authority
## Setup
Your DMARC policy must be set to at least `p=quarantine`:
```
v=DMARC1; p=quarantine; rua=mailto:dmarc@example.com
```
Create a square SVG logo that meets BIMI requirements. The logo must be in Tiny PS format.
Add a TXT record at `default._bimi.yourdomain.com`:
```
v=BIMI1; l=https://example.com/logo.svg; a=https://example.com/vmc.pem
```
BIMI adoption is growing but not yet universal. Apple Mail, Gmail, and Yahoo support it. Outlook does not yet.
---
# guides/apple-private-relay.mdx
Source: https://reloop.sh/docs/guides/apple-private-relay
Markdown: https://reloop.sh/docs/guides/apple-private-relay.md
How to send emails to Apple Private Relay addresses.
## Overview
Understanding this topic is important for maintaining good email deliverability with Reloop.
## Key Points
- Follow email sending best practices to maintain a strong sender reputation
- Monitor your delivery rates in the [Reloop dashboard](https://app.reloop.sh)
- Keep your email lists clean and up-to-date
## Best Practices
Regularly check your delivery, bounce, and complaint rates in the Reloop dashboard.
Ensure SPF, DKIM, and DMARC are properly configured for your domain.
Always include an unsubscribe mechanism in marketing emails and honor opt-out requests promptly.
For detailed guidance on email deliverability, see our [Email Best Practices](/docs/integrations/email-best-practices) skill documentation.
## Learn More
- [Emails Going to Spam](/docs/guides/emails-going-to-spam)
- [Warm-up Guide](/docs/guides/warmup-guide)
- [Audience Hygiene](/docs/guides/audience-hygiene)
- [Domains Guide](/docs/learn/domain)
---
# guides/audience-hygiene.mdx
Source: https://reloop.sh/docs/guides/audience-hygiene
Markdown: https://reloop.sh/docs/guides/audience-hygiene.md
Best practices for maintaining a clean email list.
## Overview
Understanding this topic is important for maintaining good email deliverability with Reloop.
## Key Points
- Follow email sending best practices to maintain a strong sender reputation
- Monitor your delivery rates in the [Reloop dashboard](https://app.reloop.sh)
- Keep your email lists clean and up-to-date
## Best Practices
Regularly check your delivery, bounce, and complaint rates in the Reloop dashboard.
Ensure SPF, DKIM, and DMARC are properly configured for your domain.
Always include an unsubscribe mechanism in marketing emails and honor opt-out requests promptly.
For detailed guidance on email deliverability, see our [Email Best Practices](/docs/integrations/email-best-practices) skill documentation.
## Learn More
- [Emails Going to Spam](/docs/guides/emails-going-to-spam)
- [Warm-up Guide](/docs/guides/warmup-guide)
- [Audience Hygiene](/docs/guides/audience-hygiene)
- [Domains Guide](/docs/learn/domain)
---
# guides/avoid-gmail-spam.mdx
Source: https://reloop.sh/docs/guides/avoid-gmail-spam
Markdown: https://reloop.sh/docs/guides/avoid-gmail-spam.md
Tips to prevent your emails from landing in Gmail spam.
## Overview
This article covers common causes and solutions for this issue when using Reloop.
## Common Causes
- Misconfigured DNS records
- API key permissions not matching the domain
- Rate limiting or account restrictions
## Resolution Steps
Review your domain settings in the [Reloop dashboard](https://app.reloop.sh/domains) and ensure all DNS records are correctly configured.
Ensure your API key has the correct permissions for the operation you're performing. Go to [API Keys](https://app.reloop.sh/api-keys) to review.
If the issue persists, reach out to [Reloop support](https://reloop.sh/help) with your error details and domain information.
## Learn More
- [Domain Not Verifying](/docs/guides/domain-not-verifying)
- [Avoid MX Conflicts](/docs/guides/avoid-mx-conflicts)
- [Emails Going to Spam](/docs/guides/emails-going-to-spam)
---
# guides/avoid-mx-conflicts.mdx
Source: https://reloop.sh/docs/guides/avoid-mx-conflicts
Markdown: https://reloop.sh/docs/guides/avoid-mx-conflicts.md
This guide moved to **[MX conflicts](/docs/guides/connect-domain/troubleshoot/mx-conflicts)** under Connect a domain.
Also see [Sending vs receiving](/docs/guides/connect-domain/sending-vs-receiving) and [Root vs subdomain](/docs/guides/connect-domain/what-is-a-domain).
---
# guides/avoid-outlook-spam.mdx
Source: https://reloop.sh/docs/guides/avoid-outlook-spam
Markdown: https://reloop.sh/docs/guides/avoid-outlook-spam.md
Tips to prevent your emails from landing in Outlook spam.
## Overview
This article covers common causes and solutions for this issue when using Reloop.
## Common Causes
- Misconfigured DNS records
- API key permissions not matching the domain
- Rate limiting or account restrictions
## Resolution Steps
Review your domain settings in the [Reloop dashboard](https://app.reloop.sh/domains) and ensure all DNS records are correctly configured.
Ensure your API key has the correct permissions for the operation you're performing. Go to [API Keys](https://app.reloop.sh/api-keys) to review.
If the issue persists, reach out to [Reloop support](https://reloop.sh/help) with your error details and domain information.
## Learn More
- [Domain Not Verifying](/docs/guides/domain-not-verifying)
- [Avoid MX Conflicts](/docs/guides/avoid-mx-conflicts)
- [Emails Going to Spam](/docs/guides/emails-going-to-spam)
---
# guides/change-email-address.mdx
Source: https://reloop.sh/docs/guides/change-email-address
Markdown: https://reloop.sh/docs/guides/change-email-address.md
How to change the email address associated with your Reloop account.
## Overview
Manage your Reloop account settings effectively to ensure smooth operation.
## Steps
Navigate to the [Account Settings](https://app.reloop.sh/settings) page in your Reloop dashboard.
Follow the on-screen instructions to update your account configuration.
Review and confirm your changes. Some changes may require email verification.
If you need assistance with account changes, contact [Reloop support](https://reloop.sh/help).
## Learn More
- [Handling API Keys](/docs/guides/handling-api-keys)
- [Account Quotas and Limits](/docs/guides/account-quotas-limits)
---
# guides/configuring-tls.mdx
Source: https://reloop.sh/docs/guides/configuring-tls
Markdown: https://reloop.sh/docs/guides/configuring-tls.md
The difference between opportunistic and enforced TLS.
## Overview
Manage your Reloop account settings effectively to ensure smooth operation.
## Steps
Navigate to the [Account Settings](https://app.reloop.sh/settings) page in your Reloop dashboard.
Follow the on-screen instructions to update your account configuration.
Review and confirm your changes. Some changes may require email verification.
If you need assistance with account changes, contact [Reloop support](https://reloop.sh/help).
## Learn More
- [Handling API Keys](/docs/guides/handling-api-keys)
- [Account Quotas and Limits](/docs/guides/account-quotas-limits)
---
# guides/connect-domain/add-domain.mdx
Source: https://reloop.sh/docs/guides/connect-domain/add-domain
Markdown: https://reloop.sh/docs/guides/connect-domain/add-domain.md
This is the main path from “I have a domain” to “I can send as `@mydomain.com`.”
## Before you start
- You can log in to the place that manages **nameservers** for the domain ([find your DNS provider](/docs/guides/connect-domain/find-dns-provider)).
- Decide [root vs subdomain](/docs/guides/connect-domain/what-is-a-domain) — Reloop supports either, or both.
- Decide if you need [receiving](/docs/guides/connect-domain/sending-vs-receiving) or only sending.
## Steps
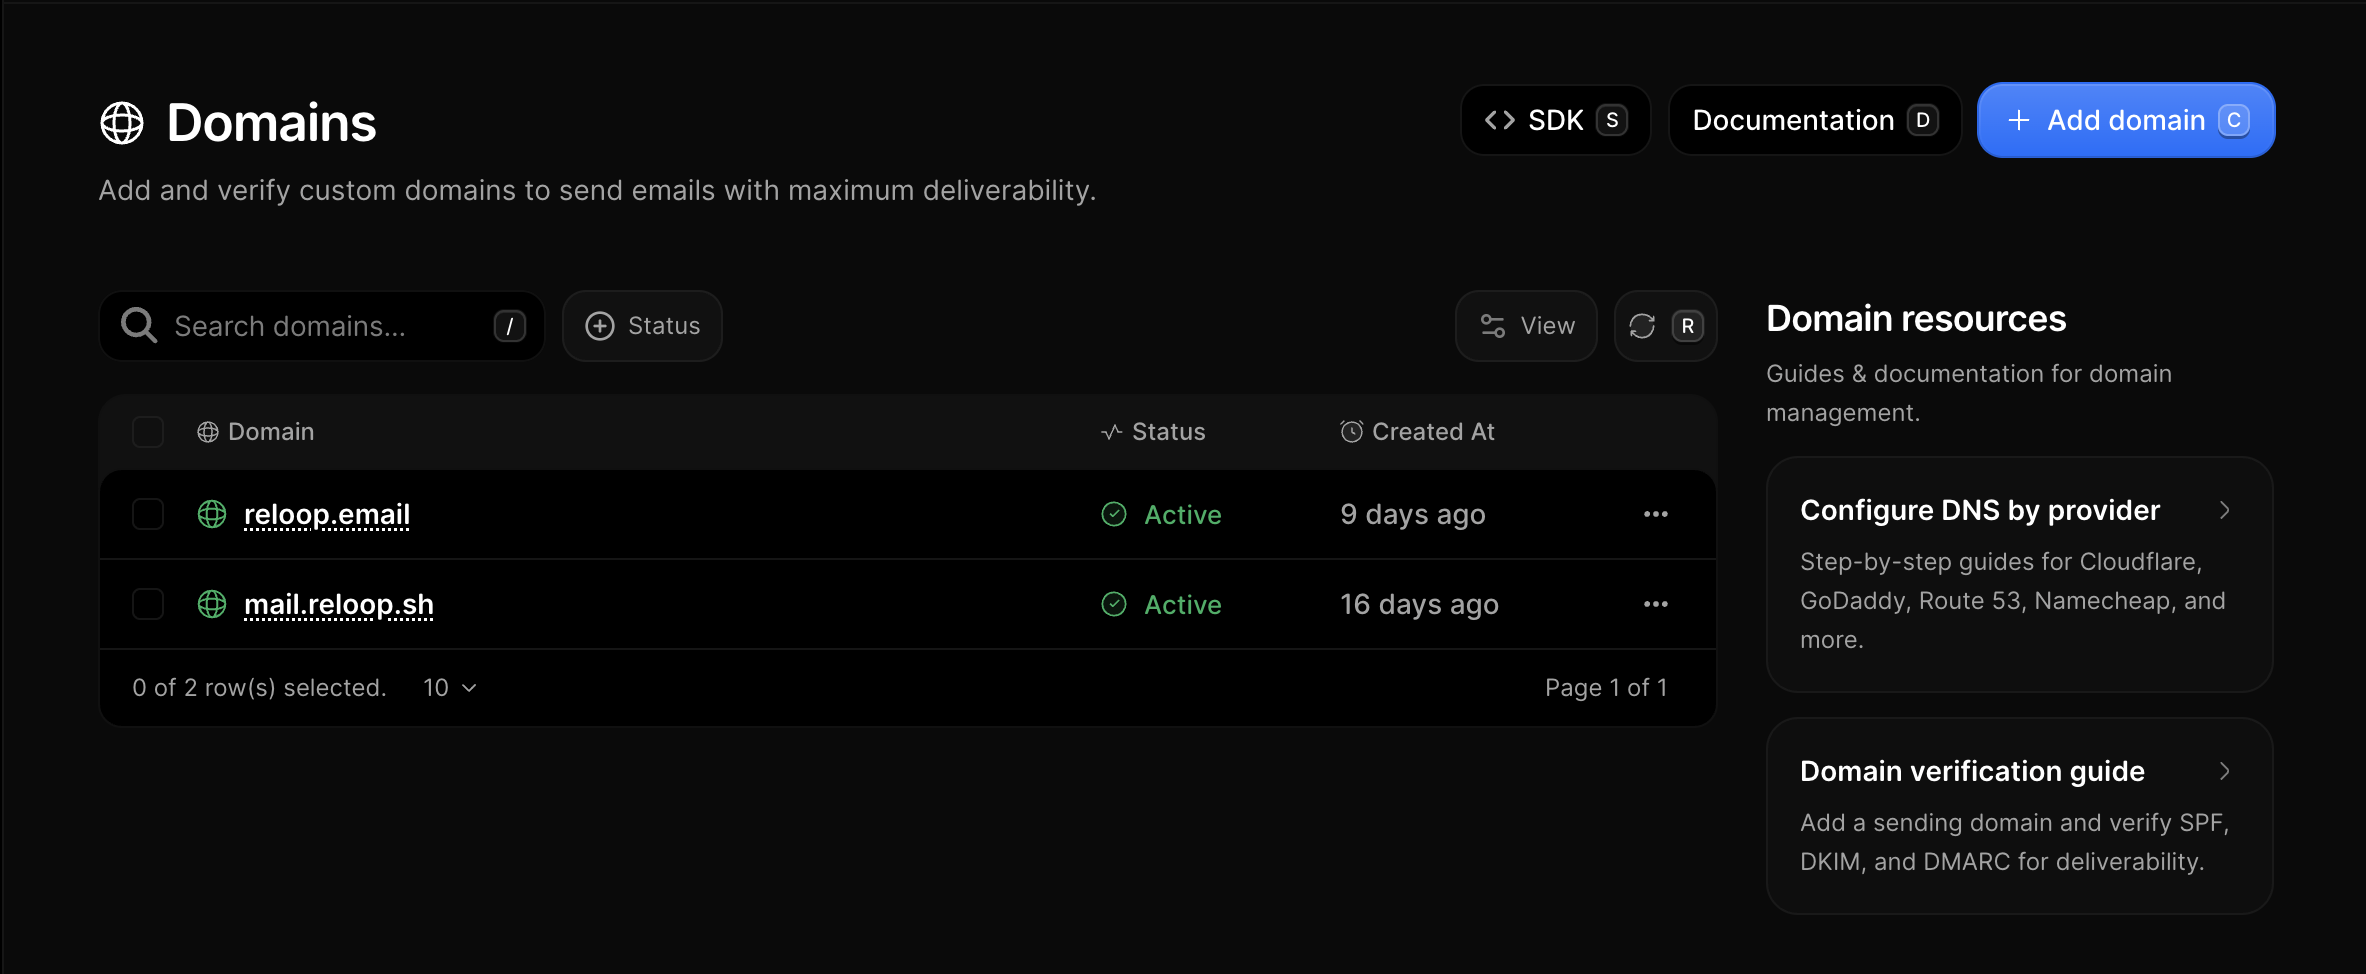
Go to [Domains](https://reloop.sh/dashboard/domain) in the Reloop dashboard (or finish the onboarding domain step). Click **Add domain**.
Enter the hostname you want to send from, for example:
- `acme.com` (root)
- `mail.acme.com` or `notifications.acme.com` (subdomain)
Confirm organization and create the domain. Reloop generates DNS records and DKIM keys.
On the domain page, Reloop shows a provider when nameservers are recognized.
- **Auto-populate available** → continue with [Auto-populate](/docs/guides/connect-domain/auto-populate)
- **Provider known, manual only** → [Manual setup](/docs/guides/connect-domain/manual-setup) + that host’s [guide](/docs/guides/connect-domain/providers)
- **Unknown** → [Unknown provider](/docs/guides/connect-domain/providers/unknown-provider)
Either complete the Domain Connect consent flow, or copy every required record into your DNS panel. Do not skip DKIM or SPF.
Click **Verify** (or wait for automatic checks). Status moves through [pending → verifying → active](/docs/guides/connect-domain/verification/statuses) when public DNS matches.
Use [Test your domain](/docs/guides/connect-domain/after/test-domain) to confirm SPF/DKIM/DMARC in a real inbox.
## Domain already in use
If another Reloop organization already verified the domain, see [Domain already registered](/docs/guides/connect-domain/troubleshoot/domain-already-registered).
---
# guides/connect-domain/after/change-dns.mdx
Source: https://reloop.sh/docs/guides/connect-domain/after/change-dns
Markdown: https://reloop.sh/docs/guides/connect-domain/after/change-dns.md
## Safe migration checklist
From the old DNS host (or Reloop dashboard), note SPF, DKIM, DMARC, MX, and tracking values.
Add the domain/zone at Cloudflare, Route 53, etc., and recreate **all** important records (website + mail), including Reloop’s.
A day before, set TTL to 300s on old NS-related records if your registrar allows.
Point NS to the new host. Keep the old zone until dig shows the new NS everywhere.
After NS propagate, open the domain → **Verify**. Auto populate may appear if the new host supports Reloop’s Domain Connect template.
## Avoid
- Deleting Reloop records on the old host **before** the new host is live
- Switching NS without recreating MX if you still need inbound mail
## Related
- [Wrong nameservers](/docs/guides/connect-domain/troubleshoot/wrong-nameservers)
- [Find your DNS provider](/docs/guides/connect-domain/find-dns-provider)
---
# guides/connect-domain/after/index.mdx
Source: https://reloop.sh/docs/guides/connect-domain/after
Markdown: https://reloop.sh/docs/guides/connect-domain/after.md
Once status is **active**:
- [Test your domain](/docs/guides/connect-domain/after/test-domain)
- [Change DNS later](/docs/guides/connect-domain/after/change-dns)
- [Remove a domain](/docs/guides/connect-domain/after/remove-domain)
For inbox placement and reputation, continue with deliverability guides under [Guides](/docs/guides) (warmup, spam folders, suppression list).
---
# guides/connect-domain/after/remove-domain.mdx
Source: https://reloop.sh/docs/guides/connect-domain/after/remove-domain
Markdown: https://reloop.sh/docs/guides/connect-domain/after/remove-domain.md
## In Reloop
From [Domains](https://reloop.sh/dashboard/domain), open the domain and use the delete/remove action. After removal:
- You can no longer send with that domain’s identities in Reloop
- API/SMTP From addresses on that domain will fail authentication checks
## DNS cleanup (optional but recommended)
At your DNS host, remove Reloop-specific rows you no longer need:
- `reloop._domainkey` TXT
- Reloop SPF include (or whole SPF if unused)
- Reloop DMARC if you added it only for Reloop
- Reloop MX / tracking CNAME
Do **not** remove Google/Microsoft records if you still use those services.
## Re-adding later
You can add the same domain again later and re-verify, subject to [already registered](/docs/guides/connect-domain/troubleshoot/domain-already-registered) rules if another org holds it.
---
# guides/connect-domain/after/test-domain.mdx
Source: https://reloop.sh/docs/guides/connect-domain/after/test-domain
Markdown: https://reloop.sh/docs/guides/connect-domain/after/test-domain.md
## In Reloop
1. Confirm domain status is **active**.
2. Send a test message using the dashboard send flow or your API/SMTP integration with a `From` on the verified domain.
3. Open the message in Gmail/Outlook and check authentication results.
## What “good” looks like
In Gmail → Show original (or equivalent):
- `SPF: PASS`
- `DKIM: PASS` (selector often `reloop`)
- `DMARC: PASS` (when aligned)
## If authentication fails but Reloop says active
- Wait for propagation on the receiver’s resolvers
- Re-check public DNS with `dig`
- Confirm you did not remove records after verify
- See [Domain not verifying](/docs/guides/connect-domain/troubleshoot/not-verifying) if Reloop flipped back to failed
## Related
- [Warm-up guide](/docs/guides/warmup-guide)
- [Emails going to spam](/docs/guides/emails-going-to-spam)
---
# guides/connect-domain/auto-populate.mdx
Source: https://reloop.sh/docs/guides/connect-domain/auto-populate
Markdown: https://reloop.sh/docs/guides/connect-domain/auto-populate.md
**Auto-populate** uses the open [Domain Connect](https://www.domainconnect.org/) standard. Reloop opens your DNS provider, you approve a template, and the provider writes SPF, DKIM, DMARC, MX, and tracking records for you.
Which hosts can do this **changes over time**. Reloop does not rely on a fixed allowlist in the docs — it checks live whether your domain’s DNS host supports Reloop’s Domain Connect template (`reloop.sh` / `email-setup` in the [Domain Connect Templates](https://github.com/Domain-Connect/Templates) registry).
## When you see the button
On the domain page (and during onboarding DNS step):
- **Auto populate** → your host can apply Reloop’s template; use this flow
- **Open DNS settings** (or no Auto populate) → use [manual setup](/docs/guides/connect-domain/manual-setup)
Trust the dashboard for your domain. A host that supports Domain Connect in general may still lack Reloop’s template until they onboard it.
## How the flow works
Reloop runs Domain Connect **discovery** against your domain (`_domainconnect` DNS + provider API) and confirms the Reloop template is available.
A new tab opens on your DNS host. Sign in if needed, review the records, and confirm.
After success you are redirected back (or you can return manually). Click **Verify** if status is still pending.
Reloop re-checks live discovery when you click Auto populate. If the provider dropped the template or discovery fails, you get an error toast and should continue manually.
## What gets applied
The Reloop Domain Connect template typically applies:
- DKIM TXT on `reloop._domainkey`
- SPF via SPFM / merge (`include:reloop.sh`)
- DMARC on `_dmarc`
- MX for sending/receiving as defined in the template
- Tracking CNAME `link` → `link.reloop.sh`
Exact groups can depend on template version; the consent screen lists what will change.
## If Auto-populate fails
See [Auto-populate failed](/docs/guides/connect-domain/troubleshoot/auto-populate-failed) for:
- Popup blocked
- User cancelled consent
- Template not found at provider
- Domain Connect not supported on that zone
You can always fall back to [manual setup](/docs/guides/connect-domain/manual-setup) using the same dashboard records.
## Security notes
- Only approve the flow while logged into **your** DNS account for that domain.
- Reloop signs Domain Connect apply URLs; do not reuse apply links from untrusted sources.
- After you approve, check the records in your DNS panel, then click **Verify** in Reloop.
---
# guides/connect-domain/dns-records-explained.mdx
Source: https://reloop.sh/docs/guides/connect-domain/dns-records-explained
Markdown: https://reloop.sh/docs/guides/connect-domain/dns-records-explained.md
When you add a domain, Reloop generates the exact records to publish. Always prefer the dashboard values over examples here. Your **DKIM key is unique**.
## Quick map
| Purpose | Typical type | Example host | What it does |
| --- | --- | --- | --- |
| **SPF** | TXT | `@` | Authorizes Reloop to send for your domain |
| **DKIM** | TXT | `reloop._domainkey` | Cryptographic signature so receivers trust the message |
| **DMARC** | TXT | `_dmarc` | Policy if SPF/DKIM fail (Reloop suggests a strict policy) |
| **Sending MX** | MX | `@` | Used in Reloop’s sending/return-path setup as shown in the dashboard |
| **Receiving MX** | MX | `@` or your subdomain | Routes **inbound** mail to Reloop (`inbound.reloop.sh`) when receiving is on |
| **Tracking** | CNAME | `link` | Click/open tracking (`link.yourdomain.com` → `link.reloop.sh`) |
Hosts and whether MX/tracking appear depend on your domain settings (apex vs subdomain, sending/receiving toggles).
## SPF (Sender Policy Framework)
**Type:** TXT
**Example value:**
```
v=spf1 include:reloop.sh -all
```
SPF lists which servers may send mail as your domain. Reloop’s include is `include:reloop.sh` (hosted product).
You may only have **one SPF TXT** on a given host. If you already have SPF (Google, Microsoft, Mailchimp, …), **merge** Reloop’s `include:reloop.sh` into that record — do not add a second SPF. See [SPF conflicts](/docs/guides/connect-domain/troubleshoot/spf-conflicts).
## DKIM (DomainKeys Identified Mail)
**Type:** TXT
**Host:** usually `reloop._domainkey` (selector `reloop`)
**Value:** looks like:
```
v=DKIM1; k=rsa; p=MIIBIjANBgkqhkiG9w0BAQEFAAOCAQ8A...
```
The long `p=` string is your public key. Reloop signs outbound mail with the matching private key. If the TXT is truncated, quoted wrongly, or split incorrectly, verification fails. See [DKIM / DMARC typos](/docs/guides/connect-domain/troubleshoot/dkim-dmarc-typos).
## DMARC
**Type:** TXT
**Host:** `_dmarc`
**Example value:**
```
v=DMARC1; p=reject;
```
DMARC tells receivers what to do when authentication fails. Reloop’s default template uses `p=reject`. If you already have DMARC for Google/Microsoft, review carefully before overwriting — you may keep your existing policy and align later.
## MX (mail exchange)
MX records control **where inbound mail is delivered**.
- **Sending-only:** you may still see MX-related rows in Reloop; follow the dashboard. Reloop sending does not require replacing your existing inbox MX if you only send from Reloop.
- **Receiving enabled:** Reloop expects MX pointing at `inbound.reloop.sh` (priority typically `10`). That **will conflict** with another inbox already using MX on the same hostname. Use a [separate hostname](/docs/guides/connect-domain/what-is-a-domain) for Reloop receiving, or see [MX conflicts](/docs/guides/connect-domain/troubleshoot/mx-conflicts).
## Tracking CNAME
**Type:** CNAME
**Host:** usually `link`
**Value:** `link.reloop.sh`
Used for branded click/open tracking links (`https://link.yourdomain.com/...`).
Conflicts if `link` already points elsewhere, or if your provider disallows CNAMEs in that spot. See [Tracking CNAME issues](/docs/guides/connect-domain/troubleshoot/tracking-cname).
## How to read a Reloop dashboard row
For each row, match three things in your DNS UI:
1. **Type** (TXT / MX / CNAME)
2. **Name / Host** — some UIs want `@` for the root; others want a blank host or the bare domain
3. **Value** — paste exactly; for MX also set **Priority**
Provider-specific quirks (Cloudflare proxy, GoDaddy host field, Route 53 hosted zone) are in each [provider guide](/docs/guides/connect-domain/providers).
## Related
- [Manual setup](/docs/guides/connect-domain/manual-setup)
- [Auto-populate](/docs/guides/connect-domain/auto-populate)
- [Sending vs receiving](/docs/guides/connect-domain/sending-vs-receiving)
---
# guides/connect-domain/find-dns-provider.mdx
Source: https://reloop.sh/docs/guides/connect-domain/find-dns-provider
Markdown: https://reloop.sh/docs/guides/connect-domain/find-dns-provider.md
You need to know **who hosts your nameservers** before you can publish Reloop records (or before Auto-populate can work).
## Method 1 — Reloop dashboard (easiest)
1. Add the domain at [Domains](https://reloop.sh/dashboard/domain) if you have not already.
2. Open the domain detail page.
3. Reloop reads public nameservers and shows a **Provider** chip when it recognizes the host (Cloudflare, GoDaddy, Vercel, Namecheap, …).
If Reloop shows a provider:
- **Auto populate** on the domain page → use [Auto-populate](/docs/guides/connect-domain/auto-populate)
- **Otherwise** → open that host’s guide under [Provider guides](/docs/guides/connect-domain/providers) and add records manually
If Reloop cannot detect a provider, use Method 2 or 3.
## Method 2 — Registrar control panel
1. Log in where you **bought / renew** the domain.
2. Open the domain → **Nameservers** / **DNS** / **Manage DNS**.
3. Note the nameserver hostnames, for example:
| Nameserver contains | Likely DNS host |
| --- | --- |
| `cloudflare.com` | Cloudflare |
| `vercel-dns.com` | Vercel |
| `domaincontrol.com` | GoDaddy |
| `registrar-servers.com` | Namecheap |
| `awsdns-` | AWS Route 53 |
| `domainchief.` | Domain Chief |
| `dnsowl.com` / `hostsilo.com` | NameSilo |
| `ui-dns.` | IONOS |
| `squarespace.com` / `googledomains.com` | Squarespace |
| `hetzner.com` / `hetzner.de` | Hetzner |
| `hostinger.` / `dns-parking.com` | Hostinger |
| `gandi.net` | Gandi |
| `porkbun.com` | Porkbun |
| `strato.de` / `strato-hosting.eu` | Strato |
| `dreamhost.com` / `dreamhosters.com` | DreamHost |
| `as207960.net` / `glauca.digital` | Glauca Digital |
| `wordpress.com` / `wp.com` | WordPress.com |
| `plesk` | Plesk (or your host’s Plesk panel) |
Then open the matching [provider guide](/docs/guides/connect-domain/providers).
## Method 3 — Public lookup
### In the browser
Use any “DNS lookup” / “whois” tool and query **NS** records for your domain (e.g. `acme.com`).
### On your computer
```bash
dig NS acme.com +short
# or
nslookup -type=NS acme.com
```
Example output:
```
ada.ns.cloudflare.com.
bob.ns.cloudflare.com.
```
→ DNS is on **Cloudflare**.
## Bought at A, DNS at B
If the registrar is GoDaddy but NS are Cloudflare, **ignore GoDaddy’s DNS record editor** for Reloop. Edit Cloudflare. Full explanation: [Registrar vs DNS host](/docs/guides/connect-domain/registrar-vs-dns-host).
## Still stuck?
Use the [Unknown provider](/docs/guides/connect-domain/providers/unknown-provider) guide: open whatever panel controls the NS hosts you found, and paste the records from Reloop.
---
# guides/connect-domain/index.mdx
Source: https://reloop.sh/docs/guides/connect-domain
Markdown: https://reloop.sh/docs/guides/connect-domain.md
Reloop can send (and optionally receive) email for **any domain you control**. You do not need to buy the domain from Reloop — register it anywhere, point DNS at the records Reloop shows you, and verify.
The [Domains](https://reloop.sh/dashboard/domain) page lists every sending domain in your organization, with status and shortcuts to DNS guides.

## What you will do
Open [Domains](https://reloop.sh/dashboard/domain) and click **Add domain**. Enter `example.com` or a subdomain like `mail.example.com`.
Reloop detects your nameservers when possible. If you are unsure who hosts DNS, see [Find your DNS provider](/docs/guides/connect-domain/find-dns-provider).
On the domain page, follow the banner Reloop shows for your DNS host — see below.
Click **Verify** (or wait for automatic checks). When status is **active**, you can send from that domain.
## Configuring DNS from the banner
After you add a domain, Reloop shows a banner based on the nameservers it detected.
- If the banner names your DNS host and offers **Auto populate**, click it. Approve the consent screen at your provider and Reloop’s records are written for you. More detail: [Auto populate](/docs/guides/connect-domain/auto-populate).
- If the banner does not offer Auto populate (or you prefer not to use it), copy the Type / Host / Value rows from the dashboard into your DNS panel. More detail: [Manual setup](/docs/guides/connect-domain/manual-setup) and the [DNS guides](/docs/guides/connect-domain/providers).
Either way, Reloop checks public DNS afterward and marks the domain verified when the records match.
## New to DNS?
Start here — you do not need to be a network engineer:
1. [What is a domain?](/docs/guides/connect-domain/what-is-a-domain)
2. [What is DNS?](/docs/guides/connect-domain/what-is-dns)
3. [Registrar vs DNS host](/docs/guides/connect-domain/registrar-vs-dns-host)
4. [Find your DNS provider](/docs/guides/connect-domain/find-dns-provider)
5. [DNS records Reloop needs](/docs/guides/connect-domain/dns-records-explained)
## Full map
- **Setup** — [Add a domain](/docs/guides/connect-domain/add-domain) · [What is a domain?](/docs/guides/connect-domain/what-is-a-domain) · [Sending vs receiving](/docs/guides/connect-domain/sending-vs-receiving)
- **DNS guides** — [All DNS hosts](/docs/guides/connect-domain/providers)
- **Verification** — [Statuses](/docs/guides/connect-domain/verification/statuses) · [Propagation](/docs/guides/connect-domain/verification/propagation)
- **Troubleshoot** — [Domain not verifying](/docs/guides/connect-domain/troubleshoot/not-verifying) and more
- **After connect** — [Test](/docs/guides/connect-domain/after/test-domain) · [Change DNS](/docs/guides/connect-domain/after/change-dns) · [Remove](/docs/guides/connect-domain/after/remove-domain)
Always copy values from your domain’s page in the Reloop dashboard. Examples in docs use placeholders; your DKIM key and hosts are unique to your domain.
---
# guides/connect-domain/manual-setup.mdx
Source: https://reloop.sh/docs/guides/connect-domain/manual-setup
Markdown: https://reloop.sh/docs/guides/connect-domain/manual-setup.md
## Prerequisites
- Domain added in [Reloop](https://reloop.sh/dashboard/domain)
- Access to the DNS panel for the **nameserver** host ([find your provider](/docs/guides/connect-domain/find-dns-provider))
## Steps
Go to [Domains](https://reloop.sh/dashboard/domain) → select the domain. Keep this tab open — you will copy each row.
Use **Open DNS settings** in Reloop if shown, or jump to the matching [provider guide](/docs/guides/connect-domain/providers).
For every required row in Reloop:
1. Choose the same **type** (TXT, MX, CNAME)
2. Set **name/host** as shown (`@`, `reloop._domainkey`, `_dmarc`, `link`, …)
3. Paste **value** exactly
4. For MX, set **priority** (often `10`)
5. Save
Provider UIs differ:
- Some want blank host instead of `@`
- Some auto-append your domain — do not enter `reloop._domainkey.acme.com` if the UI already adds `acme.com`
- Cloudflare: keep records **DNS only** (grey cloud) unless you know you need a proxy (almost never for mail TXT/MX)
If an SPF TXT already exists, merge `include:reloop.sh` into it. Do not create a second SPF. See [SPF conflicts](/docs/guides/connect-domain/troubleshoot/spf-conflicts).
Return to Reloop → **Verify**. Allow time for [propagation](/docs/guides/connect-domain/verification/propagation) if checks fail immediately.
## Checklist before you verify
- [ ] Edited the DNS host that matches your **NS** records (not only the registrar invoice)
- [ ] DKIM TXT is complete (long `p=` value not cut off)
- [ ] Only one SPF record on that host
- [ ] MX only changed if you intend to ([sending vs receiving](/docs/guides/connect-domain/sending-vs-receiving))
- [ ] Tracking CNAME host is free or intentionally replaced
## Provider-specific guides
See the full list: [Provider guides](/docs/guides/connect-domain/providers).
## Related
- [DNS records explained](/docs/guides/connect-domain/dns-records-explained)
- [Domain not verifying](/docs/guides/connect-domain/troubleshoot/not-verifying)
---
# guides/connect-domain/providers/cloudflare.mdx
Source: https://reloop.sh/docs/guides/connect-domain/providers/cloudflare
Markdown: https://reloop.sh/docs/guides/connect-domain/providers/cloudflare.md
## Add domain to Reloop
First, log in to [Reloop](https://reloop.sh/dashboard/domain) and [add a domain](/docs/guides/connect-domain/add-domain).
It is [best practice to use a subdomain](/docs/guides/connect-domain/what-is-a-domain) (for example `mail.example.com` or `team.example.com`) instead of the root domain (`example.com`). A subdomain keeps sending reputation separate and is especially important if you enable receiving with Reloop.
## Automatic setup (recommended)
The fastest way to verify your domain on Cloudflare is **Auto populate** in Reloop. This uses [Domain Connect](https://www.domainconnect.org/) to configure your DNS records.
1. Go to your [Domains](https://reloop.sh/dashboard/domain) page in Reloop and open the domain.
2. (Optional) If you want to receive emails, turn **Receiving** on before Auto-populate so the inbound MX is included. [Learn more below](#receiving-emails).
3. Click **Auto populate**.
4. Authorize Reloop in Cloudflare and approve the records.
5. Return to Reloop — records are written automatically.
That’s it. Your domain will usually verify within a few minutes.
If Auto-populate fails, use **Manual setup** below. See also [Auto-populate DNS](/docs/guides/connect-domain/auto-populate) and [Auto-populate failed](/docs/guides/connect-domain/troubleshoot/auto-populate-failed).
## Manual setup
If you prefer to add DNS records manually, follow these steps. Always copy Type / Name / Value from your domain page in Reloop — examples below use placeholders.
### Log in to Cloudflare
Log in to your [Cloudflare account](https://dash.cloudflare.com) and open **DNS → Records** for the domain whose nameservers match `*.ns.cloudflare.com`.
If Reloop or `dig NS yourdomain.com` shows a different host, stop and edit that host instead — see [Wrong nameservers](/docs/guides/connect-domain/troubleshoot/wrong-nameservers).
### Add MX SPF record
Click **Add record** on Cloudflare:
1. Set the Type to `MX`.
2. Set the **Name** to the host Reloop shows (for a subdomain like `team.example.com`, Cloudflare often wants `team`).
3. Copy the MX value from Reloop into the **Mail server** field (typically `reloop.sh`).
4. Use `Auto` for **TTL**.
5. Set **Priority** to the value Reloop shows (often `10`).
6. Select **Save**.
Below is a mapping of the record fields from Reloop to Cloudflare:
| Cloudflare | Reloop | Example value |
| --- | --- | --- |
| Type | Type | `MX` |
| Name | Name | `team` (or `@` for the root) |
| Mail server | Value | `reloop.sh` |
| Priority | Priority | `10` |
| TTL | TTL | `Auto` |
Omit your domain from the Name field when Cloudflare appends it. Paste `team`, not `team.example.com`.
Do not reuse the same priority for conflicting MX records you must keep. If Priority `10` is already in use on that host, follow Reloop’s UI or use a [separate subdomain](/docs/guides/connect-domain/what-is-a-domain).
### Add TXT SPF record
Click **Add record** on Cloudflare:
1. Set the Type to `TXT`.
2. Set the **Name** to the host Reloop shows (same host as the sending MX, e.g. `team` or `@`).
3. Copy the TXT value from Reloop into **Content** (typically `v=spf1 include:reloop.sh -all`).
4. Use `Auto` for **TTL**.
5. Select **Save**.
| Cloudflare | Reloop | Example value |
| --- | --- | --- |
| Type | Type | `TXT` |
| Name | Name | `team` (or `@` for the root) |
| Content | Value | `v=spf1 include:reloop.sh -all` |
| TTL | TTL | `Auto` |
Omit your domain from the Name field when Cloudflare appends it. Paste `team`, not `team.example.com`.
Never create a second SPF TXT on the same host. If SPF already exists, merge `include:reloop.sh` into that record. See [SPF conflicts](/docs/guides/connect-domain/troubleshoot/spf-conflicts).
### Add TXT DKIM record
Click **Add record** on Cloudflare:
1. Set the Type to `TXT`.
2. Set the **Name** from Reloop (selector is usually `reloop._domainkey`). For a subdomain zone at the apex, Cloudflare often needs `reloop._domainkey.team`.
3. Copy the full TXT value from Reloop into **Content** (`v=DKIM1; k=rsa; p=…`).
4. Use `Auto` for **TTL**.
5. Select **Save**.
| Cloudflare | Reloop | Example value |
| --- | --- | --- |
| Type | Type | `TXT` |
| Name | Name | `reloop._domainkey` (or `reloop._domainkey.team` under the apex zone) |
| Content | Value | `v=DKIM1; k=rsa; p=…` (unique per domain) |
| TTL | TTL | `Auto` |
Omit your domain from the Name field when Cloudflare appends it. Paste `reloop._domainkey` or `reloop._domainkey.team`, not the full FQDN ending in `.example.com`.
### Receiving emails
If you want Reloop to **receive** mail on this hostname, turn **Receiving** on in the domain settings in Reloop, then click **Add record** on Cloudflare:
1. Set the Type to `MX`.
2. Set the **Name** to the host Reloop shows (e.g. `team` or `@`).
3. Copy the MX value from Reloop into **Mail server** (typically `inbound.reloop.sh`).
4. Use `Auto` for **TTL**.
5. Set **Priority** as shown in Reloop (often `10`).
6. Select **Save**.
| Cloudflare | Reloop | Example value |
| --- | --- | --- |
| Type | Type | `MX` |
| Name | Name | `team` (or `@` for the root) |
| Mail server | Value | `inbound.reloop.sh` |
| Priority | Priority | `10` |
| TTL | TTL | `Auto` |
When Reloop’s inbound MX is active on a hostname, Reloop receives mail for that hostname according to MX priority. That can conflict with another inbox already using MX on the same name — prefer a [subdomain](/docs/guides/connect-domain/what-is-a-domain). See [MX conflicts](/docs/guides/connect-domain/troubleshoot/mx-conflicts) and [Sending vs receiving](/docs/guides/connect-domain/sending-vs-receiving).
### Complete verification
Return to [Domains](https://reloop.sh/dashboard/domain) in Reloop, open the domain, and click **Verify & finish**. It may take a few minutes (rarely up to 48–72 hours) — see [propagation](/docs/guides/connect-domain/verification/propagation).
When verification succeeds, Reloop shows **You're all set!** — Domain added → Verified → Ready to send. Your domain is verified and you are good to go.
## Cloudflare-specific notes
- Keep Reloop mail/auth records on **DNS only** (grey cloud). Orange-cloud proxy often breaks verification.
- Optional **DMARC** and **tracking** (`link` CNAME) rows also appear in Reloop when enabled — add them the same way from the dashboard values.
## Troubleshooting
If your domain is not successfully verified, try these common fixes.
Confirm Reloop records use **DNS only** (grey cloud), not Proxied (orange cloud).
Re-open the Reloop domain page and compare every Type / Name / Value to Cloudflare. Fix typos, truncated DKIM keys, and duplicate SPF records. Then click **Verify** again.
Follow [Domain not verifying](/docs/guides/connect-domain/troubleshoot/not-verifying) and [DNS propagation](/docs/guides/connect-domain/verification/propagation).
## Related
- [DNS records explained](/docs/guides/connect-domain/dns-records-explained)
- [Manual DNS setup](/docs/guides/connect-domain/manual-setup)
- [Auto-populate DNS](/docs/guides/connect-domain/auto-populate)
- [All provider guides](/docs/guides/connect-domain/providers)
---
# guides/connect-domain/providers/domain-chief.mdx
Source: https://reloop.sh/docs/guides/connect-domain/providers/domain-chief
Markdown: https://reloop.sh/docs/guides/connect-domain/providers/domain-chief.md
Domain Chief can use Reloop **Auto-populate** when nameservers match. Manual steps are always available as a fallback.
First, log in to [Reloop](https://reloop.sh/dashboard/domain) and [add a domain](/docs/guides/connect-domain/add-domain).
It is [best practice to use a subdomain](/docs/guides/connect-domain/what-is-a-domain) (for example `mail.example.com` or `team.example.com`) instead of the root domain (`example.com`). A subdomain keeps sending reputation separate and is especially important if you enable receiving with Reloop.
## Automatic setup (recommended)
The fastest way to verify your domain on Domain Chief is **Auto populate** in Reloop. This uses [Domain Connect](https://www.domainconnect.org/) — Domain Chief indexes public templates automatically ([Domain Chief Domain Connect](https://aka.chief.app/domainconnect)).
1. Go to your [Domains](https://reloop.sh/dashboard/domain) page in Reloop and open the domain.
2. (Optional) If you want to receive emails, turn **Receiving** on before Auto-populate so the inbound MX is included. [Learn more below](#receiving-emails).
3. Click **Auto populate** (shown when Reloop detects Domain Chief nameservers).
4. Authorize Reloop in Domain Chief and approve the records.
5. Return to Reloop — records are written automatically.
That’s it. Your domain will usually verify within a few minutes.
If Auto-populate fails or Reloop does not offer it, use **Manual setup** below. See also [Auto-populate DNS](/docs/guides/connect-domain/auto-populate) and [Auto-populate failed](/docs/guides/connect-domain/troubleshoot/auto-populate-failed).
## Manual setup
If you prefer to add DNS records manually, follow these steps. Always copy Type / Name / Value from your domain page in Reloop — examples below use placeholders.
### Log in to Domain Chief
Log in to [Domain Chief](https://domain.chief.app) and open DNS for the domain whose nameservers match `ns.domainchief.app` / `.eu` / `.nl` / `.net`.
Domain Chief → select domain → DNS.
If Reloop or `dig NS yourdomain.com` shows a different host, stop and edit that host instead — see [Wrong nameservers](/docs/guides/connect-domain/troubleshoot/wrong-nameservers).
### Add MX SPF record
Add a record in Domain Chief:
1. Set the Type to `MX`.
2. Set the **Name** to the host Reloop shows (for a subdomain like `team.example.com`, often `team` or `@` depending on the UI).
3. Copy the MX value from Reloop into the mail server / value field (typically `reloop.sh`).
4. Use `Auto` or the provider default for **TTL**.
5. Set **Priority** to the value Reloop shows (often `10`).
6. Save.
| Domain Chief | Reloop | Example value |
| --- | --- | --- |
| Type | Type | `MX` |
| Name / Host | Name | `team` (or `@` for the root) |
| Value / Mail server | Value | `reloop.sh` |
| Priority | Priority | `10` |
| TTL | TTL | `Auto` |
Omit your domain from the Name field when Domain Chief appends it. Paste `team`, not `team.example.com`.
Do not reuse the same priority for conflicting MX records you must keep. If Priority `10` is already in use on that host, follow Reloop’s UI or use a [separate subdomain](/docs/guides/connect-domain/what-is-a-domain).
### Add TXT SPF record
Add a record in Domain Chief:
1. Set the Type to `TXT`.
2. Set the **Name** to the host Reloop shows (same host as the sending MX, e.g. `team` or `@`).
3. Copy the TXT value from Reloop (typically `v=spf1 include:reloop.sh -all`).
4. Use `Auto` or the provider default for **TTL**.
5. Save.
| Domain Chief | Reloop | Example value |
| --- | --- | --- |
| Type | Type | `TXT` |
| Name / Host | Name | `team` (or `@` for the root) |
| Value / Content | Value | `v=spf1 include:reloop.sh -all` |
| TTL | TTL | `Auto` |
Omit your domain from the Name field when Domain Chief appends it. Paste `team`, not `team.example.com`.
Never create a second SPF TXT on the same host. If SPF already exists, merge `include:reloop.sh` into that record. See [SPF conflicts](/docs/guides/connect-domain/troubleshoot/spf-conflicts).
### Add TXT DKIM record
Add a record in Domain Chief:
1. Set the Type to `TXT`.
2. Set the **Name** from Reloop (selector is usually `reloop._domainkey`). Under an apex zone this may be `reloop._domainkey.team`.
3. Copy the full TXT value from Reloop into the value field (`v=DKIM1; k=rsa; p=…`).
4. Use `Auto` or the provider default for **TTL**.
5. Save.
| Domain Chief | Reloop | Example value |
| --- | --- | --- |
| Type | Type | `TXT` |
| Name / Host | Name | `reloop._domainkey` (or `reloop._domainkey.team` under the apex zone) |
| Value / Content | Value | `v=DKIM1; k=rsa; p=…` (unique per domain) |
| TTL | TTL | `Auto` |
Omit your domain from the Name field when Domain Chief appends it. Paste `reloop._domainkey` or `reloop._domainkey.team`, not the full FQDN ending in `.example.com`.
### Receiving emails
If you want Reloop to **receive** mail on this hostname, turn **Receiving** on in the domain settings in Reloop, then add an MX record in Domain Chief:
1. Set the Type to `MX`.
2. Set the **Name** to the host Reloop shows (e.g. `team` or `@`).
3. Copy the MX value from Reloop (typically `inbound.reloop.sh`).
4. Use `Auto` or the provider default for **TTL**.
5. Set **Priority** as shown in Reloop (often `10`).
6. Save.
| Domain Chief | Reloop | Example value |
| --- | --- | --- |
| Type | Type | `MX` |
| Name / Host | Name | `team` (or `@` for the root) |
| Value / Mail server | Value | `inbound.reloop.sh` |
| Priority | Priority | `10` |
| TTL | TTL | `Auto` |
When Reloop’s inbound MX is active on a hostname, Reloop receives mail for that hostname according to MX priority. That can conflict with another inbox already using MX on the same name — prefer a [subdomain](/docs/guides/connect-domain/what-is-a-domain). See [MX conflicts](/docs/guides/connect-domain/troubleshoot/mx-conflicts) and [Sending vs receiving](/docs/guides/connect-domain/sending-vs-receiving).
### Complete verification
Return to [Domains](https://reloop.sh/dashboard/domain) in Reloop, open the domain, and click **Verify & finish**. It may take a few minutes (rarely up to 48–72 hours) — see [propagation](/docs/guides/connect-domain/verification/propagation).
When verification succeeds, Reloop shows **You're all set!** — Domain added → Verified → Ready to send. Your domain is verified and you are good to go.
## Domain Chief-specific notes
- Domain Chief auto-indexes public Domain Connect templates — prefer **Auto populate** when Reloop offers it.
- Auto-populate only works when public nameservers point at Domain Chief.
- Optional **DMARC** and **tracking** (`link` CNAME) rows also appear in Reloop when enabled — add them the same way from the dashboard values.
## Troubleshooting
If your domain is not successfully verified, try these common fixes.
Confirm nameservers are Domain Chief (`dig NS yourdomain.com`). Auto-populate needs Domain Chief hosted DNS. Otherwise use manual setup above.
Re-open the Reloop domain page and compare every Type / Name / Value to Domain Chief. Fix typos, truncated DKIM keys, and duplicate SPF records. Then click **Verify** again.
Follow [Domain not verifying](/docs/guides/connect-domain/troubleshoot/not-verifying) and [DNS propagation](/docs/guides/connect-domain/verification/propagation).
## Related
- [DNS records explained](/docs/guides/connect-domain/dns-records-explained)
- [Manual DNS setup](/docs/guides/connect-domain/manual-setup)
- [Auto-populate DNS](/docs/guides/connect-domain/auto-populate)
- [All provider guides](/docs/guides/connect-domain/providers)
---
# guides/connect-domain/providers/dreamhost.mdx
Source: https://reloop.sh/docs/guides/connect-domain/providers/dreamhost
Markdown: https://reloop.sh/docs/guides/connect-domain/providers/dreamhost.md
Add Reloop’s DNS records in DreamHost using the values from your domain page in Reloop.
## Add a domain in Reloop
1. Log in to [Reloop](https://reloop.sh/dashboard/domain) and [add a domain](/docs/guides/connect-domain/add-domain).
2. Keep that tab open — every host and value you paste must match Reloop exactly (especially the DKIM key).
Reloop works with the [root domain, a subdomain, or both](/docs/guides/connect-domain/what-is-a-domain) — for example `example.com`, `mail.example.com`, or `updates.example.com`.
## Manual setup
### Log in to DreamHost
Open [DreamHost](https://panel.dreamhost.com) and go to DNS for the domain whose **nameservers** match `dreamhost.com / dreamhosters.com`.
DreamHost Panel → Domains → DNS.
If Reloop or `dig NS yourdomain.com` shows a different host, stop and edit that host instead — see [Wrong nameservers](/docs/guides/connect-domain/troubleshoot/wrong-nameservers).
### Field mapping
| Reloop | DreamHost field | Example |
| --- | --- | --- |
| Type | Type | `TXT` / `MX` / `CNAME` |
| Name / Host | Name | `@`, `reloop._domainkey`, `_dmarc`, `link`, … |
| Value / Content | Value | Exact value from Reloop |
| TTL | TTL | `Auto` or provider default |
| Priority (MX only) | Priority | As shown in Reloop (often `10`) |
Omit your domain from the Name/Host field when the provider appends it automatically. Paste `reloop._domainkey` or `link`, not `reloop._domainkey.example.com`.
### Add the records from Reloop
For **each required row** on the Reloop domain page:
Match Reloop’s type: `TXT`, `MX`, or `CNAME`.
Copy the host from Reloop (`@`, `reloop._domainkey`, `_dmarc`, `link`, …).
Copy the value exactly. For MX, also set **Priority** as shown (often `10`). If priority `10` is already used by another MX you must keep, use the next free value only when Reloop’s UI allows it — otherwise use a [subdomain](/docs/guides/connect-domain/what-is-a-domain).
Save the record, then continue with the next Reloop row.
Typical Reloop rows (always confirm in the dashboard):
| Purpose | Type | Host (typical) | Value (typical) |
| --- | --- | --- | --- |
| SPF | TXT | `@` | `v=spf1 include:reloop.sh -all` (or merge into existing SPF) |
| DKIM | TXT | `reloop._domainkey` | `v=DKIM1; k=rsa; p=…` (unique per domain) |
| DMARC | TXT | `_dmarc` | `v=DMARC1; p=reject;` (or your existing policy) |
| Tracking | CNAME | `link` | `link.reloop.sh` |
| Receiving MX | MX | `@` or subdomain host | `inbound.reloop.sh` (when receiving is enabled) |
Never create a second SPF TXT on the same host. Merge `include:reloop.sh` into the existing SPF. See [SPF conflicts](/docs/guides/connect-domain/troubleshoot/spf-conflicts).
## DreamHost-specific notes
- DreamHost uses `@` or blank for the root host depending on the screen.
- Confirm you are editing the zone that matches public nameservers.
## Receiving emails
If you enable **Receiving** on the domain in Reloop, you must publish the inbound **MX** Reloop shows (typically `inbound.reloop.sh`).
When Reloop’s MX is active on a hostname, Reloop receives mail for that hostname according to MX priority. That can conflict with another inbox already using MX on the same name — use a separate hostname for Reloop receiving if needed. See [MX conflicts](/docs/guides/connect-domain/troubleshoot/mx-conflicts) and [Sending vs receiving](/docs/guides/connect-domain/sending-vs-receiving).
## Complete verification
1. Return to [Domains](https://reloop.sh/dashboard/domain) in Reloop.
2. Open the domain and click **Verify**.
3. Wait until status is **active**. Most providers update within minutes; allow up to 48–72 hours in rare cases ([propagation](/docs/guides/connect-domain/verification/propagation)).
## Troubleshooting
Re-open the Reloop domain page and compare every Type / Host / Value to DreamHost. Fix typos, truncated DKIM keys, and duplicate SPF records. Then click **Verify** again.
Confirm you edited the DNS host that matches public nameservers (`dig NS yourdomain.com`). See [Wrong nameservers](/docs/guides/connect-domain/troubleshoot/wrong-nameservers).
Follow [Domain not verifying](/docs/guides/connect-domain/troubleshoot/not-verifying) and [DNS propagation](/docs/guides/connect-domain/verification/propagation).
## Related
- [DNS records explained](/docs/guides/connect-domain/dns-records-explained)
- [Manual DNS setup](/docs/guides/connect-domain/manual-setup)
- [Auto-populate DNS](/docs/guides/connect-domain/auto-populate)
- [All provider guides](/docs/guides/connect-domain/providers)
---
# guides/connect-domain/providers/gandi.mdx
Source: https://reloop.sh/docs/guides/connect-domain/providers/gandi
Markdown: https://reloop.sh/docs/guides/connect-domain/providers/gandi.md
Add Reloop’s DNS records in Gandi using the values from your domain page in Reloop.
## Add a domain in Reloop
1. Log in to [Reloop](https://reloop.sh/dashboard/domain) and [add a domain](/docs/guides/connect-domain/add-domain).
2. Keep that tab open — every host and value you paste must match Reloop exactly (especially the DKIM key).
Reloop works with the [root domain, a subdomain, or both](/docs/guides/connect-domain/what-is-a-domain) — for example `example.com`, `mail.example.com`, or `updates.example.com`.
## Manual setup
### Log in to Gandi
Open [Gandi](https://admin.gandi.net/domain) and go to DNS for the domain whose **nameservers** match `gandi.net`.
Gandi Admin → Domain → DNS Records.
If Reloop or `dig NS yourdomain.com` shows a different host, stop and edit that host instead — see [Wrong nameservers](/docs/guides/connect-domain/troubleshoot/wrong-nameservers).
### Field mapping
| Reloop | Gandi field | Example |
| --- | --- | --- |
| Type | Type | `TXT` / `MX` / `CNAME` |
| Name / Host | Name | `@`, `reloop._domainkey`, `_dmarc`, `link`, … |
| Value / Content | Value | Exact value from Reloop |
| TTL | TTL | `Auto` or provider default |
| Priority (MX only) | Priority | As shown in Reloop (often `10`) |
Omit your domain from the Name/Host field when the provider appends it automatically. Paste `reloop._domainkey` or `link`, not `reloop._domainkey.example.com`.
### Add the records from Reloop
For **each required row** on the Reloop domain page:
Match Reloop’s type: `TXT`, `MX`, or `CNAME`.
Copy the host from Reloop (`@`, `reloop._domainkey`, `_dmarc`, `link`, …).
Copy the value exactly. For MX, also set **Priority** as shown (often `10`). If priority `10` is already used by another MX you must keep, use the next free value only when Reloop’s UI allows it — otherwise use a [subdomain](/docs/guides/connect-domain/what-is-a-domain).
Save the record, then continue with the next Reloop row.
Typical Reloop rows (always confirm in the dashboard):
| Purpose | Type | Host (typical) | Value (typical) |
| --- | --- | --- | --- |
| SPF | TXT | `@` | `v=spf1 include:reloop.sh -all` (or merge into existing SPF) |
| DKIM | TXT | `reloop._domainkey` | `v=DKIM1; k=rsa; p=…` (unique per domain) |
| DMARC | TXT | `_dmarc` | `v=DMARC1; p=reject;` (or your existing policy) |
| Tracking | CNAME | `link` | `link.reloop.sh` |
| Receiving MX | MX | `@` or subdomain host | `inbound.reloop.sh` (when receiving is enabled) |
Never create a second SPF TXT on the same host. Merge `include:reloop.sh` into the existing SPF. See [SPF conflicts](/docs/guides/connect-domain/troubleshoot/spf-conflicts).
## Gandi-specific notes
- Gandi LiveDNS uses relative hostnames; omit the domain suffix.
- If the domain uses external nameservers, edit that host instead.
## Receiving emails
If you enable **Receiving** on the domain in Reloop, you must publish the inbound **MX** Reloop shows (typically `inbound.reloop.sh`).
When Reloop’s MX is active on a hostname, Reloop receives mail for that hostname according to MX priority. That can conflict with another inbox already using MX on the same name — use a separate hostname for Reloop receiving if needed. See [MX conflicts](/docs/guides/connect-domain/troubleshoot/mx-conflicts) and [Sending vs receiving](/docs/guides/connect-domain/sending-vs-receiving).
## Complete verification
1. Return to [Domains](https://reloop.sh/dashboard/domain) in Reloop.
2. Open the domain and click **Verify**.
3. Wait until status is **active**. Most providers update within minutes; allow up to 48–72 hours in rare cases ([propagation](/docs/guides/connect-domain/verification/propagation)).
## Troubleshooting
Re-open the Reloop domain page and compare every Type / Host / Value to Gandi. Fix typos, truncated DKIM keys, and duplicate SPF records. Then click **Verify** again.
Confirm you edited the DNS host that matches public nameservers (`dig NS yourdomain.com`). See [Wrong nameservers](/docs/guides/connect-domain/troubleshoot/wrong-nameservers).
Follow [Domain not verifying](/docs/guides/connect-domain/troubleshoot/not-verifying) and [DNS propagation](/docs/guides/connect-domain/verification/propagation).
## Related
- [DNS records explained](/docs/guides/connect-domain/dns-records-explained)
- [Manual DNS setup](/docs/guides/connect-domain/manual-setup)
- [Auto-populate DNS](/docs/guides/connect-domain/auto-populate)
- [All provider guides](/docs/guides/connect-domain/providers)
---
# guides/connect-domain/providers/glauca-digital.mdx
Source: https://reloop.sh/docs/guides/connect-domain/providers/glauca-digital
Markdown: https://reloop.sh/docs/guides/connect-domain/providers/glauca-digital.md
Add Reloop’s DNS records in Glauca Digital using the values from your domain page in Reloop.
## Add a domain in Reloop
1. Log in to [Reloop](https://reloop.sh/dashboard/domain) and [add a domain](/docs/guides/connect-domain/add-domain).
2. Keep that tab open — every host and value you paste must match Reloop exactly (especially the DKIM key).
Reloop works with the [root domain, a subdomain, or both](/docs/guides/connect-domain/what-is-a-domain) — for example `example.com`, `mail.example.com`, or `updates.example.com`.
## Manual setup
### Log in to Glauca Digital
Open [Glauca Digital](https://domains.glauca.digital) and go to DNS for the domain whose **nameservers** match `as207960.net / glauca.digital`.
Glauca HexDNS → zone DNS.
If Reloop or `dig NS yourdomain.com` shows a different host, stop and edit that host instead — see [Wrong nameservers](/docs/guides/connect-domain/troubleshoot/wrong-nameservers).
### Field mapping
| Reloop | Glauca Digital field | Example |
| --- | --- | --- |
| Type | Type | `TXT` / `MX` / `CNAME` |
| Name / Host | Name | `@`, `reloop._domainkey`, `_dmarc`, `link`, … |
| Value / Content | Value | Exact value from Reloop |
| TTL | TTL | `Auto` or provider default |
| Priority (MX only) | Priority | As shown in Reloop (often `10`) |
Omit your domain from the Name/Host field when the provider appends it automatically. Paste `reloop._domainkey` or `link`, not `reloop._domainkey.example.com`.
### Add the records from Reloop
For **each required row** on the Reloop domain page:
Match Reloop’s type: `TXT`, `MX`, or `CNAME`.
Copy the host from Reloop (`@`, `reloop._domainkey`, `_dmarc`, `link`, …).
Copy the value exactly. For MX, also set **Priority** as shown (often `10`). If priority `10` is already used by another MX you must keep, use the next free value only when Reloop’s UI allows it — otherwise use a [subdomain](/docs/guides/connect-domain/what-is-a-domain).
Save the record, then continue with the next Reloop row.
Typical Reloop rows (always confirm in the dashboard):
| Purpose | Type | Host (typical) | Value (typical) |
| --- | --- | --- | --- |
| SPF | TXT | `@` | `v=spf1 include:reloop.sh -all` (or merge into existing SPF) |
| DKIM | TXT | `reloop._domainkey` | `v=DKIM1; k=rsa; p=…` (unique per domain) |
| DMARC | TXT | `_dmarc` | `v=DMARC1; p=reject;` (or your existing policy) |
| Tracking | CNAME | `link` | `link.reloop.sh` |
| Receiving MX | MX | `@` or subdomain host | `inbound.reloop.sh` (when receiving is enabled) |
Never create a second SPF TXT on the same host. Merge `include:reloop.sh` into the existing SPF. See [SPF conflicts](/docs/guides/connect-domain/troubleshoot/spf-conflicts).
## Glauca Digital-specific notes
- Glauca Digital supports Domain Connect ([HexDNS](https://docs.glauca.digital/hexdns/domain-connect/)). Reloop’s template may become available after public registry sync — if Reloop does not show **Auto populate**, use manual setup.
- Default HexDNS nameservers are `ns1`–`ns4.as207960.net`.
## Receiving emails
If you enable **Receiving** on the domain in Reloop, you must publish the inbound **MX** Reloop shows (typically `inbound.reloop.sh`).
When Reloop’s MX is active on a hostname, Reloop receives mail for that hostname according to MX priority. That can conflict with another inbox already using MX on the same name — use a separate hostname for Reloop receiving if needed. See [MX conflicts](/docs/guides/connect-domain/troubleshoot/mx-conflicts) and [Sending vs receiving](/docs/guides/connect-domain/sending-vs-receiving).
## Complete verification
1. Return to [Domains](https://reloop.sh/dashboard/domain) in Reloop.
2. Open the domain and click **Verify**.
3. Wait until status is **active**. Most providers update within minutes; allow up to 48–72 hours in rare cases ([propagation](/docs/guides/connect-domain/verification/propagation)).
## Troubleshooting
Re-open the Reloop domain page and compare every Type / Host / Value to Glauca Digital. Fix typos, truncated DKIM keys, and duplicate SPF records. Then click **Verify** again.
Confirm you edited the DNS host that matches public nameservers (`dig NS yourdomain.com`). See [Wrong nameservers](/docs/guides/connect-domain/troubleshoot/wrong-nameservers).
Follow [Domain not verifying](/docs/guides/connect-domain/troubleshoot/not-verifying) and [DNS propagation](/docs/guides/connect-domain/verification/propagation).
## Related
- [DNS records explained](/docs/guides/connect-domain/dns-records-explained)
- [Manual DNS setup](/docs/guides/connect-domain/manual-setup)
- [Auto-populate DNS](/docs/guides/connect-domain/auto-populate)
- [All provider guides](/docs/guides/connect-domain/providers)
---
# guides/connect-domain/providers/godaddy.mdx
Source: https://reloop.sh/docs/guides/connect-domain/providers/godaddy
Markdown: https://reloop.sh/docs/guides/connect-domain/providers/godaddy.md
Add Reloop’s DNS records in GoDaddy using the values from your domain page in Reloop.
## Add a domain in Reloop
1. Log in to [Reloop](https://reloop.sh/dashboard/domain) and [add a domain](/docs/guides/connect-domain/add-domain).
2. Keep that tab open — every host and value you paste must match Reloop exactly (especially the DKIM key).
Reloop works with the [root domain, a subdomain, or both](/docs/guides/connect-domain/what-is-a-domain) — for example `example.com`, `mail.example.com`, or `updates.example.com`.
## Manual setup
### Log in to GoDaddy
Open [GoDaddy](https://dcc.godaddy.com/dns) and go to DNS for the domain whose **nameservers** match `domaincontrol.com`.
GoDaddy Domain Control Center → DNS.
If Reloop or `dig NS yourdomain.com` shows a different host, stop and edit that host instead — see [Wrong nameservers](/docs/guides/connect-domain/troubleshoot/wrong-nameservers).
### Field mapping
| Reloop | GoDaddy field | Example |
| --- | --- | --- |
| Type | Type | `TXT` / `MX` / `CNAME` |
| Name / Host | Name | `@`, `reloop._domainkey`, `_dmarc`, `link`, … |
| Value / Content | Value | Exact value from Reloop |
| TTL | TTL | `Auto` or provider default |
| Priority (MX only) | Priority | As shown in Reloop (often `10`) |
Omit your domain from the Name/Host field when the provider appends it automatically. Paste `reloop._domainkey` or `link`, not `reloop._domainkey.example.com`.
### Add the records from Reloop
For **each required row** on the Reloop domain page:
Match Reloop’s type: `TXT`, `MX`, or `CNAME`.
Copy the host from Reloop (`@`, `reloop._domainkey`, `_dmarc`, `link`, …).
Copy the value exactly. For MX, also set **Priority** as shown (often `10`). If priority `10` is already used by another MX you must keep, use the next free value only when Reloop’s UI allows it — otherwise use a [subdomain](/docs/guides/connect-domain/what-is-a-domain).
Save the record, then continue with the next Reloop row.
Typical Reloop rows (always confirm in the dashboard):
| Purpose | Type | Host (typical) | Value (typical) |
| --- | --- | --- | --- |
| SPF | TXT | `@` | `v=spf1 include:reloop.sh -all` (or merge into existing SPF) |
| DKIM | TXT | `reloop._domainkey` | `v=DKIM1; k=rsa; p=…` (unique per domain) |
| DMARC | TXT | `_dmarc` | `v=DMARC1; p=reject;` (or your existing policy) |
| Tracking | CNAME | `link` | `link.reloop.sh` |
| Receiving MX | MX | `@` or subdomain host | `inbound.reloop.sh` (when receiving is enabled) |
Never create a second SPF TXT on the same host. Merge `include:reloop.sh` into the existing SPF. See [SPF conflicts](/docs/guides/connect-domain/troubleshoot/spf-conflicts).
## GoDaddy-specific notes
- GoDaddy supports Domain Connect for some products, but Reloop’s template is **not** onboarded there yet — use manual setup.
- If nameservers point to Cloudflare (or another host), edit that host instead of GoDaddy DNS.
- For apex hosts GoDaddy uses `@`.
## Receiving emails
If you enable **Receiving** on the domain in Reloop, you must publish the inbound **MX** Reloop shows (typically `inbound.reloop.sh`).
When Reloop’s MX is active on a hostname, Reloop receives mail for that hostname according to MX priority. That can conflict with another inbox already using MX on the same name — use a separate hostname for Reloop receiving if needed. See [MX conflicts](/docs/guides/connect-domain/troubleshoot/mx-conflicts) and [Sending vs receiving](/docs/guides/connect-domain/sending-vs-receiving).
## Complete verification
1. Return to [Domains](https://reloop.sh/dashboard/domain) in Reloop.
2. Open the domain and click **Verify**.
3. Wait until status is **active**. Most providers update within minutes; allow up to 48–72 hours in rare cases ([propagation](/docs/guides/connect-domain/verification/propagation)).
## Troubleshooting
Re-open the Reloop domain page and compare every Type / Host / Value to GoDaddy. Fix typos, truncated DKIM keys, and duplicate SPF records. Then click **Verify** again.
Confirm you edited the DNS host that matches public nameservers (`dig NS yourdomain.com`). See [Wrong nameservers](/docs/guides/connect-domain/troubleshoot/wrong-nameservers).
Follow [Domain not verifying](/docs/guides/connect-domain/troubleshoot/not-verifying) and [DNS propagation](/docs/guides/connect-domain/verification/propagation).
## Related
- [DNS records explained](/docs/guides/connect-domain/dns-records-explained)
- [Manual DNS setup](/docs/guides/connect-domain/manual-setup)
- [Auto-populate DNS](/docs/guides/connect-domain/auto-populate)
- [All provider guides](/docs/guides/connect-domain/providers)
---
# guides/connect-domain/providers/hetzner.mdx
Source: https://reloop.sh/docs/guides/connect-domain/providers/hetzner
Markdown: https://reloop.sh/docs/guides/connect-domain/providers/hetzner.md
Add Reloop’s DNS records in Hetzner using the values from your domain page in Reloop.
## Add a domain in Reloop
1. Log in to [Reloop](https://reloop.sh/dashboard/domain) and [add a domain](/docs/guides/connect-domain/add-domain).
2. Keep that tab open — every host and value you paste must match Reloop exactly (especially the DKIM key).
Reloop works with the [root domain, a subdomain, or both](/docs/guides/connect-domain/what-is-a-domain) — for example `example.com`, `mail.example.com`, or `updates.example.com`.
## Manual setup
### Log in to Hetzner
Open [Hetzner](https://dns.hetzner.com) and go to DNS for the domain whose **nameservers** match `hetzner.com / hetzner.de`.
Hetzner DNS Console → zone records.
If Reloop or `dig NS yourdomain.com` shows a different host, stop and edit that host instead — see [Wrong nameservers](/docs/guides/connect-domain/troubleshoot/wrong-nameservers).
### Field mapping
| Reloop | Hetzner field | Example |
| --- | --- | --- |
| Type | Type | `TXT` / `MX` / `CNAME` |
| Name / Host | Name | `@`, `reloop._domainkey`, `_dmarc`, `link`, … |
| Value / Content | Value | Exact value from Reloop |
| TTL | TTL | `Auto` or provider default |
| Priority (MX only) | Priority | As shown in Reloop (often `10`) |
Omit your domain from the Name/Host field when the provider appends it automatically. Paste `reloop._domainkey` or `link`, not `reloop._domainkey.example.com`.
### Add the records from Reloop
For **each required row** on the Reloop domain page:
Match Reloop’s type: `TXT`, `MX`, or `CNAME`.
Copy the host from Reloop (`@`, `reloop._domainkey`, `_dmarc`, `link`, …).
Copy the value exactly. For MX, also set **Priority** as shown (often `10`). If priority `10` is already used by another MX you must keep, use the next free value only when Reloop’s UI allows it — otherwise use a [subdomain](/docs/guides/connect-domain/what-is-a-domain).
Save the record, then continue with the next Reloop row.
Typical Reloop rows (always confirm in the dashboard):
| Purpose | Type | Host (typical) | Value (typical) |
| --- | --- | --- | --- |
| SPF | TXT | `@` | `v=spf1 include:reloop.sh -all` (or merge into existing SPF) |
| DKIM | TXT | `reloop._domainkey` | `v=DKIM1; k=rsa; p=…` (unique per domain) |
| DMARC | TXT | `_dmarc` | `v=DMARC1; p=reject;` (or your existing policy) |
| Tracking | CNAME | `link` | `link.reloop.sh` |
| Receiving MX | MX | `@` or subdomain host | `inbound.reloop.sh` (when receiving is enabled) |
Never create a second SPF TXT on the same host. Merge `include:reloop.sh` into the existing SPF. See [SPF conflicts](/docs/guides/connect-domain/troubleshoot/spf-conflicts).
## Hetzner-specific notes
- Use the Hetzner DNS Console for zones on Hetzner nameservers.
- Merge SPF carefully — Hetzner may already have a default TXT.
## Receiving emails
If you enable **Receiving** on the domain in Reloop, you must publish the inbound **MX** Reloop shows (typically `inbound.reloop.sh`).
When Reloop’s MX is active on a hostname, Reloop receives mail for that hostname according to MX priority. That can conflict with another inbox already using MX on the same name — use a separate hostname for Reloop receiving if needed. See [MX conflicts](/docs/guides/connect-domain/troubleshoot/mx-conflicts) and [Sending vs receiving](/docs/guides/connect-domain/sending-vs-receiving).
## Complete verification
1. Return to [Domains](https://reloop.sh/dashboard/domain) in Reloop.
2. Open the domain and click **Verify**.
3. Wait until status is **active**. Most providers update within minutes; allow up to 48–72 hours in rare cases ([propagation](/docs/guides/connect-domain/verification/propagation)).
## Troubleshooting
Re-open the Reloop domain page and compare every Type / Host / Value to Hetzner. Fix typos, truncated DKIM keys, and duplicate SPF records. Then click **Verify** again.
Confirm you edited the DNS host that matches public nameservers (`dig NS yourdomain.com`). See [Wrong nameservers](/docs/guides/connect-domain/troubleshoot/wrong-nameservers).
Follow [Domain not verifying](/docs/guides/connect-domain/troubleshoot/not-verifying) and [DNS propagation](/docs/guides/connect-domain/verification/propagation).
## Related
- [DNS records explained](/docs/guides/connect-domain/dns-records-explained)
- [Manual DNS setup](/docs/guides/connect-domain/manual-setup)
- [Auto-populate DNS](/docs/guides/connect-domain/auto-populate)
- [All provider guides](/docs/guides/connect-domain/providers)
---
# guides/connect-domain/providers/hostinger.mdx
Source: https://reloop.sh/docs/guides/connect-domain/providers/hostinger
Markdown: https://reloop.sh/docs/guides/connect-domain/providers/hostinger.md
Add Reloop’s DNS records in Hostinger using the values from your domain page in Reloop.
## Add a domain in Reloop
1. Log in to [Reloop](https://reloop.sh/dashboard/domain) and [add a domain](/docs/guides/connect-domain/add-domain).
2. Keep that tab open — every host and value you paste must match Reloop exactly (especially the DKIM key).
Reloop works with the [root domain, a subdomain, or both](/docs/guides/connect-domain/what-is-a-domain) — for example `example.com`, `mail.example.com`, or `updates.example.com`.
## Manual setup
### Log in to Hostinger
Open [Hostinger](https://hpanel.hostinger.com/domains) and go to DNS for the domain whose **nameservers** match `hostinger. / dns-parking.com`.
hPanel → Domains → DNS / Name Servers.
If Reloop or `dig NS yourdomain.com` shows a different host, stop and edit that host instead — see [Wrong nameservers](/docs/guides/connect-domain/troubleshoot/wrong-nameservers).
### Field mapping
| Reloop | Hostinger field | Example |
| --- | --- | --- |
| Type | Type | `TXT` / `MX` / `CNAME` |
| Name / Host | Name | `@`, `reloop._domainkey`, `_dmarc`, `link`, … |
| Value / Content | Value | Exact value from Reloop |
| TTL | TTL | `Auto` or provider default |
| Priority (MX only) | Priority | As shown in Reloop (often `10`) |
Omit your domain from the Name/Host field when the provider appends it automatically. Paste `reloop._domainkey` or `link`, not `reloop._domainkey.example.com`.
### Add the records from Reloop
For **each required row** on the Reloop domain page:
Match Reloop’s type: `TXT`, `MX`, or `CNAME`.
Copy the host from Reloop (`@`, `reloop._domainkey`, `_dmarc`, `link`, …).
Copy the value exactly. For MX, also set **Priority** as shown (often `10`). If priority `10` is already used by another MX you must keep, use the next free value only when Reloop’s UI allows it — otherwise use a [subdomain](/docs/guides/connect-domain/what-is-a-domain).
Save the record, then continue with the next Reloop row.
Typical Reloop rows (always confirm in the dashboard):
| Purpose | Type | Host (typical) | Value (typical) |
| --- | --- | --- | --- |
| SPF | TXT | `@` | `v=spf1 include:reloop.sh -all` (or merge into existing SPF) |
| DKIM | TXT | `reloop._domainkey` | `v=DKIM1; k=rsa; p=…` (unique per domain) |
| DMARC | TXT | `_dmarc` | `v=DMARC1; p=reject;` (or your existing policy) |
| Tracking | CNAME | `link` | `link.reloop.sh` |
| Receiving MX | MX | `@` or subdomain host | `inbound.reloop.sh` (when receiving is enabled) |
Never create a second SPF TXT on the same host. Merge `include:reloop.sh` into the existing SPF. See [SPF conflicts](/docs/guides/connect-domain/troubleshoot/spf-conflicts).
## Hostinger-specific notes
- Hostinger hPanel is the editor when nameservers point at Hostinger.
- If you pointed NS at Cloudflare (or another host), edit that host instead.
## Receiving emails
If you enable **Receiving** on the domain in Reloop, you must publish the inbound **MX** Reloop shows (typically `inbound.reloop.sh`).
When Reloop’s MX is active on a hostname, Reloop receives mail for that hostname according to MX priority. That can conflict with another inbox already using MX on the same name — use a separate hostname for Reloop receiving if needed. See [MX conflicts](/docs/guides/connect-domain/troubleshoot/mx-conflicts) and [Sending vs receiving](/docs/guides/connect-domain/sending-vs-receiving).
## Complete verification
1. Return to [Domains](https://reloop.sh/dashboard/domain) in Reloop.
2. Open the domain and click **Verify**.
3. Wait until status is **active**. Most providers update within minutes; allow up to 48–72 hours in rare cases ([propagation](/docs/guides/connect-domain/verification/propagation)).
## Troubleshooting
Re-open the Reloop domain page and compare every Type / Host / Value to Hostinger. Fix typos, truncated DKIM keys, and duplicate SPF records. Then click **Verify** again.
Confirm you edited the DNS host that matches public nameservers (`dig NS yourdomain.com`). See [Wrong nameservers](/docs/guides/connect-domain/troubleshoot/wrong-nameservers).
Follow [Domain not verifying](/docs/guides/connect-domain/troubleshoot/not-verifying) and [DNS propagation](/docs/guides/connect-domain/verification/propagation).
## Related
- [DNS records explained](/docs/guides/connect-domain/dns-records-explained)
- [Manual DNS setup](/docs/guides/connect-domain/manual-setup)
- [Auto-populate DNS](/docs/guides/connect-domain/auto-populate)
- [All provider guides](/docs/guides/connect-domain/providers)
---
# guides/connect-domain/providers/index.mdx
Source: https://reloop.sh/docs/guides/connect-domain/providers
Markdown: https://reloop.sh/docs/guides/connect-domain/providers.md
Pick the company that hosts your **nameservers** (not always where you bought the domain). Unsure? [Find your DNS provider](/docs/guides/connect-domain/find-dns-provider).
Each guide covers adding a domain in Reloop, provider login, field mapping, record-by-record setup, receiving mail, verification, and troubleshooting. If Reloop shows **Auto populate** for a host, that guide includes an **Automatic setup** section first — otherwise follow the manual steps. See [Auto-populate DNS](/docs/guides/connect-domain/auto-populate).
This set includes common registrars/DNS hosts plus every DNS provider with a live [Domain Connect](https://www.domainconnect.org/dns-providers/) implementation.
## All DNS guides
Includes Auto-populate when Reloop detects this host.
Includes Auto-populate when Reloop detects this host.
Step-by-step manual DNS setup.
Step-by-step manual DNS setup.
Domain Connect host — use Auto-populate when Reloop offers it.
Step-by-step manual DNS setup.
Step-by-step manual DNS setup.
Step-by-step manual DNS setup.
Step-by-step manual DNS setup.
Step-by-step manual DNS setup.
Includes Auto-populate when Reloop detects this host.
Step-by-step manual DNS setup.
Step-by-step manual DNS setup.
Step-by-step manual DNS setup.
Step-by-step manual DNS setup.
Step-by-step manual DNS setup.
Includes Auto-populate when Reloop detects this host.
Step-by-step manual DNS setup.
## Not listed?
Use [Unknown or other DNS provider](/docs/guides/connect-domain/providers/unknown-provider).
## Related
- [Connect a domain](/docs/guides/connect-domain)
- [Auto-populate](/docs/guides/connect-domain/auto-populate)
- [Manual setup](/docs/guides/connect-domain/manual-setup)
- [Domain Connect DNS providers](https://www.domainconnect.org/dns-providers/)
---
# guides/connect-domain/providers/ionos.mdx
Source: https://reloop.sh/docs/guides/connect-domain/providers/ionos
Markdown: https://reloop.sh/docs/guides/connect-domain/providers/ionos.md
Add Reloop’s DNS records in IONOS using the values from your domain page in Reloop.
## Add a domain in Reloop
1. Log in to [Reloop](https://reloop.sh/dashboard/domain) and [add a domain](/docs/guides/connect-domain/add-domain).
2. Keep that tab open — every host and value you paste must match Reloop exactly (especially the DKIM key).
Reloop works with the [root domain, a subdomain, or both](/docs/guides/connect-domain/what-is-a-domain) — for example `example.com`, `mail.example.com`, or `updates.example.com`.
## Manual setup
### Log in to IONOS
Open [IONOS](https://my.ionos.com/domains) and go to DNS for the domain whose **nameservers** match `ui-dns.com / .de / .org / .biz`.
IONOS → Domains → DNS.
If Reloop or `dig NS yourdomain.com` shows a different host, stop and edit that host instead — see [Wrong nameservers](/docs/guides/connect-domain/troubleshoot/wrong-nameservers).
### Field mapping
| Reloop | IONOS field | Example |
| --- | --- | --- |
| Type | Type | `TXT` / `MX` / `CNAME` |
| Name / Host | Host Name | `@`, `reloop._domainkey`, `_dmarc`, `link`, … |
| Value / Content | Points to / Value | Exact value from Reloop |
| TTL | TTL | `Auto` or provider default |
| Priority (MX only) | Priority | As shown in Reloop (often `10`) |
Omit your domain from the Name/Host field when the provider appends it automatically. Paste `reloop._domainkey` or `link`, not `reloop._domainkey.example.com`.
### Add the records from Reloop
For **each required row** on the Reloop domain page:
Match Reloop’s type: `TXT`, `MX`, or `CNAME`.
Copy the host from Reloop (`@`, `reloop._domainkey`, `_dmarc`, `link`, …).
Copy the value exactly. For MX, also set **Priority** as shown (often `10`). If priority `10` is already used by another MX you must keep, use the next free value only when Reloop’s UI allows it — otherwise use a [subdomain](/docs/guides/connect-domain/what-is-a-domain).
Save the record, then continue with the next Reloop row.
Typical Reloop rows (always confirm in the dashboard):
| Purpose | Type | Host (typical) | Value (typical) |
| --- | --- | --- | --- |
| SPF | TXT | `@` | `v=spf1 include:reloop.sh -all` (or merge into existing SPF) |
| DKIM | TXT | `reloop._domainkey` | `v=DKIM1; k=rsa; p=…` (unique per domain) |
| DMARC | TXT | `_dmarc` | `v=DMARC1; p=reject;` (or your existing policy) |
| Tracking | CNAME | `link` | `link.reloop.sh` |
| Receiving MX | MX | `@` or subdomain host | `inbound.reloop.sh` (when receiving is enabled) |
Never create a second SPF TXT on the same host. Merge `include:reloop.sh` into the existing SPF. See [SPF conflicts](/docs/guides/connect-domain/troubleshoot/spf-conflicts).
## IONOS-specific notes
- IONOS Domain Connect has not finished Reloop template onboarding — use manual setup.
## Receiving emails
If you enable **Receiving** on the domain in Reloop, you must publish the inbound **MX** Reloop shows (typically `inbound.reloop.sh`).
When Reloop’s MX is active on a hostname, Reloop receives mail for that hostname according to MX priority. That can conflict with another inbox already using MX on the same name — use a separate hostname for Reloop receiving if needed. See [MX conflicts](/docs/guides/connect-domain/troubleshoot/mx-conflicts) and [Sending vs receiving](/docs/guides/connect-domain/sending-vs-receiving).
## Complete verification
1. Return to [Domains](https://reloop.sh/dashboard/domain) in Reloop.
2. Open the domain and click **Verify**.
3. Wait until status is **active**. Most providers update within minutes; allow up to 48–72 hours in rare cases ([propagation](/docs/guides/connect-domain/verification/propagation)).
## Troubleshooting
Re-open the Reloop domain page and compare every Type / Host / Value to IONOS. Fix typos, truncated DKIM keys, and duplicate SPF records. Then click **Verify** again.
Confirm you edited the DNS host that matches public nameservers (`dig NS yourdomain.com`). See [Wrong nameservers](/docs/guides/connect-domain/troubleshoot/wrong-nameservers).
Follow [Domain not verifying](/docs/guides/connect-domain/troubleshoot/not-verifying) and [DNS propagation](/docs/guides/connect-domain/verification/propagation).
## Related
- [DNS records explained](/docs/guides/connect-domain/dns-records-explained)
- [Manual DNS setup](/docs/guides/connect-domain/manual-setup)
- [Auto-populate DNS](/docs/guides/connect-domain/auto-populate)
- [All provider guides](/docs/guides/connect-domain/providers)
---
# guides/connect-domain/providers/namecheap.mdx
Source: https://reloop.sh/docs/guides/connect-domain/providers/namecheap
Markdown: https://reloop.sh/docs/guides/connect-domain/providers/namecheap.md
Add Reloop’s DNS records in Namecheap using the values from your domain page in Reloop.
## Add a domain in Reloop
1. Log in to [Reloop](https://reloop.sh/dashboard/domain) and [add a domain](/docs/guides/connect-domain/add-domain).
2. Keep that tab open — every host and value you paste must match Reloop exactly (especially the DKIM key).
Reloop works with the [root domain, a subdomain, or both](/docs/guides/connect-domain/what-is-a-domain) — for example `example.com`, `mail.example.com`, or `updates.example.com`.
## Manual setup
### Log in to Namecheap
Open [Namecheap](https://ap.www.namecheap.com/domains/list) and go to DNS for the domain whose **nameservers** match `registrar-servers.com`.
Domain List → Manage → Advanced DNS.
If Reloop or `dig NS yourdomain.com` shows a different host, stop and edit that host instead — see [Wrong nameservers](/docs/guides/connect-domain/troubleshoot/wrong-nameservers).
### Field mapping
| Reloop | Namecheap field | Example |
| --- | --- | --- |
| Type | Type | `TXT` / `MX` / `CNAME` |
| Name / Host | Name | `@`, `reloop._domainkey`, `_dmarc`, `link`, … |
| Value / Content | Value | Exact value from Reloop |
| TTL | TTL | `Auto` or provider default |
| Priority (MX only) | Priority | As shown in Reloop (often `10`) |
Omit your domain from the Name/Host field when the provider appends it automatically. Paste `reloop._domainkey` or `link`, not `reloop._domainkey.example.com`.
### Add the records from Reloop
For **each required row** on the Reloop domain page:
Match Reloop’s type: `TXT`, `MX`, or `CNAME`.
Copy the host from Reloop (`@`, `reloop._domainkey`, `_dmarc`, `link`, …).
Copy the value exactly. For MX, also set **Priority** as shown (often `10`). If priority `10` is already used by another MX you must keep, use the next free value only when Reloop’s UI allows it — otherwise use a [subdomain](/docs/guides/connect-domain/what-is-a-domain).
Save the record, then continue with the next Reloop row.
Typical Reloop rows (always confirm in the dashboard):
| Purpose | Type | Host (typical) | Value (typical) |
| --- | --- | --- | --- |
| SPF | TXT | `@` | `v=spf1 include:reloop.sh -all` (or merge into existing SPF) |
| DKIM | TXT | `reloop._domainkey` | `v=DKIM1; k=rsa; p=…` (unique per domain) |
| DMARC | TXT | `_dmarc` | `v=DMARC1; p=reject;` (or your existing policy) |
| Tracking | CNAME | `link` | `link.reloop.sh` |
| Receiving MX | MX | `@` or subdomain host | `inbound.reloop.sh` (when receiving is enabled) |
Never create a second SPF TXT on the same host. Merge `include:reloop.sh` into the existing SPF. See [SPF conflicts](/docs/guides/connect-domain/troubleshoot/spf-conflicts).
## Namecheap-specific notes
- Use Advanced DNS when Namecheap nameservers are active.
- For apex hosts Namecheap often uses `@`.
## Receiving emails
If you enable **Receiving** on the domain in Reloop, you must publish the inbound **MX** Reloop shows (typically `inbound.reloop.sh`).
When Reloop’s MX is active on a hostname, Reloop receives mail for that hostname according to MX priority. That can conflict with another inbox already using MX on the same name — use a separate hostname for Reloop receiving if needed. See [MX conflicts](/docs/guides/connect-domain/troubleshoot/mx-conflicts) and [Sending vs receiving](/docs/guides/connect-domain/sending-vs-receiving).
## Complete verification
1. Return to [Domains](https://reloop.sh/dashboard/domain) in Reloop.
2. Open the domain and click **Verify**.
3. Wait until status is **active**. Most providers update within minutes; allow up to 48–72 hours in rare cases ([propagation](/docs/guides/connect-domain/verification/propagation)).
## Troubleshooting
Re-open the Reloop domain page and compare every Type / Host / Value to Namecheap. Fix typos, truncated DKIM keys, and duplicate SPF records. Then click **Verify** again.
Confirm you edited the DNS host that matches public nameservers (`dig NS yourdomain.com`). See [Wrong nameservers](/docs/guides/connect-domain/troubleshoot/wrong-nameservers).
Follow [Domain not verifying](/docs/guides/connect-domain/troubleshoot/not-verifying) and [DNS propagation](/docs/guides/connect-domain/verification/propagation).
## Related
- [DNS records explained](/docs/guides/connect-domain/dns-records-explained)
- [Manual DNS setup](/docs/guides/connect-domain/manual-setup)
- [Auto-populate DNS](/docs/guides/connect-domain/auto-populate)
- [All provider guides](/docs/guides/connect-domain/providers)
---
# guides/connect-domain/providers/namesilo.mdx
Source: https://reloop.sh/docs/guides/connect-domain/providers/namesilo
Markdown: https://reloop.sh/docs/guides/connect-domain/providers/namesilo.md
NameSilo can use Reloop **Auto-populate** when nameservers match. Manual steps are always available as a fallback.
## Add a domain in Reloop
1. Log in to [Reloop](https://reloop.sh/dashboard/domain) and [add a domain](/docs/guides/connect-domain/add-domain).
2. Keep that tab open — every host and value you paste must match Reloop exactly (especially the DKIM key).
Reloop works with the [root domain, a subdomain, or both](/docs/guides/connect-domain/what-is-a-domain) — for example `example.com`, `mail.example.com`, or `updates.example.com`.
## Automatic setup (recommended)
NameSilo supports Reloop **Auto-populate** (Domain Connect). This is usually the fastest path.
Go to [Domains](https://reloop.sh/dashboard/domain) and open the domain you added.
If you need Reloop to **receive** mail on this hostname, turn receiving on in the domain settings **before** Auto-populate so the correct MX rows are included. See [Sending vs receiving](/docs/guides/connect-domain/sending-vs-receiving).
Reloop opens NameSilo for consent. Sign in if asked, review the records, and approve.
Return to Reloop and click **Verify**. Status should move to **active** within a few minutes (see [propagation](/docs/guides/connect-domain/verification/propagation)).
If Auto-populate fails or you prefer full control, use **Manual setup** below. Details: [Auto-populate DNS](/docs/guides/connect-domain/auto-populate) and [Auto-populate failed](/docs/guides/connect-domain/troubleshoot/auto-populate-failed).
## Manual setup
### Log in to NameSilo
Open [NameSilo](https://www.namesilo.com/account_domain.php) and go to DNS for the domain whose **nameservers** match `dnsowl.com / hostsilo.com`.
NameSilo → Domain Manager → DNS Manager.
If Reloop or `dig NS yourdomain.com` shows a different host, stop and edit that host instead — see [Wrong nameservers](/docs/guides/connect-domain/troubleshoot/wrong-nameservers).
### Field mapping
| Reloop | NameSilo field | Example |
| --- | --- | --- |
| Type | Type | `TXT` / `MX` / `CNAME` |
| Name / Host | Name | `@`, `reloop._domainkey`, `_dmarc`, `link`, … |
| Value / Content | Value | Exact value from Reloop |
| TTL | TTL | `Auto` or provider default |
| Priority (MX only) | Priority | As shown in Reloop (often `10`) |
Omit your domain from the Name/Host field when the provider appends it automatically. Paste `reloop._domainkey` or `link`, not `reloop._domainkey.example.com`.
### Add the records from Reloop
For **each required row** on the Reloop domain page:
Match Reloop’s type: `TXT`, `MX`, or `CNAME`.
Copy the host from Reloop (`@`, `reloop._domainkey`, `_dmarc`, `link`, …).
Copy the value exactly. For MX, also set **Priority** as shown (often `10`). If priority `10` is already used by another MX you must keep, use the next free value only when Reloop’s UI allows it — otherwise use a [subdomain](/docs/guides/connect-domain/what-is-a-domain).
Save the record, then continue with the next Reloop row.
Typical Reloop rows (always confirm in the dashboard):
| Purpose | Type | Host (typical) | Value (typical) |
| --- | --- | --- | --- |
| SPF | TXT | `@` | `v=spf1 include:reloop.sh -all` (or merge into existing SPF) |
| DKIM | TXT | `reloop._domainkey` | `v=DKIM1; k=rsa; p=…` (unique per domain) |
| DMARC | TXT | `_dmarc` | `v=DMARC1; p=reject;` (or your existing policy) |
| Tracking | CNAME | `link` | `link.reloop.sh` |
| Receiving MX | MX | `@` or subdomain host | `inbound.reloop.sh` (when receiving is enabled) |
Never create a second SPF TXT on the same host. Merge `include:reloop.sh` into the existing SPF. See [SPF conflicts](/docs/guides/connect-domain/troubleshoot/spf-conflicts).
## NameSilo-specific notes
- NameSilo syncs Domain Connect templates from the public registry — prefer Auto-populate when offered.
- Confirm you are editing DNS at NameSilo (not a different host pointed to by custom NS).
## Receiving emails
If you enable **Receiving** on the domain in Reloop, you must publish the inbound **MX** Reloop shows (typically `inbound.reloop.sh`).
When Reloop’s MX is active on a hostname, Reloop receives mail for that hostname according to MX priority. That can conflict with another inbox already using MX on the same name — use a separate hostname for Reloop receiving if needed. See [MX conflicts](/docs/guides/connect-domain/troubleshoot/mx-conflicts) and [Sending vs receiving](/docs/guides/connect-domain/sending-vs-receiving).
## Complete verification
1. Return to [Domains](https://reloop.sh/dashboard/domain) in Reloop.
2. Open the domain and click **Verify**.
3. Wait until status is **active**. Most providers update within minutes; allow up to 48–72 hours in rare cases ([propagation](/docs/guides/connect-domain/verification/propagation)).
## Troubleshooting
Re-open the Reloop domain page and compare every Type / Host / Value to NameSilo. Fix typos, truncated DKIM keys, and duplicate SPF records. Then click **Verify** again.
Confirm you edited the DNS host that matches public nameservers (`dig NS yourdomain.com`). See [Wrong nameservers](/docs/guides/connect-domain/troubleshoot/wrong-nameservers).
Follow [Domain not verifying](/docs/guides/connect-domain/troubleshoot/not-verifying) and [DNS propagation](/docs/guides/connect-domain/verification/propagation).
## Related
- [DNS records explained](/docs/guides/connect-domain/dns-records-explained)
- [Manual DNS setup](/docs/guides/connect-domain/manual-setup)
- [Auto-populate DNS](/docs/guides/connect-domain/auto-populate)
- [All provider guides](/docs/guides/connect-domain/providers)
---
# guides/connect-domain/providers/plesk.mdx
Source: https://reloop.sh/docs/guides/connect-domain/providers/plesk
Markdown: https://reloop.sh/docs/guides/connect-domain/providers/plesk.md
Add Reloop’s DNS records in Plesk using the values from your domain page in Reloop.
## Add a domain in Reloop
1. Log in to [Reloop](https://reloop.sh/dashboard/domain) and [add a domain](/docs/guides/connect-domain/add-domain).
2. Keep that tab open — every host and value you paste must match Reloop exactly (especially the DKIM key).
Reloop works with the [root domain, a subdomain, or both](/docs/guides/connect-domain/what-is-a-domain) — for example `example.com`, `mail.example.com`, or `updates.example.com`.
## Manual setup
### Log in to Plesk
Open your host’s [Plesk](https://www.plesk.com) panel (URL varies by host) and go to DNS for the domain. Nameservers often belong to the hosting brand, not a shared `plesk.*` hostname.
Plesk → Domains → DNS Settings.
If Reloop or `dig NS yourdomain.com` shows a different host, stop and edit that host instead — see [Wrong nameservers](/docs/guides/connect-domain/troubleshoot/wrong-nameservers).
### Field mapping
| Reloop | Plesk field | Example |
| --- | --- | --- |
| Type | Type | `TXT` / `MX` / `CNAME` |
| Name / Host | Name | `@`, `reloop._domainkey`, `_dmarc`, `link`, … |
| Value / Content | Value | Exact value from Reloop |
| TTL | TTL | `Auto` or provider default |
| Priority (MX only) | Priority | As shown in Reloop (often `10`) |
Omit your domain from the Name/Host field when the provider appends it automatically. Paste `reloop._domainkey` or `link`, not `reloop._domainkey.example.com`.
### Add the records from Reloop
For **each required row** on the Reloop domain page:
Match Reloop’s type: `TXT`, `MX`, or `CNAME`.
Copy the host from Reloop (`@`, `reloop._domainkey`, `_dmarc`, `link`, …).
Copy the value exactly. For MX, also set **Priority** as shown (often `10`). If priority `10` is already used by another MX you must keep, use the next free value only when Reloop’s UI allows it — otherwise use a [subdomain](/docs/guides/connect-domain/what-is-a-domain).
Save the record, then continue with the next Reloop row.
Typical Reloop rows (always confirm in the dashboard):
| Purpose | Type | Host (typical) | Value (typical) |
| --- | --- | --- | --- |
| SPF | TXT | `@` | `v=spf1 include:reloop.sh -all` (or merge into existing SPF) |
| DKIM | TXT | `reloop._domainkey` | `v=DKIM1; k=rsa; p=…` (unique per domain) |
| DMARC | TXT | `_dmarc` | `v=DMARC1; p=reject;` (or your existing policy) |
| Tracking | CNAME | `link` | `link.reloop.sh` |
| Receiving MX | MX | `@` or subdomain host | `inbound.reloop.sh` (when receiving is enabled) |
Never create a second SPF TXT on the same host. Merge `include:reloop.sh` into the existing SPF. See [SPF conflicts](/docs/guides/connect-domain/troubleshoot/spf-conflicts).
## Plesk-specific notes
- Plesk supports Domain Connect as a DNS provider. Reloop’s template is **not** onboarded for every Plesk installation — use manual setup unless Reloop shows **Auto populate**.
- Plesk is often behind a hosting brand: open the panel that actually serves your public nameservers.
- Login URL varies by host; Reloop cannot deep-link to a single Plesk URL.
## Receiving emails
If you enable **Receiving** on the domain in Reloop, you must publish the inbound **MX** Reloop shows (typically `inbound.reloop.sh`).
When Reloop’s MX is active on a hostname, Reloop receives mail for that hostname according to MX priority. That can conflict with another inbox already using MX on the same name — use a separate hostname for Reloop receiving if needed. See [MX conflicts](/docs/guides/connect-domain/troubleshoot/mx-conflicts) and [Sending vs receiving](/docs/guides/connect-domain/sending-vs-receiving).
## Complete verification
1. Return to [Domains](https://reloop.sh/dashboard/domain) in Reloop.
2. Open the domain and click **Verify**.
3. Wait until status is **active**. Most providers update within minutes; allow up to 48–72 hours in rare cases ([propagation](/docs/guides/connect-domain/verification/propagation)).
## Troubleshooting
Re-open the Reloop domain page and compare every Type / Host / Value to Plesk. Fix typos, truncated DKIM keys, and duplicate SPF records. Then click **Verify** again.
Confirm you edited the DNS host that matches public nameservers (`dig NS yourdomain.com`). See [Wrong nameservers](/docs/guides/connect-domain/troubleshoot/wrong-nameservers).
Follow [Domain not verifying](/docs/guides/connect-domain/troubleshoot/not-verifying) and [DNS propagation](/docs/guides/connect-domain/verification/propagation).
## Related
- [DNS records explained](/docs/guides/connect-domain/dns-records-explained)
- [Manual DNS setup](/docs/guides/connect-domain/manual-setup)
- [Auto-populate DNS](/docs/guides/connect-domain/auto-populate)
- [All provider guides](/docs/guides/connect-domain/providers)
---
# guides/connect-domain/providers/porkbun.mdx
Source: https://reloop.sh/docs/guides/connect-domain/providers/porkbun
Markdown: https://reloop.sh/docs/guides/connect-domain/providers/porkbun.md
Add Reloop’s DNS records in Porkbun using the values from your domain page in Reloop.
## Add a domain in Reloop
1. Log in to [Reloop](https://reloop.sh/dashboard/domain) and [add a domain](/docs/guides/connect-domain/add-domain).
2. Keep that tab open — every host and value you paste must match Reloop exactly (especially the DKIM key).
Reloop works with the [root domain, a subdomain, or both](/docs/guides/connect-domain/what-is-a-domain) — for example `example.com`, `mail.example.com`, or `updates.example.com`.
## Manual setup
### Log in to Porkbun
Open [Porkbun](https://porkbun.com/account/domains) and go to DNS for the domain whose **nameservers** match `porkbun.com`.
Porkbun → Domain Management → DNS Records.
If Reloop or `dig NS yourdomain.com` shows a different host, stop and edit that host instead — see [Wrong nameservers](/docs/guides/connect-domain/troubleshoot/wrong-nameservers).
### Field mapping
| Reloop | Porkbun field | Example |
| --- | --- | --- |
| Type | Type | `TXT` / `MX` / `CNAME` |
| Name / Host | Name | `@`, `reloop._domainkey`, `_dmarc`, `link`, … |
| Value / Content | Value | Exact value from Reloop |
| TTL | TTL | `Auto` or provider default |
| Priority (MX only) | Priority | As shown in Reloop (often `10`) |
Omit your domain from the Name/Host field when the provider appends it automatically. Paste `reloop._domainkey` or `link`, not `reloop._domainkey.example.com`.
### Add the records from Reloop
For **each required row** on the Reloop domain page:
Match Reloop’s type: `TXT`, `MX`, or `CNAME`.
Copy the host from Reloop (`@`, `reloop._domainkey`, `_dmarc`, `link`, …).
Copy the value exactly. For MX, also set **Priority** as shown (often `10`). If priority `10` is already used by another MX you must keep, use the next free value only when Reloop’s UI allows it — otherwise use a [subdomain](/docs/guides/connect-domain/what-is-a-domain).
Save the record, then continue with the next Reloop row.
Typical Reloop rows (always confirm in the dashboard):
| Purpose | Type | Host (typical) | Value (typical) |
| --- | --- | --- | --- |
| SPF | TXT | `@` | `v=spf1 include:reloop.sh -all` (or merge into existing SPF) |
| DKIM | TXT | `reloop._domainkey` | `v=DKIM1; k=rsa; p=…` (unique per domain) |
| DMARC | TXT | `_dmarc` | `v=DMARC1; p=reject;` (or your existing policy) |
| Tracking | CNAME | `link` | `link.reloop.sh` |
| Receiving MX | MX | `@` or subdomain host | `inbound.reloop.sh` (when receiving is enabled) |
Never create a second SPF TXT on the same host. Merge `include:reloop.sh` into the existing SPF. See [SPF conflicts](/docs/guides/connect-domain/troubleshoot/spf-conflicts).
## Porkbun-specific notes
- Porkbun uses relative host fields; omit your domain suffix.
- Confirm DNS is managed at Porkbun (not parked elsewhere).
## Receiving emails
If you enable **Receiving** on the domain in Reloop, you must publish the inbound **MX** Reloop shows (typically `inbound.reloop.sh`).
When Reloop’s MX is active on a hostname, Reloop receives mail for that hostname according to MX priority. That can conflict with another inbox already using MX on the same name — use a separate hostname for Reloop receiving if needed. See [MX conflicts](/docs/guides/connect-domain/troubleshoot/mx-conflicts) and [Sending vs receiving](/docs/guides/connect-domain/sending-vs-receiving).
## Complete verification
1. Return to [Domains](https://reloop.sh/dashboard/domain) in Reloop.
2. Open the domain and click **Verify**.
3. Wait until status is **active**. Most providers update within minutes; allow up to 48–72 hours in rare cases ([propagation](/docs/guides/connect-domain/verification/propagation)).
## Troubleshooting
Re-open the Reloop domain page and compare every Type / Host / Value to Porkbun. Fix typos, truncated DKIM keys, and duplicate SPF records. Then click **Verify** again.
Confirm you edited the DNS host that matches public nameservers (`dig NS yourdomain.com`). See [Wrong nameservers](/docs/guides/connect-domain/troubleshoot/wrong-nameservers).
Follow [Domain not verifying](/docs/guides/connect-domain/troubleshoot/not-verifying) and [DNS propagation](/docs/guides/connect-domain/verification/propagation).
## Related
- [DNS records explained](/docs/guides/connect-domain/dns-records-explained)
- [Manual DNS setup](/docs/guides/connect-domain/manual-setup)
- [Auto-populate DNS](/docs/guides/connect-domain/auto-populate)
- [All provider guides](/docs/guides/connect-domain/providers)
---
# guides/connect-domain/providers/route53.mdx
Source: https://reloop.sh/docs/guides/connect-domain/providers/route53
Markdown: https://reloop.sh/docs/guides/connect-domain/providers/route53.md
Add Reloop’s DNS records in AWS Route 53 using the values from your domain page in Reloop.
## Add a domain in Reloop
1. Log in to [Reloop](https://reloop.sh/dashboard/domain) and [add a domain](/docs/guides/connect-domain/add-domain).
2. Keep that tab open — every host and value you paste must match Reloop exactly (especially the DKIM key).
Reloop works with the [root domain, a subdomain, or both](/docs/guides/connect-domain/what-is-a-domain) — for example `example.com`, `mail.example.com`, or `updates.example.com`.
## Manual setup
### Log in to AWS Route 53
Open [AWS Route 53](https://console.aws.amazon.com/route53) and go to DNS for the domain whose **nameservers** match `awsdns-`.
Route 53 → Hosted zones → your zone → Records.
If Reloop or `dig NS yourdomain.com` shows a different host, stop and edit that host instead — see [Wrong nameservers](/docs/guides/connect-domain/troubleshoot/wrong-nameservers).
### Field mapping
| Reloop | AWS Route 53 field | Example |
| --- | --- | --- |
| Type | Type | `TXT` / `MX` / `CNAME` |
| Name / Host | Name | `@`, `reloop._domainkey`, `_dmarc`, `link`, … |
| Value / Content | Value | Exact value from Reloop |
| TTL | TTL | `Auto` or provider default |
| Priority (MX only) | Priority | As shown in Reloop (often `10`) |
Omit your domain from the Name/Host field when the provider appends it automatically. Paste `reloop._domainkey` or `link`, not `reloop._domainkey.example.com`.
### Add the records from Reloop
For **each required row** on the Reloop domain page:
Match Reloop’s type: `TXT`, `MX`, or `CNAME`.
Copy the host from Reloop (`@`, `reloop._domainkey`, `_dmarc`, `link`, …).
Copy the value exactly. For MX, also set **Priority** as shown (often `10`). If priority `10` is already used by another MX you must keep, use the next free value only when Reloop’s UI allows it — otherwise use a [subdomain](/docs/guides/connect-domain/what-is-a-domain).
Save the record, then continue with the next Reloop row.
Typical Reloop rows (always confirm in the dashboard):
| Purpose | Type | Host (typical) | Value (typical) |
| --- | --- | --- | --- |
| SPF | TXT | `@` | `v=spf1 include:reloop.sh -all` (or merge into existing SPF) |
| DKIM | TXT | `reloop._domainkey` | `v=DKIM1; k=rsa; p=…` (unique per domain) |
| DMARC | TXT | `_dmarc` | `v=DMARC1; p=reject;` (or your existing policy) |
| Tracking | CNAME | `link` | `link.reloop.sh` |
| Receiving MX | MX | `@` or subdomain host | `inbound.reloop.sh` (when receiving is enabled) |
Never create a second SPF TXT on the same host. Merge `include:reloop.sh` into the existing SPF. See [SPF conflicts](/docs/guides/connect-domain/troubleshoot/spf-conflicts).
## AWS Route 53-specific notes
- Edit the hosted zone whose NS match the public nameservers (`awsdns-`).
- For MX, set the Priority field separately from the Value.
## Receiving emails
If you enable **Receiving** on the domain in Reloop, you must publish the inbound **MX** Reloop shows (typically `inbound.reloop.sh`).
When Reloop’s MX is active on a hostname, Reloop receives mail for that hostname according to MX priority. That can conflict with another inbox already using MX on the same name — use a separate hostname for Reloop receiving if needed. See [MX conflicts](/docs/guides/connect-domain/troubleshoot/mx-conflicts) and [Sending vs receiving](/docs/guides/connect-domain/sending-vs-receiving).
## Complete verification
1. Return to [Domains](https://reloop.sh/dashboard/domain) in Reloop.
2. Open the domain and click **Verify**.
3. Wait until status is **active**. Most providers update within minutes; allow up to 48–72 hours in rare cases ([propagation](/docs/guides/connect-domain/verification/propagation)).
## Troubleshooting
Re-open the Reloop domain page and compare every Type / Host / Value to AWS Route 53. Fix typos, truncated DKIM keys, and duplicate SPF records. Then click **Verify** again.
Confirm you edited the DNS host that matches public nameservers (`dig NS yourdomain.com`). See [Wrong nameservers](/docs/guides/connect-domain/troubleshoot/wrong-nameservers).
Follow [Domain not verifying](/docs/guides/connect-domain/troubleshoot/not-verifying) and [DNS propagation](/docs/guides/connect-domain/verification/propagation).
## Related
- [DNS records explained](/docs/guides/connect-domain/dns-records-explained)
- [Manual DNS setup](/docs/guides/connect-domain/manual-setup)
- [Auto-populate DNS](/docs/guides/connect-domain/auto-populate)
- [All provider guides](/docs/guides/connect-domain/providers)
---
# guides/connect-domain/providers/squarespace.mdx
Source: https://reloop.sh/docs/guides/connect-domain/providers/squarespace
Markdown: https://reloop.sh/docs/guides/connect-domain/providers/squarespace.md
Add Reloop’s DNS records in Squarespace using the values from your domain page in Reloop.
## Add a domain in Reloop
1. Log in to [Reloop](https://reloop.sh/dashboard/domain) and [add a domain](/docs/guides/connect-domain/add-domain).
2. Keep that tab open — every host and value you paste must match Reloop exactly (especially the DKIM key).
Reloop works with the [root domain, a subdomain, or both](/docs/guides/connect-domain/what-is-a-domain) — for example `example.com`, `mail.example.com`, or `updates.example.com`.
## Manual setup
### Log in to Squarespace
Open [Squarespace](https://account.squarespace.com/domains) and go to DNS for the domain whose **nameservers** match `squarespace.com / sqsp.net / googledomains.com`.
Squarespace → Domains → DNS Settings.
If Reloop or `dig NS yourdomain.com` shows a different host, stop and edit that host instead — see [Wrong nameservers](/docs/guides/connect-domain/troubleshoot/wrong-nameservers).
### Field mapping
| Reloop | Squarespace field | Example |
| --- | --- | --- |
| Type | Type | `TXT` / `MX` / `CNAME` |
| Name / Host | Name | `@`, `reloop._domainkey`, `_dmarc`, `link`, … |
| Value / Content | Value | Exact value from Reloop |
| TTL | TTL | `Auto` or provider default |
| Priority (MX only) | Priority | As shown in Reloop (often `10`) |
Omit your domain from the Name/Host field when the provider appends it automatically. Paste `reloop._domainkey` or `link`, not `reloop._domainkey.example.com`.
### Add the records from Reloop
For **each required row** on the Reloop domain page:
Match Reloop’s type: `TXT`, `MX`, or `CNAME`.
Copy the host from Reloop (`@`, `reloop._domainkey`, `_dmarc`, `link`, …).
Copy the value exactly. For MX, also set **Priority** as shown (often `10`). If priority `10` is already used by another MX you must keep, use the next free value only when Reloop’s UI allows it — otherwise use a [subdomain](/docs/guides/connect-domain/what-is-a-domain).
Save the record, then continue with the next Reloop row.
Typical Reloop rows (always confirm in the dashboard):
| Purpose | Type | Host (typical) | Value (typical) |
| --- | --- | --- | --- |
| SPF | TXT | `@` | `v=spf1 include:reloop.sh -all` (or merge into existing SPF) |
| DKIM | TXT | `reloop._domainkey` | `v=DKIM1; k=rsa; p=…` (unique per domain) |
| DMARC | TXT | `_dmarc` | `v=DMARC1; p=reject;` (or your existing policy) |
| Tracking | CNAME | `link` | `link.reloop.sh` |
| Receiving MX | MX | `@` or subdomain host | `inbound.reloop.sh` (when receiving is enabled) |
Never create a second SPF TXT on the same host. Merge `include:reloop.sh` into the existing SPF. See [SPF conflicts](/docs/guides/connect-domain/troubleshoot/spf-conflicts).
## Squarespace-specific notes
- Domains migrated from Google Domains often still show `googledomains.com` nameservers — manage them in Squarespace.
- Use `@` for the root host when Squarespace requires it.
## Receiving emails
If you enable **Receiving** on the domain in Reloop, you must publish the inbound **MX** Reloop shows (typically `inbound.reloop.sh`).
When Reloop’s MX is active on a hostname, Reloop receives mail for that hostname according to MX priority. That can conflict with another inbox already using MX on the same name — use a separate hostname for Reloop receiving if needed. See [MX conflicts](/docs/guides/connect-domain/troubleshoot/mx-conflicts) and [Sending vs receiving](/docs/guides/connect-domain/sending-vs-receiving).
## Complete verification
1. Return to [Domains](https://reloop.sh/dashboard/domain) in Reloop.
2. Open the domain and click **Verify**.
3. Wait until status is **active**. Most providers update within minutes; allow up to 48–72 hours in rare cases ([propagation](/docs/guides/connect-domain/verification/propagation)).
## Troubleshooting
Re-open the Reloop domain page and compare every Type / Host / Value to Squarespace. Fix typos, truncated DKIM keys, and duplicate SPF records. Then click **Verify** again.
Confirm you edited the DNS host that matches public nameservers (`dig NS yourdomain.com`). See [Wrong nameservers](/docs/guides/connect-domain/troubleshoot/wrong-nameservers).
Follow [Domain not verifying](/docs/guides/connect-domain/troubleshoot/not-verifying) and [DNS propagation](/docs/guides/connect-domain/verification/propagation).
## Related
- [DNS records explained](/docs/guides/connect-domain/dns-records-explained)
- [Manual DNS setup](/docs/guides/connect-domain/manual-setup)
- [Auto-populate DNS](/docs/guides/connect-domain/auto-populate)
- [All provider guides](/docs/guides/connect-domain/providers)
---
# guides/connect-domain/providers/strato.mdx
Source: https://reloop.sh/docs/guides/connect-domain/providers/strato
Markdown: https://reloop.sh/docs/guides/connect-domain/providers/strato.md
Add Reloop’s DNS records in Strato using the values from your domain page in Reloop.
## Add a domain in Reloop
1. Log in to [Reloop](https://reloop.sh/dashboard/domain) and [add a domain](/docs/guides/connect-domain/add-domain).
2. Keep that tab open — every host and value you paste must match Reloop exactly (especially the DKIM key).
Reloop works with the [root domain, a subdomain, or both](/docs/guides/connect-domain/what-is-a-domain) — for example `example.com`, `mail.example.com`, or `updates.example.com`.
## Manual setup
### Log in to Strato
Open [Strato](https://www.strato.de/apps/CustomerService) and go to DNS for the domain whose **nameservers** match `strato.de / strato-hosting.eu`.
Strato Kunden-Login → Domains → DNS / Domainverwaltung.
If Reloop or `dig NS yourdomain.com` shows a different host, stop and edit that host instead — see [Wrong nameservers](/docs/guides/connect-domain/troubleshoot/wrong-nameservers).
### Field mapping
| Reloop | Strato field | Example |
| --- | --- | --- |
| Type | Type | `TXT` / `MX` / `CNAME` |
| Name / Host | Name | `@`, `reloop._domainkey`, `_dmarc`, `link`, … |
| Value / Content | Value | Exact value from Reloop |
| TTL | TTL | `Auto` or provider default |
| Priority (MX only) | Priority | As shown in Reloop (often `10`) |
Omit your domain from the Name/Host field when the provider appends it automatically. Paste `reloop._domainkey` or `link`, not `reloop._domainkey.example.com`.
### Add the records from Reloop
For **each required row** on the Reloop domain page:
Match Reloop’s type: `TXT`, `MX`, or `CNAME`.
Copy the host from Reloop (`@`, `reloop._domainkey`, `_dmarc`, `link`, …).
Copy the value exactly. For MX, also set **Priority** as shown (often `10`). If priority `10` is already used by another MX you must keep, use the next free value only when Reloop’s UI allows it — otherwise use a [subdomain](/docs/guides/connect-domain/what-is-a-domain).
Save the record, then continue with the next Reloop row.
Typical Reloop rows (always confirm in the dashboard):
| Purpose | Type | Host (typical) | Value (typical) |
| --- | --- | --- | --- |
| SPF | TXT | `@` | `v=spf1 include:reloop.sh -all` (or merge into existing SPF) |
| DKIM | TXT | `reloop._domainkey` | `v=DKIM1; k=rsa; p=…` (unique per domain) |
| DMARC | TXT | `_dmarc` | `v=DMARC1; p=reject;` (or your existing policy) |
| Tracking | CNAME | `link` | `link.reloop.sh` |
| Receiving MX | MX | `@` or subdomain host | `inbound.reloop.sh` (when receiving is enabled) |
Never create a second SPF TXT on the same host. Merge `include:reloop.sh` into the existing SPF. See [SPF conflicts](/docs/guides/connect-domain/troubleshoot/spf-conflicts).
## Strato-specific notes
- Strato’s DNS UI labels vary by language (DE/EN).
- Confirm public NS match Strato before editing.
## Receiving emails
If you enable **Receiving** on the domain in Reloop, you must publish the inbound **MX** Reloop shows (typically `inbound.reloop.sh`).
When Reloop’s MX is active on a hostname, Reloop receives mail for that hostname according to MX priority. That can conflict with another inbox already using MX on the same name — use a separate hostname for Reloop receiving if needed. See [MX conflicts](/docs/guides/connect-domain/troubleshoot/mx-conflicts) and [Sending vs receiving](/docs/guides/connect-domain/sending-vs-receiving).
## Complete verification
1. Return to [Domains](https://reloop.sh/dashboard/domain) in Reloop.
2. Open the domain and click **Verify**.
3. Wait until status is **active**. Most providers update within minutes; allow up to 48–72 hours in rare cases ([propagation](/docs/guides/connect-domain/verification/propagation)).
## Troubleshooting
Re-open the Reloop domain page and compare every Type / Host / Value to Strato. Fix typos, truncated DKIM keys, and duplicate SPF records. Then click **Verify** again.
Confirm you edited the DNS host that matches public nameservers (`dig NS yourdomain.com`). See [Wrong nameservers](/docs/guides/connect-domain/troubleshoot/wrong-nameservers).
Follow [Domain not verifying](/docs/guides/connect-domain/troubleshoot/not-verifying) and [DNS propagation](/docs/guides/connect-domain/verification/propagation).
## Related
- [DNS records explained](/docs/guides/connect-domain/dns-records-explained)
- [Manual DNS setup](/docs/guides/connect-domain/manual-setup)
- [Auto-populate DNS](/docs/guides/connect-domain/auto-populate)
- [All provider guides](/docs/guides/connect-domain/providers)
---
# guides/connect-domain/providers/unknown-provider.mdx
Source: https://reloop.sh/docs/guides/connect-domain/providers/unknown-provider
Markdown: https://reloop.sh/docs/guides/connect-domain/providers/unknown-provider.md
You can connect **any** domain. If Reloop shows **Auto populate** for your host, use that; otherwise use the same manual path below.
## Add a domain in Reloop
1. Log in to [Reloop](https://reloop.sh/dashboard/domain) and [add a domain](/docs/guides/connect-domain/add-domain).
2. Keep the DNS records table open for copy/paste.
Reloop works with the [root domain, a subdomain, or both](/docs/guides/connect-domain/what-is-a-domain).
## Find the live DNS host
```bash
dig NS yourdomain.com +short
```
Or follow [Find your DNS provider](/docs/guides/connect-domain/find-dns-provider). Edit DNS **only** where those nameservers point.
## Add records
For each Reloop row, create a matching Type / Name / Value (and MX Priority) in that provider’s zone editor.
Omit your domain from the Name/Host field when the UI appends it automatically.
Merge `include:reloop.sh` into an existing SPF TXT — do not create two SPF records. See [SPF conflicts](/docs/guides/connect-domain/troubleshoot/spf-conflicts).
## Receiving emails
Enable receiving in Reloop only if you want MX for that hostname to point at Reloop (`inbound.reloop.sh`). That can replace another inbox on the same name — see [MX conflicts](/docs/guides/connect-domain/troubleshoot/mx-conflicts).
## Complete verification
Return to Reloop → **Verify**. See [propagation](/docs/guides/connect-domain/verification/propagation) if checks lag.
## Troubleshooting
- [Domain not verifying](/docs/guides/connect-domain/troubleshoot/not-verifying)
- [Wrong nameservers](/docs/guides/connect-domain/troubleshoot/wrong-nameservers)
---
# guides/connect-domain/providers/vercel.mdx
Source: https://reloop.sh/docs/guides/connect-domain/providers/vercel
Markdown: https://reloop.sh/docs/guides/connect-domain/providers/vercel.md
Vercel can use Reloop **Auto-populate** when nameservers match. Manual steps are always available as a fallback.
## Add a domain in Reloop
1. Log in to [Reloop](https://reloop.sh/dashboard/domain) and [add a domain](/docs/guides/connect-domain/add-domain).
2. Keep that tab open — every host and value you paste must match Reloop exactly (especially the DKIM key).
Reloop works with the [root domain, a subdomain, or both](/docs/guides/connect-domain/what-is-a-domain) — for example `example.com`, `mail.example.com`, or `updates.example.com`.
## Automatic setup (recommended)
Vercel supports Reloop **Auto-populate** (Domain Connect). This is usually the fastest path.
Go to [Domains](https://reloop.sh/dashboard/domain) and open the domain you added.
If you need Reloop to **receive** mail on this hostname, turn receiving on in the domain settings **before** Auto-populate so the correct MX rows are included. See [Sending vs receiving](/docs/guides/connect-domain/sending-vs-receiving).
Reloop opens Vercel for consent. Sign in if asked, review the records, and approve.
Return to Reloop and click **Verify**. Status should move to **active** within a few minutes (see [propagation](/docs/guides/connect-domain/verification/propagation)).
If Auto-populate fails or you prefer full control, use **Manual setup** below. Details: [Auto-populate DNS](/docs/guides/connect-domain/auto-populate) and [Auto-populate failed](/docs/guides/connect-domain/troubleshoot/auto-populate-failed).
## Manual setup
### Log in to Vercel
Open [Vercel](https://vercel.com/dashboard/domains) and go to DNS for the domain whose **nameservers** match `vercel-dns.com`.
Vercel → Domains → domain DNS.
If Reloop or `dig NS yourdomain.com` shows a different host, stop and edit that host instead — see [Wrong nameservers](/docs/guides/connect-domain/troubleshoot/wrong-nameservers).
### Field mapping
| Reloop | Vercel field | Example |
| --- | --- | --- |
| Type | Type | `TXT` / `MX` / `CNAME` |
| Name / Host | Name | `@`, `reloop._domainkey`, `_dmarc`, `link`, … |
| Value / Content | Value | Exact value from Reloop |
| TTL | TTL | `Auto` or provider default |
| Priority (MX only) | Priority | As shown in Reloop (often `10`) |
Omit your domain from the Name/Host field when the provider appends it automatically. Paste `reloop._domainkey` or `link`, not `reloop._domainkey.example.com`.
### Add the records from Reloop
For **each required row** on the Reloop domain page:
Match Reloop’s type: `TXT`, `MX`, or `CNAME`.
Copy the host from Reloop (`@`, `reloop._domainkey`, `_dmarc`, `link`, …).
Copy the value exactly. For MX, also set **Priority** as shown (often `10`). If priority `10` is already used by another MX you must keep, use the next free value only when Reloop’s UI allows it — otherwise use a [subdomain](/docs/guides/connect-domain/what-is-a-domain).
Save the record, then continue with the next Reloop row.
Typical Reloop rows (always confirm in the dashboard):
| Purpose | Type | Host (typical) | Value (typical) |
| --- | --- | --- | --- |
| SPF | TXT | `@` | `v=spf1 include:reloop.sh -all` (or merge into existing SPF) |
| DKIM | TXT | `reloop._domainkey` | `v=DKIM1; k=rsa; p=…` (unique per domain) |
| DMARC | TXT | `_dmarc` | `v=DMARC1; p=reject;` (or your existing policy) |
| Tracking | CNAME | `link` | `link.reloop.sh` |
| Receiving MX | MX | `@` or subdomain host | `inbound.reloop.sh` (when receiving is enabled) |
Never create a second SPF TXT on the same host. Merge `include:reloop.sh` into the existing SPF. See [SPF conflicts](/docs/guides/connect-domain/troubleshoot/spf-conflicts).
## Vercel-specific notes
- Prefer Reloop Auto-populate when Vercel nameservers are detected.
- If the domain is only bought at Vercel but NS point elsewhere, edit that host.
## Receiving emails
If you enable **Receiving** on the domain in Reloop, you must publish the inbound **MX** Reloop shows (typically `inbound.reloop.sh`).
When Reloop’s MX is active on a hostname, Reloop receives mail for that hostname according to MX priority. That can conflict with another inbox already using MX on the same name — use a separate hostname for Reloop receiving if needed. See [MX conflicts](/docs/guides/connect-domain/troubleshoot/mx-conflicts) and [Sending vs receiving](/docs/guides/connect-domain/sending-vs-receiving).
## Complete verification
1. Return to [Domains](https://reloop.sh/dashboard/domain) in Reloop.
2. Open the domain and click **Verify**.
3. Wait until status is **active**. Most providers update within minutes; allow up to 48–72 hours in rare cases ([propagation](/docs/guides/connect-domain/verification/propagation)).
## Troubleshooting
Re-open the Reloop domain page and compare every Type / Host / Value to Vercel. Fix typos, truncated DKIM keys, and duplicate SPF records. Then click **Verify** again.
Confirm you edited the DNS host that matches public nameservers (`dig NS yourdomain.com`). See [Wrong nameservers](/docs/guides/connect-domain/troubleshoot/wrong-nameservers).
Follow [Domain not verifying](/docs/guides/connect-domain/troubleshoot/not-verifying) and [DNS propagation](/docs/guides/connect-domain/verification/propagation).
## Related
- [DNS records explained](/docs/guides/connect-domain/dns-records-explained)
- [Manual DNS setup](/docs/guides/connect-domain/manual-setup)
- [Auto-populate DNS](/docs/guides/connect-domain/auto-populate)
- [All provider guides](/docs/guides/connect-domain/providers)
---
# guides/connect-domain/providers/wordpress-com.mdx
Source: https://reloop.sh/docs/guides/connect-domain/providers/wordpress-com
Markdown: https://reloop.sh/docs/guides/connect-domain/providers/wordpress-com.md
Add Reloop’s DNS records in WordPress.com using the values from your domain page in Reloop.
## Add a domain in Reloop
1. Log in to [Reloop](https://reloop.sh/dashboard/domain) and [add a domain](/docs/guides/connect-domain/add-domain).
2. Keep that tab open — every host and value you paste must match Reloop exactly (especially the DKIM key).
Reloop works with the [root domain, a subdomain, or both](/docs/guides/connect-domain/what-is-a-domain) — for example `example.com`, `mail.example.com`, or `updates.example.com`.
## Manual setup
### Log in to WordPress.com
Open [WordPress.com](https://wordpress.com/domains/manage) and go to DNS for the domain whose **nameservers** match `wordpress.com / wp.com`.
WordPress.com → Domains → DNS records.
If Reloop or `dig NS yourdomain.com` shows a different host, stop and edit that host instead — see [Wrong nameservers](/docs/guides/connect-domain/troubleshoot/wrong-nameservers).
### Field mapping
| Reloop | WordPress.com field | Example |
| --- | --- | --- |
| Type | Type | `TXT` / `MX` / `CNAME` |
| Name / Host | Name | `@`, `reloop._domainkey`, `_dmarc`, `link`, … |
| Value / Content | Value | Exact value from Reloop |
| TTL | TTL | `Auto` or provider default |
| Priority (MX only) | Priority | As shown in Reloop (often `10`) |
Omit your domain from the Name/Host field when the provider appends it automatically. Paste `reloop._domainkey` or `link`, not `reloop._domainkey.example.com`.
### Add the records from Reloop
For **each required row** on the Reloop domain page:
Match Reloop’s type: `TXT`, `MX`, or `CNAME`.
Copy the host from Reloop (`@`, `reloop._domainkey`, `_dmarc`, `link`, …).
Copy the value exactly. For MX, also set **Priority** as shown (often `10`). If priority `10` is already used by another MX you must keep, use the next free value only when Reloop’s UI allows it — otherwise use a [subdomain](/docs/guides/connect-domain/what-is-a-domain).
Save the record, then continue with the next Reloop row.
Typical Reloop rows (always confirm in the dashboard):
| Purpose | Type | Host (typical) | Value (typical) |
| --- | --- | --- | --- |
| SPF | TXT | `@` | `v=spf1 include:reloop.sh -all` (or merge into existing SPF) |
| DKIM | TXT | `reloop._domainkey` | `v=DKIM1; k=rsa; p=…` (unique per domain) |
| DMARC | TXT | `_dmarc` | `v=DMARC1; p=reject;` (or your existing policy) |
| Tracking | CNAME | `link` | `link.reloop.sh` |
| Receiving MX | MX | `@` or subdomain host | `inbound.reloop.sh` (when receiving is enabled) |
Never create a second SPF TXT on the same host. Merge `include:reloop.sh` into the existing SPF. See [SPF conflicts](/docs/guides/connect-domain/troubleshoot/spf-conflicts).
## WordPress.com-specific notes
- WordPress.com is listed as a Domain Connect DNS provider. Reloop’s template is **not** onboarded there yet — use manual setup unless Reloop shows **Auto populate**.
- If the domain uses custom nameservers elsewhere, edit that host instead.
## Receiving emails
If you enable **Receiving** on the domain in Reloop, you must publish the inbound **MX** Reloop shows (typically `inbound.reloop.sh`).
When Reloop’s MX is active on a hostname, Reloop receives mail for that hostname according to MX priority. That can conflict with another inbox already using MX on the same name — use a separate hostname for Reloop receiving if needed. See [MX conflicts](/docs/guides/connect-domain/troubleshoot/mx-conflicts) and [Sending vs receiving](/docs/guides/connect-domain/sending-vs-receiving).
## Complete verification
1. Return to [Domains](https://reloop.sh/dashboard/domain) in Reloop.
2. Open the domain and click **Verify**.
3. Wait until status is **active**. Most providers update within minutes; allow up to 48–72 hours in rare cases ([propagation](/docs/guides/connect-domain/verification/propagation)).
## Troubleshooting
Re-open the Reloop domain page and compare every Type / Host / Value to WordPress.com. Fix typos, truncated DKIM keys, and duplicate SPF records. Then click **Verify** again.
Confirm you edited the DNS host that matches public nameservers (`dig NS yourdomain.com`). See [Wrong nameservers](/docs/guides/connect-domain/troubleshoot/wrong-nameservers).
Follow [Domain not verifying](/docs/guides/connect-domain/troubleshoot/not-verifying) and [DNS propagation](/docs/guides/connect-domain/verification/propagation).
## Related
- [DNS records explained](/docs/guides/connect-domain/dns-records-explained)
- [Manual DNS setup](/docs/guides/connect-domain/manual-setup)
- [Auto-populate DNS](/docs/guides/connect-domain/auto-populate)
- [All provider guides](/docs/guides/connect-domain/providers)
---
# guides/connect-domain/registrar-vs-dns-host.mdx
Source: https://reloop.sh/docs/guides/connect-domain/registrar-vs-dns-host
Markdown: https://reloop.sh/docs/guides/connect-domain/registrar-vs-dns-host.md
Two different jobs are easy to confuse:
| Role | What they do | Examples |
| --- | --- | --- |
| **Registrar** | Sells/renews the domain name; stores who owns it | Namecheap, GoDaddy, NameSilo, Cloudflare Registrar |
| **DNS host** | Answers DNS queries for the domain (hosts the zone) | Cloudflare DNS, Route 53, Vercel DNS, the registrar’s own DNS |
Reloop records must be added at the **DNS host** — the place your **nameservers** point to — not necessarily the place you paid for the domain.
## Common setups
### Same company for both
You bought the domain at Namecheap and left default Namecheap nameservers (`registrar-servers.com`). Add Reloop records in Namecheap Advanced DNS.
### Split (very common)
You bought the domain at GoDaddy, but pointed nameservers to Cloudflare:
```
ada.ns.cloudflare.com
bob.ns.cloudflare.com
```
Add Reloop records in **Cloudflare**, not GoDaddy’s DNS UI. Changes in GoDaddy’s zone editor will be ignored while NS point elsewhere.
### Website host as DNS
Domains on Vercel, Netlify, or Squarespace often use that product’s nameservers. Manage Reloop records in that product’s domain/DNS settings.
## How to tell which you have
1. In Reloop, open the domain — we show the detected provider when nameservers match a known host.
2. Or look up nameservers — see [Find your DNS provider](/docs/guides/connect-domain/find-dns-provider).
3. Or check your registrar’s “Nameservers” page: if it lists Cloudflare/AWS/Vercel hosts, use that host’s panel.
## Rule of thumb
> Edit DNS where the **nameservers** live.
If Auto-populate or verification fails after you “added records,” you almost always edited the wrong panel. See [Wrong nameservers](/docs/guides/connect-domain/troubleshoot/wrong-nameservers).
---
# guides/connect-domain/sending-vs-receiving.mdx
Source: https://reloop.sh/docs/guides/connect-domain/sending-vs-receiving
Markdown: https://reloop.sh/docs/guides/connect-domain/sending-vs-receiving.md
Reloop can **send** mail as your domain, **receive** mail into Reloop, or both. DNS requirements differ.
## Sending (outbound)
Goal: Gmail/Outlook/others accept mail from `you@yourdomain.com` as authenticated.
Typically involves:
- **SPF** — authorize Reloop (`include:reloop.sh`)
- **DKIM** — sign messages (`reloop._domainkey`)
- **DMARC** — policy for failures
- **Tracking CNAME** — optional but used for click/open tracking (`link`)
You can keep another provider as the inbox on the same domain **if** you do not point MX at Reloop for that hostname.
## Receiving (inbound)
Goal: Mail addressed to your domain is delivered into Reloop (Agent Inbox / inbound pipelines).
Requires **MX** records pointing at Reloop’s inbound host, typically:
```
inbound.reloop.sh
```
(with the priority shown in the dashboard).
MX is winner-take-most for delivery. Pointing apex MX at Reloop **replaces** any existing inbox on that hostname. Use a [separate hostname](/docs/guides/connect-domain/what-is-a-domain) if you need Reloop receiving alongside another inbox.
## Dashboard toggles
On the domain configuration screen you may enable or disable sending/receiving features. When you change them, Reloop shows which DNS rows are required. Publish only what the dashboard marks as needed, then verify again.
## Practical recipes
| Goal | Approach |
| --- | --- |
| Transactional send only; keep existing inbox | Root or subdomain + SPF/DKIM/DMARC (+ tracking); **do not** move your current MX to Reloop |
| Full Reloop inbox + send | Subdomain or dedicated domain; MX → `inbound.reloop.sh` |
| Send from `news.acme.com`, inbox stays on `acme.com` | Add `news.acme.com` in Reloop; leave root MX alone |
## Related
- [DNS records explained](/docs/guides/connect-domain/dns-records-explained)
- [MX conflicts](/docs/guides/connect-domain/troubleshoot/mx-conflicts)
---
# guides/connect-domain/troubleshoot/auto-populate-failed.mdx
Source: https://reloop.sh/docs/guides/connect-domain/troubleshoot/auto-populate-failed
Markdown: https://reloop.sh/docs/guides/connect-domain/troubleshoot/auto-populate-failed.md
## Messages you might see
| Message (paraphrased) | Meaning | Action |
| --- | --- | --- |
| Provider doesn’t support automatic configuration | No Domain Connect / no sync UX | [Manual setup](/docs/guides/connect-domain/manual-setup) |
| Supports Domain Connect but hasn’t onboarded Reloop’s template | Protocol yes, Reloop template no | [Manual setup](/docs/guides/connect-domain/manual-setup) |
| Failed to start auto-configuration / signing key | Reloop server-side apply URL issue | Retry later or manual; contact support if persistent |
| Popup blocked / nothing opened | Browser blocked the provider tab | Allow popups for Reloop, click again |
| You cancelled at the provider | Consent denied | Retry Auto-populate or configure manually |
## When Auto-populate is offered
Reloop discovers Domain Connect support live for your domain. If **Auto populate** appears, your host can apply Reloop’s template — see [Auto-populate DNS](/docs/guides/connect-domain/auto-populate). There is no fixed provider list in the docs.
## Fallback
Every domain can be configured manually with the same records. Auto-populate is convenience, not a hard requirement.
---
# guides/connect-domain/troubleshoot/cname-conflicts.mdx
Source: https://reloop.sh/docs/guides/connect-domain/troubleshoot/cname-conflicts
Markdown: https://reloop.sh/docs/guides/connect-domain/troubleshoot/cname-conflicts.md
## Common cases
### Cloudflare orange cloud
Mail and auth records should usually be **DNS only** (grey cloud). Proxying MX/TXT/CNAME for mail often breaks verification or delivery. Set Reloop-related records to DNS only.
### Apex CNAME
Some providers forbid CNAME on `@`. Reloop’s tracking record uses a **subdomain** (`link`), which is allowed almost everywhere. If your provider rejects a CNAME, confirm you did not place it on `@` by mistake.
### Existing record on the same host
If `link.yourdomain.com` already has an A/AAAA/CNAME for another product, Reloop’s tracking CNAME cannot coexist on that exact name. Either:
- Change Reloop’s tracking subdomain in domain settings (if available), or
- Repoint `link` to Reloop and move the old service elsewhere
See [Tracking CNAME](/docs/guides/connect-domain/troubleshoot/tracking-cname).
### CNAME + other types on same name
DNS forbids mixing CNAME with other record types on the same owner name. Remove conflicting A/TXT on `link` before adding the Reloop CNAME.
---
# guides/connect-domain/troubleshoot/dkim-dmarc-typos.mdx
Source: https://reloop.sh/docs/guides/connect-domain/troubleshoot/dkim-dmarc-typos
Markdown: https://reloop.sh/docs/guides/connect-domain/troubleshoot/dkim-dmarc-typos.md
## DKIM checklist
| Check | Details |
| --- | --- |
| Host | Usually `reloop._domainkey` — not `reloop._domainkey.yourdomain.com` if the UI adds the domain |
| Type | TXT |
| Value | Starts with `v=DKIM1; k=rsa; p=` and a long base64 key |
| Length | If the panel truncates, use “split TXT” / multi-string support or a provider that accepts long TXT |
### Verify
```bash
dig TXT reloop._domainkey.yourdomain.com +short
```
The `p=` material should match Reloop’s dashboard (ignoring quotes/spaces some dig output adds).
## DMARC checklist
| Check | Details |
| --- | --- |
| Host | `_dmarc` |
| Type | TXT |
| Value | Starts with `v=DMARC1;` |
Reloop may suggest `p=reject`. If you already run a careful DMARC program with Google/Microsoft, do not blindly overwrite without reviewing `rua` / policy impact.
## Quotes and spaces
Some UIs wrap TXT values in quotes automatically. Prefer pasting the raw value Reloop shows. Avoid inserting line breaks in the middle of the DKIM key unless the provider’s docs say to split properly.
---
# guides/connect-domain/troubleshoot/domain-already-registered.mdx
Source: https://reloop.sh/docs/guides/connect-domain/troubleshoot/domain-already-registered
Markdown: https://reloop.sh/docs/guides/connect-domain/troubleshoot/domain-already-registered.md
Reloop allows a domain to be verified in one organization at a time (product rules may vary by environment). If you see that the domain is already registered:
1. Confirm you are in the correct Reloop organization.
2. Ask the owner of the other org to remove the domain if it was added by mistake.
3. If you believe this is an error (expired trial, lost access), contact Reloop support with proof of domain ownership (registrar WHOIS / DNS challenge).
Also see the guides article: [Domain already registered](/docs/guides/domain-already-registered).
---
# guides/connect-domain/troubleshoot/domain-mismatch.mdx
Source: https://reloop.sh/docs/guides/connect-domain/troubleshoot/domain-mismatch
Markdown: https://reloop.sh/docs/guides/connect-domain/troubleshoot/domain-mismatch.md
## Symptom
API or SMTP send fails because the `From` address domain is not a verified domain in your organization.
## Fix
1. Verify the domain (or subdomain) you want to send from — [Add a domain](/docs/guides/connect-domain/add-domain).
2. Send with a `From` on that exact verified hostname (e.g. if you verified `mail.acme.com`, use `you@mail.acme.com`).
Also see: [Domain mismatch](/docs/guides/error-domain-mismatch).
---
# guides/connect-domain/troubleshoot/index.mdx
Source: https://reloop.sh/docs/guides/connect-domain/troubleshoot
Markdown: https://reloop.sh/docs/guides/connect-domain/troubleshoot.md
Pick the problem that matches what you see:
| Symptom | Guide |
| --- | --- |
| Verify stays pending/failed | [Domain not verifying](/docs/guides/connect-domain/troubleshoot/not-verifying) |
| Added records but dig is empty / wrong host | [Wrong nameservers](/docs/guides/connect-domain/troubleshoot/wrong-nameservers) |
| Two SPF records / SPF fail | [SPF conflicts](/docs/guides/connect-domain/troubleshoot/spf-conflicts) |
| CNAME not allowed / orange cloud | [CNAME conflicts](/docs/guides/connect-domain/troubleshoot/cname-conflicts) |
| Existing inbox broke after MX change | [MX conflicts](/docs/guides/connect-domain/troubleshoot/mx-conflicts) |
| DKIM/DMARC value looks wrong | [DKIM / DMARC typos](/docs/guides/connect-domain/troubleshoot/dkim-dmarc-typos) |
| `link` subdomain clash | [Tracking CNAME](/docs/guides/connect-domain/troubleshoot/tracking-cname) |
| Auto-populate error toast | [Auto-populate failed](/docs/guides/connect-domain/troubleshoot/auto-populate-failed) |
| Domain taken in Reloop | [Already registered](/docs/guides/connect-domain/troubleshoot/domain-already-registered) |
| From domain does not match | [Domain mismatch](/docs/guides/connect-domain/troubleshoot/domain-mismatch) |
---
# guides/connect-domain/troubleshoot/mx-conflicts.mdx
Source: https://reloop.sh/docs/guides/connect-domain/troubleshoot/mx-conflicts
Markdown: https://reloop.sh/docs/guides/connect-domain/troubleshoot/mx-conflicts.md
MX records decide **where inbound mail is delivered**.
## Sending-only with an existing inbox
If you only need Reloop to **send**, keep your current MX where it is. Publish SPF, DKIM, DMARC (and tracking) for Reloop without replacing MX.
## Receiving with Reloop
Enabling Reloop receiving sets MX toward `inbound.reloop.sh`. On the **same hostname**, that typically **stops** delivery to any other inbox on that name.
### Safe pattern
Use separate hostnames:
- `acme.com` MX → your existing inbox
- `mail.acme.com` MX → Reloop (inbound + Reloop send)
Reloop supports the [root, a subdomain, or both](/docs/guides/connect-domain/what-is-a-domain). See also [Sending vs receiving](/docs/guides/connect-domain/sending-vs-receiving).
## Multiple MX priorities
If you experiment with multiple MX targets, lower priority number = higher preference. Mixing two inbox providers on one hostname is advanced and usually the wrong fix — prefer a separate hostname for Reloop receiving.
---
# guides/connect-domain/troubleshoot/not-verifying.mdx
Source: https://reloop.sh/docs/guides/connect-domain/troubleshoot/not-verifying
Markdown: https://reloop.sh/docs/guides/connect-domain/troubleshoot/not-verifying.md
Work through this list in order. Most failures are wrong panel, typo, SPF duplicate, or propagation.
## 1. Confirm you edited the live DNS host
Lookup NS for your domain. The company in those hostnames must be where you added records.
```bash
dig NS yourdomain.com +short
```
If NS say Cloudflare but you edited GoDaddy, Reloop will never see your changes. See [Wrong nameservers](/docs/guides/connect-domain/troubleshoot/wrong-nameservers).
## 2. Confirm records are public
```bash
dig TXT reloop._domainkey.yourdomain.com +short
dig TXT yourdomain.com +short
dig TXT _dmarc.yourdomain.com +short
```
Compare to the Reloop dashboard. If dig is empty, wait for [propagation](/docs/guides/connect-domain/verification/propagation) or fix the publish step.
## 3. Fix common record mistakes
- **DKIM truncated** — paste the full `p=` key ([typos](/docs/guides/connect-domain/troubleshoot/dkim-dmarc-typos))
- **Two SPF TXT records** — merge ([SPF conflicts](/docs/guides/connect-domain/troubleshoot/spf-conflicts))
- **Wrong host** — UI double-appended the domain (`reloop._domainkey.example.com.example.com`)
- **Proxied Cloudflare records** — set mail-related records to DNS only
- **Missing required group** — receiving MX or tracking still off while dashboard expects them
## 4. Re-verify
In Reloop, open the domain → **Verify**. Repeat after 15–30 minutes if dig just started showing values.
## 5. Still failing?
- Open the matching [provider guide](/docs/guides/connect-domain/providers)
- Try [Auto-populate](/docs/guides/connect-domain/auto-populate) if your host supports it
- Contact Reloop support with: domain name, screenshot of DNS rows, and `dig` output
---
# guides/connect-domain/troubleshoot/spf-conflicts.mdx
Source: https://reloop.sh/docs/guides/connect-domain/troubleshoot/spf-conflicts
Markdown: https://reloop.sh/docs/guides/connect-domain/troubleshoot/spf-conflicts.md
## Rule
A hostname should have **one** SPF policy — one TXT that starts with `v=spf1`. Multiple SPF TXT records cause unpredictable failures.
## Reloop’s include
```
include:reloop.sh
```
Example merged record (illustrative):
```
v=spf1 include:_spf.google.com include:reloop.sh -all
```
Keep your existing includes; add Reloop’s; keep a single ending mechanism (`-all` or `~all` as you prefer — Reloop’s generated record uses `-all` when it creates a fresh SPF).
## What not to do
- Do not add a second TXT `v=spf1 include:reloop.sh -all` beside Google’s SPF
- Do not put SPF inside a DMARC or DKIM record
- Do not use outdated includes like `_spf.reloop.sh` unless your dashboard explicitly shows them — hosted Reloop uses `include:reloop.sh`
## After merging
Save DNS → wait briefly → Verify in Reloop. Check:
```bash
dig TXT yourdomain.com +short
```
You should see one SPF string containing `include:reloop.sh`.
---
# guides/connect-domain/troubleshoot/tracking-cname.mdx
Source: https://reloop.sh/docs/guides/connect-domain/troubleshoot/tracking-cname
Markdown: https://reloop.sh/docs/guides/connect-domain/troubleshoot/tracking-cname.md
Reloop typically expects:
| Type | Host | Value |
| --- | --- | --- |
| CNAME | `link` | `link.reloop.sh` |
So `link.yourdomain.com` resolves to Reloop’s tracking edge.
## Symptoms
- Tracking record shows failed in Reloop
- Another app already uses `link.yourdomain.com`
- Provider error when saving the CNAME
## Fixes
1. Remove or rename the old `link` record if you no longer need it.
2. If you must keep `link` for something else, change Reloop’s tracking subdomain in domain settings (when available) and publish the new host.
3. Ensure no A/AAAA sits on the same host as the CNAME.
4. On Cloudflare, use **DNS only** for the tracking CNAME unless Reloop docs say otherwise.
## Related
- [CNAME conflicts](/docs/guides/connect-domain/troubleshoot/cname-conflicts)
- [DNS records explained](/docs/guides/connect-domain/dns-records-explained)
---
# guides/connect-domain/troubleshoot/wrong-nameservers.mdx
Source: https://reloop.sh/docs/guides/connect-domain/troubleshoot/wrong-nameservers
Markdown: https://reloop.sh/docs/guides/connect-domain/troubleshoot/wrong-nameservers.md
## Symptom
- Reloop Verify fails
- `dig` does not show the records you added
- Or `dig` shows an old zone
## Cause
DNS records only count at the host named by your domain’s **NS** records. Editing the registrar’s “DNS” tab while NS point to Cloudflare (or vice versa) publishes into a zone nobody queries.
## Fix
```bash
dig NS yourdomain.com +short
```
Use [Find your DNS provider](/docs/guides/connect-domain/find-dns-provider) to map NS → company.
Copy from the Reloop dashboard again into the correct panel.
Remove mistaken duplicate records from the unused panel so you are not confused later.
## Changing nameservers on purpose
If you intentionally move DNS (e.g. Namecheap → Cloudflare):
1. Copy existing important records to the new host first
2. Change NS at the registrar
3. Wait for NS propagation
4. Re-add Reloop records at the new host
5. Verify again
See also [Change DNS later](/docs/guides/connect-domain/after/change-dns).
---
# guides/connect-domain/verification/how-verification-works.mdx
Source: https://reloop.sh/docs/guides/connect-domain/verification/how-verification-works
Markdown: https://reloop.sh/docs/guides/connect-domain/verification/how-verification-works.md
## High level
1. You (or Domain Connect) publish records in your DNS host.
2. Reloop queries public DNS for each required name/type.
3. Values are compared to what Reloop stored for your domain (SPF include, DKIM public key, DMARC, MX, tracking CNAME, …).
4. If required records match, status becomes **active**.
## What Reloop does *not* do
- Reloop does not log into your registrar for you (except via Domain Connect consent you approve).
- Reloop does not see private DNS behind a firewall — only what the public internet resolves.
- Reloop cannot fix typos in your panel; you must edit DNS and re-verify.
## Partial matches
Some records may pass while others fail (e.g. SPF OK, DKIM truncated). The domain stays non-active until required rows succeed. Open the domain’s DNS records UI in Reloop to see which groups still fail.
## Re-verification
After any DNS edit, click **Verify** again (or wait for background jobs). Cached resolvers may lag — see [propagation](/docs/guides/connect-domain/verification/propagation).
## Related
- [DNS records explained](/docs/guides/connect-domain/dns-records-explained)
- [Domain not verifying](/docs/guides/connect-domain/troubleshoot/not-verifying)
---
# guides/connect-domain/verification/index.mdx
Source: https://reloop.sh/docs/guides/connect-domain/verification
Markdown: https://reloop.sh/docs/guides/connect-domain/verification.md
After you publish DNS records, Reloop checks the public internet for a match. This section explains statuses, the check process, and propagation delays.
## In this section
- [Domain statuses](/docs/guides/connect-domain/verification/statuses)
- [How verification works](/docs/guides/connect-domain/verification/how-verification-works)
- [DNS propagation](/docs/guides/connect-domain/verification/propagation)
## Quick path
1. Publish records ([auto](/docs/guides/connect-domain/auto-populate) or [manual](/docs/guides/connect-domain/manual-setup))
2. Click **Verify** on the domain page
3. Wait until status is **active**
4. [Send a test](/docs/guides/connect-domain/after/test-domain)
If checks fail, start at [Domain not verifying](/docs/guides/connect-domain/troubleshoot/not-verifying).
---
# guides/connect-domain/verification/propagation.mdx
Source: https://reloop.sh/docs/guides/connect-domain/verification/propagation
Markdown: https://reloop.sh/docs/guides/connect-domain/verification/propagation.md
**Propagation** means “how long until DNS resolvers worldwide see your new records.” It is normal for Reloop verification to fail for a few minutes after you save.
## Typical times
| Provider class | Often visible within |
| --- | --- |
| Cloudflare, Vercel, many modern APIs | Seconds to a few minutes |
| Traditional registrars | Minutes to a few hours |
| Worst case (high TTL / stubborn caches) | Up to 48–72 hours |
Lower TTLs help future changes propagate faster; the first publish still depends on old cache entries.
## Check yourself
Replace `acme.com` with your domain:
```bash
# SPF / apex TXT
dig TXT acme.com +short
# DKIM
dig TXT reloop._domainkey.acme.com +short
# DMARC
dig TXT _dmarc.acme.com +short
# Tracking
dig CNAME link.acme.com +short
# MX
dig MX acme.com +short
```
If `dig` does not show the Reloop values yet, Reloop cannot verify either. Wait and retry.
Online “DNS checker” sites that query multiple regions are also fine.
## Tips
- After Domain Connect approve, wait 1–2 minutes before the first Verify.
- Do not delete and recreate records repeatedly — that resets TTL clocks.
- Confirm you edited the live nameserver host ([wrong nameservers](/docs/guides/connect-domain/troubleshoot/wrong-nameservers)).
## Related
- [How verification works](/docs/guides/connect-domain/verification/how-verification-works)
- [Domain not verifying](/docs/guides/connect-domain/troubleshoot/not-verifying)
---
# guides/connect-domain/verification/statuses.mdx
Source: https://reloop.sh/docs/guides/connect-domain/verification/statuses
Markdown: https://reloop.sh/docs/guides/connect-domain/verification/statuses.md
| Status | Meaning | What you should do |
| --- | --- | --- |
| **pending** | Domain created; DNS not confirmed yet | Publish records (auto or manual), then verify |
| **verifying** | Reloop is checking public DNS | Wait; re-check after propagation |
| **active** | Required records matched | Send mail; optionally [test](/docs/guides/connect-domain/after/test-domain) |
| **failed** | Checks did not match expected records | Fix DNS using [not verifying](/docs/guides/connect-domain/troubleshoot/not-verifying) |
| **suspended** | Domain disabled (policy, billing, or admin) | Contact support / fix account issues |
## Banner behavior
While status is `pending`, `verifying`, or `failed`, the domain page shows the DNS helper banner:
- **Auto populate** when Reloop discovers Domain Connect support for your host
- **Open DNS settings** / manual guidance otherwise
## Related
- [How verification works](/docs/guides/connect-domain/verification/how-verification-works)
- [Propagation](/docs/guides/connect-domain/verification/propagation)
---
# guides/connect-domain/what-is-a-domain.mdx
Source: https://reloop.sh/docs/guides/connect-domain/what-is-a-domain
Markdown: https://reloop.sh/docs/guides/connect-domain/what-is-a-domain.md
A **domain** is the human-readable name for your brand on the internet — for example `acme.com` or `shop.acme.com`.
## Domain vs website vs email
| Concept | Example | Meaning |
| --- | --- | --- |
| **Domain** | `acme.com` | The name you registered |
| **Website** | `https://acme.com` | Pages hosted somewhere (Vercel, Netlify, WordPress, …) |
| **Email address** | `hello@acme.com` | Mail identity that uses the domain after the `@` |
Reloop is email infrastructure, not a website host. Your site can stay on Vercel, Netlify, WordPress, or anywhere else — Reloop only needs permission (via DNS) to **authenticate and deliver** mail for that domain.
## Who “owns” a domain?
Ownership is recorded at a **registrar** (GoDaddy, Namecheap, NameSilo, Cloudflare Registrar, Squarespace, etc.). You renew it yearly (or longer). Owning the domain means you can:
- Change **nameservers** (who answers DNS questions)
- Create **DNS records** (or point NS to another DNS host that does)
- Prove control to services like Reloop
## Root domain vs subdomain
- **Root (apex):** `acme.com`
- **Subdomain:** `mail.acme.com`, `news.acme.com`, `send.acme.com`
You can connect the **root**, a **subdomain**, or **both** to Reloop.
### Pros of a subdomain
- Existing MX on the root stays untouched
- Easier SPF story if the root already has a long SPF
- Separate sending reputation from corporate mail
- Clearer mental model: “product mail lives on `mail.`”
From addresses look like `hello@mail.acme.com` unless you also configure other identities — plan branding accordingly.
### Pros of the root domain
- Addresses look like `hello@acme.com`
- Fewer labels to manage
- Fine when Reloop is the primary mail platform for that domain
## What Reloop needs from you
1. A domain (or subdomain) you control
2. Ability to publish DNS records at the host that serves that domain’s nameservers
3. Verification in the Reloop dashboard
---
# guides/connect-domain/what-is-dns.mdx
Source: https://reloop.sh/docs/guides/connect-domain/what-is-dns
Markdown: https://reloop.sh/docs/guides/connect-domain/what-is-dns.md
**DNS** (Domain Name System) is the internet’s phone book. When someone sends mail to `hello@acme.com` or opens `acme.com`, computers ask DNS: “Where should this go?” and “Is this sender allowed?”
For Reloop, DNS is how you **prove you own the domain** and **authorize Reloop to send mail** on your behalf.
## Nameservers
**Nameservers** are the servers that hold your domain’s DNS zone.
Example:
```
ada.ns.cloudflare.com
bob.ns.cloudflare.com
```
Whoever runs those nameservers is your **DNS host** — that is where you add Reloop’s records. Often that is the same company as your registrar, but not always (see [Registrar vs DNS host](/docs/guides/connect-domain/registrar-vs-dns-host)).
## DNS records
A **record** is one instruction in your zone. Reloop asks for several types:
| Type | Role for Reloop |
| --- | --- |
| **TXT** | SPF, DKIM public key, DMARC policy, ownership checks |
| **MX** | Where inbound mail is delivered (only if you enable receiving) |
| **CNAME** | Click/open tracking host (e.g. `link.acme.com` → Reloop) |
Each record has roughly:
- **Host / Name** — which name the record applies to (`@`, `reloop._domainkey`, `link`, …)
- **Type** — TXT, MX, CNAME, …
- **Value / Points to / Content** — the data Reloop shows in the dashboard
- **TTL** — how long resolvers may cache the answer (Auto / 300 / 3600 are common)
Copy these **exactly** from Reloop. A missing character in a DKIM key breaks verification.
## How Reloop uses DNS
```
You add domain in Reloop
↓
Reloop generates records (SPF, DKIM, DMARC, …)
↓
You publish them at your DNS host (auto or manual)
↓
Reloop looks up public DNS worldwide
↓
If records match → domain becomes active
```
## Propagation
After you save a record, the internet does not update instantly everywhere. Caches honor **TTL**. Most providers update in minutes; worst case up to ~48–72 hours. Details: [DNS propagation](/docs/guides/connect-domain/verification/propagation).
## You do not need to memorize this
In practice:
1. Open the domain in [Reloop](https://reloop.sh/dashboard/domain)
2. Use Auto-populate **or** copy each row into your DNS panel
3. Click **Verify**
For a field-by-field map of Reloop’s records, see [DNS records explained](/docs/guides/connect-domain/dns-records-explained).
---
# guides/creating-email-address.mdx
Source: https://reloop.sh/docs/guides/creating-email-address
Markdown: https://reloop.sh/docs/guides/creating-email-address.md
How to create a sender email address in Reloop.
## Overview
This guide helps you understand and configure this sending feature in Reloop.
## Details
Understanding your sending configuration is key to successful email delivery. Review the [Reloop dashboard](https://app.reloop.sh) for your current settings and limits.
## Configuration
Check your current plan and usage in the [Reloop dashboard](https://app.reloop.sh/settings).
Adjust your sending configuration based on your requirements and plan limits.
Keep track of your sending volume and adjust as needed to stay within limits.
## Learn More
- [Account Quotas and Limits](/docs/guides/account-quotas-limits)
- [Sending Emails](/docs/learn/sending)
- [Email Best Practices](/docs/integrations/email-best-practices)
---
# guides/dedicated-ips.mdx
Source: https://reloop.sh/docs/guides/dedicated-ips
Markdown: https://reloop.sh/docs/guides/dedicated-ips.md
Understanding dedicated IP addresses for email sending.
## Overview
This guide helps you understand and configure this sending feature in Reloop.
## Details
Understanding your sending configuration is key to successful email delivery. Review the [Reloop dashboard](https://app.reloop.sh) for your current settings and limits.
## Configuration
Check your current plan and usage in the [Reloop dashboard](https://app.reloop.sh/settings).
Adjust your sending configuration based on your requirements and plan limits.
Keep track of your sending volume and adjust as needed to stay within limits.
## Learn More
- [Account Quotas and Limits](/docs/guides/account-quotas-limits)
- [Sending Emails](/docs/learn/sending)
- [Email Best Practices](/docs/integrations/email-best-practices)
---
# guides/delete-account.mdx
Source: https://reloop.sh/docs/guides/delete-account
Markdown: https://reloop.sh/docs/guides/delete-account.md
How to permanently delete your Reloop account.
## Overview
Manage your Reloop account settings effectively to ensure smooth operation.
## Steps
Navigate to the [Account Settings](https://app.reloop.sh/settings) page in your Reloop dashboard.
Follow the on-screen instructions to update your account configuration.
Review and confirm your changes. Some changes may require email verification.
If you need assistance with account changes, contact [Reloop support](https://reloop.sh/help).
## Learn More
- [Handling API Keys](/docs/guides/handling-api-keys)
- [Account Quotas and Limits](/docs/guides/account-quotas-limits)
---
# guides/delivered-not-arriving.mdx
Source: https://reloop.sh/docs/guides/delivered-not-arriving
Markdown: https://reloop.sh/docs/guides/delivered-not-arriving.md
What to do when an email shows delivered but was not received.
## Overview
Understanding this topic is important for maintaining good email deliverability with Reloop.
## Key Points
- Follow email sending best practices to maintain a strong sender reputation
- Monitor your delivery rates in the [Reloop dashboard](https://app.reloop.sh)
- Keep your email lists clean and up-to-date
## Best Practices
Regularly check your delivery, bounce, and complaint rates in the Reloop dashboard.
Ensure SPF, DKIM, and DMARC are properly configured for your domain.
Always include an unsubscribe mechanism in marketing emails and honor opt-out requests promptly.
For detailed guidance on email deliverability, see our [Email Best Practices](/docs/integrations/email-best-practices) skill documentation.
## Learn More
- [Emails Going to Spam](/docs/guides/emails-going-to-spam)
- [Warm-up Guide](/docs/guides/warmup-guide)
- [Audience Hygiene](/docs/guides/audience-hygiene)
- [Domains Guide](/docs/learn/domain)
---
# guides/dkim-key-length.mdx
Source: https://reloop.sh/docs/guides/dkim-key-length
Markdown: https://reloop.sh/docs/guides/dkim-key-length.md
Do you need 2048-bit DKIM keys?
## Overview
Understanding this topic is important for maintaining good email deliverability with Reloop.
## Key Points
- Follow email sending best practices to maintain a strong sender reputation
- Monitor your delivery rates in the [Reloop dashboard](https://app.reloop.sh)
- Keep your email lists clean and up-to-date
## Best Practices
Regularly check your delivery, bounce, and complaint rates in the Reloop dashboard.
Ensure SPF, DKIM, and DMARC are properly configured for your domain.
Always include an unsubscribe mechanism in marketing emails and honor opt-out requests promptly.
For detailed guidance on email deliverability, see our [Email Best Practices](/docs/integrations/email-best-practices) skill documentation.
## Learn More
- [Emails Going to Spam](/docs/guides/emails-going-to-spam)
- [Warm-up Guide](/docs/guides/warmup-guide)
- [Audience Hygiene](/docs/guides/audience-hygiene)
- [Domains Guide](/docs/learn/domain)
---
# guides/dns-cloudflare.mdx
Source: https://reloop.sh/docs/guides/dns-cloudflare
Markdown: https://reloop.sh/docs/guides/dns-cloudflare.md
This page moved to **[Cloudflare DNS setup](/docs/guides/connect-domain/providers/cloudflare)**.
See also the [provider guides hub](/docs/guides/connect-domain/providers) and [Connect a domain](/docs/guides/connect-domain).
---
# guides/dns-dreamhost.mdx
Source: https://reloop.sh/docs/guides/dns-dreamhost
Markdown: https://reloop.sh/docs/guides/dns-dreamhost.md
This page moved to **[DreamHost DNS setup](/docs/guides/connect-domain/providers/dreamhost)**.
See also the [provider guides hub](/docs/guides/connect-domain/providers) and [Connect a domain](/docs/guides/connect-domain).
---
# guides/dns-gandi.mdx
Source: https://reloop.sh/docs/guides/dns-gandi
Markdown: https://reloop.sh/docs/guides/dns-gandi.md
This page moved to **[Gandi DNS setup](/docs/guides/connect-domain/providers/gandi)**.
See also the [provider guides hub](/docs/guides/connect-domain/providers) and [Connect a domain](/docs/guides/connect-domain).
---
# guides/dns-godaddy.mdx
Source: https://reloop.sh/docs/guides/dns-godaddy
Markdown: https://reloop.sh/docs/guides/dns-godaddy.md
This page moved to **[GoDaddy DNS setup](/docs/guides/connect-domain/providers/godaddy)**.
See also the [provider guides hub](/docs/guides/connect-domain/providers) and [Connect a domain](/docs/guides/connect-domain).
---
# guides/dns-hetzner.mdx
Source: https://reloop.sh/docs/guides/dns-hetzner
Markdown: https://reloop.sh/docs/guides/dns-hetzner.md
This page moved to **[Hetzner DNS setup](/docs/guides/connect-domain/providers/hetzner)**.
See also the [provider guides hub](/docs/guides/connect-domain/providers) and [Connect a domain](/docs/guides/connect-domain).
---
# guides/dns-hostinger.mdx
Source: https://reloop.sh/docs/guides/dns-hostinger
Markdown: https://reloop.sh/docs/guides/dns-hostinger.md
This page moved to **[Hostinger DNS setup](/docs/guides/connect-domain/providers/hostinger)**.
See also the [provider guides hub](/docs/guides/connect-domain/providers) and [Connect a domain](/docs/guides/connect-domain).
---
# guides/dns-ionos.mdx
Source: https://reloop.sh/docs/guides/dns-ionos
Markdown: https://reloop.sh/docs/guides/dns-ionos.md
This page moved to **[IONOS DNS setup](/docs/guides/connect-domain/providers/ionos)**.
See also the [provider guides hub](/docs/guides/connect-domain/providers) and [Connect a domain](/docs/guides/connect-domain).
---
# guides/dns-namecheap.mdx
Source: https://reloop.sh/docs/guides/dns-namecheap
Markdown: https://reloop.sh/docs/guides/dns-namecheap.md
This page moved to **[Namecheap DNS setup](/docs/guides/connect-domain/providers/namecheap)**.
See also the [provider guides hub](/docs/guides/connect-domain/providers) and [Connect a domain](/docs/guides/connect-domain).
---
# guides/dns-porkbun.mdx
Source: https://reloop.sh/docs/guides/dns-porkbun
Markdown: https://reloop.sh/docs/guides/dns-porkbun.md
This page moved to **[Porkbun DNS setup](/docs/guides/connect-domain/providers/porkbun)**.
See also the [provider guides hub](/docs/guides/connect-domain/providers) and [Connect a domain](/docs/guides/connect-domain).
---
# guides/dns-route53.mdx
Source: https://reloop.sh/docs/guides/dns-route53
Markdown: https://reloop.sh/docs/guides/dns-route53.md
This page moved to **[AWS Route 53 DNS setup](/docs/guides/connect-domain/providers/route53)**.
See also the [provider guides hub](/docs/guides/connect-domain/providers) and [Connect a domain](/docs/guides/connect-domain).
---
# guides/dns-setup.mdx
Source: https://reloop.sh/docs/guides/dns-setup
Markdown: https://reloop.sh/docs/guides/dns-setup.md
DNS setup for Reloop now lives under **[Connect a domain](/docs/guides/connect-domain)**.
- [All provider guides](/docs/guides/connect-domain/providers)
- [Auto-populate](/docs/guides/connect-domain/auto-populate)
- [Manual setup](/docs/guides/connect-domain/manual-setup)
- [Find your DNS provider](/docs/guides/connect-domain/find-dns-provider)
---
# guides/dns-squarespace.mdx
Source: https://reloop.sh/docs/guides/dns-squarespace
Markdown: https://reloop.sh/docs/guides/dns-squarespace.md
This page moved to **[Squarespace DNS setup](/docs/guides/connect-domain/providers/squarespace)**.
See also the [provider guides hub](/docs/guides/connect-domain/providers) and [Connect a domain](/docs/guides/connect-domain).
---
# guides/dns-strato.mdx
Source: https://reloop.sh/docs/guides/dns-strato
Markdown: https://reloop.sh/docs/guides/dns-strato.md
This page moved to **[Strato DNS setup](/docs/guides/connect-domain/providers/strato)**.
See also the [provider guides hub](/docs/guides/connect-domain/providers) and [Connect a domain](/docs/guides/connect-domain).
---
# guides/dns-vercel.mdx
Source: https://reloop.sh/docs/guides/dns-vercel
Markdown: https://reloop.sh/docs/guides/dns-vercel.md
This page moved to **[Vercel DNS setup](/docs/guides/connect-domain/providers/vercel)**.
See also the [provider guides hub](/docs/guides/connect-domain/providers) and [Connect a domain](/docs/guides/connect-domain).
---
# guides/domain-already-registered.mdx
Source: https://reloop.sh/docs/guides/domain-already-registered
Markdown: https://reloop.sh/docs/guides/domain-already-registered.md
What to do when your domain is already registered.
## Overview
This article covers common causes and solutions for this issue when using Reloop.
## Common Causes
- Misconfigured DNS records
- API key permissions not matching the domain
- Rate limiting or account restrictions
## Resolution Steps
Review your domain settings in the [Reloop dashboard](https://app.reloop.sh/domains) and ensure all DNS records are correctly configured.
Ensure your API key has the correct permissions for the operation you're performing. Go to [API Keys](https://app.reloop.sh/api-keys) to review.
If the issue persists, reach out to [Reloop support](https://reloop.sh/help) with your error details and domain information.
## Learn More
- [Domain Not Verifying](/docs/guides/domain-not-verifying)
- [Avoid MX Conflicts](/docs/guides/avoid-mx-conflicts)
- [Emails Going to Spam](/docs/guides/emails-going-to-spam)
---
# guides/domain-not-verifying.mdx
Source: https://reloop.sh/docs/guides/domain-not-verifying
Markdown: https://reloop.sh/docs/guides/domain-not-verifying.md
This guide moved to **[Domain not verifying](/docs/guides/connect-domain/troubleshoot/not-verifying)** under Connect a domain.
Also useful:
- [Wrong nameservers](/docs/guides/connect-domain/troubleshoot/wrong-nameservers)
- [SPF conflicts](/docs/guides/connect-domain/troubleshoot/spf-conflicts)
- [Connect a domain](/docs/guides/connect-domain)
---
# guides/downloading-documents.mdx
Source: https://reloop.sh/docs/guides/downloading-documents
Markdown: https://reloop.sh/docs/guides/downloading-documents.md
How to download invoices and other documents.
## Overview
Manage your Reloop account settings effectively to ensure smooth operation.
## Steps
Navigate to the [Account Settings](https://app.reloop.sh/settings) page in your Reloop dashboard.
Follow the on-screen instructions to update your account configuration.
Review and confirm your changes. Some changes may require email verification.
If you need assistance with account changes, contact [Reloop support](https://reloop.sh/help).
## Learn More
- [Handling API Keys](/docs/guides/handling-api-keys)
- [Account Quotas and Limits](/docs/guides/account-quotas-limits)
---
# guides/e2e-testing-playwright.mdx
Source: https://reloop.sh/docs/guides/e2e-testing-playwright
Markdown: https://reloop.sh/docs/guides/e2e-testing-playwright.md
Test your email flows end-to-end using Playwright and Reloop's API.
## Approach
Use Reloop's API to verify that emails were sent correctly during your E2E tests. Instead of checking actual inboxes, query the Reloop API to confirm emails were delivered.
## Setup
```bash
npm install @playwright/test reloop
```
## Example Test
```typescript
const reloop = new Reloop(process.env.RELOOP_API_KEY);
test('signup sends welcome email', async ({ page }) => {
// Trigger the signup flow
await page.goto('/signup');
await page.fill('[name="email"]', 'test@example.com');
await page.click('button[type="submit"]');
// Wait for the email to be sent
await page.waitForTimeout(3000);
// Verify via Reloop API
const { data } = await reloop.emails.list();
const welcomeEmail = data?.data?.find(
(e) => e.to?.includes('test@example.com') && e.subject?.includes('Welcome')
);
expect(welcomeEmail).toBeDefined();
expect(welcomeEmail?.last_event).toBe('delivered');
});
```
Use [testing email addresses](/docs/guides/testing-email-addresses) to avoid sending real emails during tests.
---
# guides/email-consent.mdx
Source: https://reloop.sh/docs/guides/email-consent
Markdown: https://reloop.sh/docs/guides/email-consent.md
Understanding email consent and its legal requirements.
## Overview
Understanding this topic is important for maintaining good email deliverability with Reloop.
## Key Points
- Follow email sending best practices to maintain a strong sender reputation
- Monitor your delivery rates in the [Reloop dashboard](https://app.reloop.sh)
- Keep your email lists clean and up-to-date
## Best Practices
Regularly check your delivery, bounce, and complaint rates in the Reloop dashboard.
Ensure SPF, DKIM, and DMARC are properly configured for your domain.
Always include an unsubscribe mechanism in marketing emails and honor opt-out requests promptly.
For detailed guidance on email deliverability, see our [Email Best Practices](/docs/integrations/email-best-practices) skill documentation.
## Learn More
- [Emails Going to Spam](/docs/guides/emails-going-to-spam)
- [Warm-up Guide](/docs/guides/warmup-guide)
- [Audience Hygiene](/docs/guides/audience-hygiene)
- [Domains Guide](/docs/learn/domain)
---
# guides/emails-going-to-spam.mdx
Source: https://reloop.sh/docs/guides/emails-going-to-spam
Markdown: https://reloop.sh/docs/guides/emails-going-to-spam.md
Why your emails might be going to spam and how to fix it.
## Overview
Understanding this topic is important for maintaining good email deliverability with Reloop.
## Key Points
- Follow email sending best practices to maintain a strong sender reputation
- Monitor your delivery rates in the [Reloop dashboard](https://app.reloop.sh)
- Keep your email lists clean and up-to-date
## Best Practices
Regularly check your delivery, bounce, and complaint rates in the Reloop dashboard.
Ensure SPF, DKIM, and DMARC are properly configured for your domain.
Always include an unsubscribe mechanism in marketing emails and honor opt-out requests promptly.
For detailed guidance on email deliverability, see our [Email Best Practices](/docs/integrations/email-best-practices) skill documentation.
## Learn More
- [Emails Going to Spam](/docs/guides/emails-going-to-spam)
- [Warm-up Guide](/docs/guides/warmup-guide)
- [Audience Hygiene](/docs/guides/audience-hygiene)
- [Domains Guide](/docs/learn/domain)
---
# guides/error-1010.mdx
Source: https://reloop.sh/docs/guides/error-1010
Markdown: https://reloop.sh/docs/guides/error-1010.md
How to resolve the 403 Error 1010 when sending emails.
## Overview
This article covers common causes and solutions for this issue when using Reloop.
## Common Causes
- Misconfigured DNS records
- API key permissions not matching the domain
- Rate limiting or account restrictions
## Resolution Steps
Review your domain settings in the [Reloop dashboard](https://app.reloop.sh/domains) and ensure all DNS records are correctly configured.
Ensure your API key has the correct permissions for the operation you're performing. Go to [API Keys](https://app.reloop.sh/api-keys) to review.
If the issue persists, reach out to [Reloop support](https://reloop.sh/help) with your error details and domain information.
## Learn More
- [Domain Not Verifying](/docs/guides/domain-not-verifying)
- [Avoid MX Conflicts](/docs/guides/avoid-mx-conflicts)
- [Emails Going to Spam](/docs/guides/emails-going-to-spam)
---
# guides/error-domain-mismatch.mdx
Source: https://reloop.sh/docs/guides/error-domain-mismatch
Markdown: https://reloop.sh/docs/guides/error-domain-mismatch.md
How to fix the 403 domain mismatch error.
## Overview
This article covers common causes and solutions for this issue when using Reloop.
## Common Causes
- Misconfigured DNS records
- API key permissions not matching the domain
- Rate limiting or account restrictions
## Resolution Steps
Review your domain settings in the [Reloop dashboard](https://app.reloop.sh/domains) and ensure all DNS records are correctly configured.
Ensure your API key has the correct permissions for the operation you're performing. Go to [API Keys](https://app.reloop.sh/api-keys) to review.
If the issue persists, reach out to [Reloop support](https://reloop.sh/help) with your error details and domain information.
## Learn More
- [Domain Not Verifying](/docs/guides/domain-not-verifying)
- [Avoid MX Conflicts](/docs/guides/avoid-mx-conflicts)
- [Emails Going to Spam](/docs/guides/emails-going-to-spam)
---
# guides/error-reloop-dev-domain.mdx
Source: https://reloop.sh/docs/guides/error-reloop-dev-domain
Markdown: https://reloop.sh/docs/guides/error-reloop-dev-domain.md
Why you cannot send from the `reloop.sh` domain via the public send API.
## Overview
`reloop.sh` (or your deployment's `ONBOARDING_TEST_DOMAIN`) is a **Reloop-owned onboarding test domain**. It is reserved for the onboarding **Send email** button — not for arbitrary customer domain setup.
If you call `POST /api/mail/v1/send` with a From address on that domain, Reloop returns an error directing you to use your own verified domain.
## Common Causes
- Using `onboarding@reloop.sh` (or similar) in a public `/send` request
- Trying to add `reloop.sh` as a customer domain in the dashboard
- Expecting open sandbox sends to any recipient from the platform domain
## What works instead
After generating an API key, click **Send test email to me**. That path sends only to your account email from the platform domain.
Add your domain in the [dashboard](https://app.reloop.sh/domains), finish DNS verification, then send with a From address on that domain.
If a legitimate platform test fails, contact [Reloop support](https://reloop.sh/help) with the error payload and approximate time.
## Learn More
- [Email Addresses for Testing](/docs/guides/testing-email-addresses)
- [Domain Not Verifying](/docs/guides/domain-not-verifying)
- [Account Quotas and Limits](/docs/guides/account-quotas-limits)
---
# guides/fix-cors-issues.mdx
Source: https://reloop.sh/docs/guides/fix-cors-issues
Markdown: https://reloop.sh/docs/guides/fix-cors-issues.md
How to resolve CORS errors when calling the Reloop API.
## Overview
This article covers common causes and solutions for this issue when using Reloop.
## Common Causes
- Misconfigured DNS records
- API key permissions not matching the domain
- Rate limiting or account restrictions
## Resolution Steps
Review your domain settings in the [Reloop dashboard](https://app.reloop.sh/domains) and ensure all DNS records are correctly configured.
Ensure your API key has the correct permissions for the operation you're performing. Go to [API Keys](https://app.reloop.sh/api-keys) to review.
If the issue persists, reach out to [Reloop support](https://reloop.sh/help) with your error details and domain information.
## Learn More
- [Domain Not Verifying](/docs/guides/domain-not-verifying)
- [Avoid MX Conflicts](/docs/guides/avoid-mx-conflicts)
- [Emails Going to Spam](/docs/guides/emails-going-to-spam)
---
# guides/handling-api-keys.mdx
Source: https://reloop.sh/docs/guides/handling-api-keys
Markdown: https://reloop.sh/docs/guides/handling-api-keys.md
Create keys in the [dashboard](https://reloop.sh/dashboard/api-keys) or with code. Use the secret in your app. Manage with either platform.
## Quick rules
- Copy on create/rotate — secret is not shown again
- Store as `RELOOP_API_KEY`
- Leak? **Disable** → replace → update apps
## Guide
[API Keys](/docs/learn/api-keys) — dashboard + code for create, use, rotate, delete.
---
# guides/inbound-forward-emails.mdx
Source: https://reloop.sh/docs/guides/inbound-forward-emails
Markdown: https://reloop.sh/docs/guides/inbound-forward-emails.md
Reloop's inbound email feature can be used to forward received emails to another email address automatically.
## How It Works
1. Reloop receives an email on your verified domain
2. A webhook is triggered with the email data
3. Your webhook handler forwards the email via the Reloop API
## Setup
Go to your [domain settings](https://app.reloop.sh/domains) and enable receiving.
Set up a webhook endpoint that listens for `email.received` events.
In your webhook handler, use the Reloop API to send the email to the forwarding address:
```typescript
const reloop = new Reloop(process.env.RELOOP_API_KEY);
async function handleWebhook(event) {
if (event.type === 'email.received') {
const email = await reloop.emails.receiving.get(event.data.email_id);
await reloop.mail.send({
from: 'forwarding@yourdomain.com',
to: 'destination@example.com',
subject: `Fwd: ${email.data.subject}`,
html: email.data.html,
});
}
}
```
## Learn More
- [Receiving Emails](/docs/guides/receiving-emails)
- [Webhooks](/docs/webhooks)
---
# guides/index.mdx
Source: https://reloop.sh/docs/guides
Markdown: https://reloop.sh/docs/guides.md
Practical guides for Reloop — domains, DNS setup by provider, deliverability, sending, troubleshooting, and more.
## Domains & DNS
Domain connection docs now live under **[Connect a domain](/docs/guides/connect-domain)** (foundations, Auto-populate, every provider guide, verification, troubleshooting).
- **[Connect a domain](/docs/guides/connect-domain)** — start here
- **[Provider guides](/docs/guides/connect-domain/providers)** — Cloudflare, Vercel, GoDaddy, Route 53, NameSilo, and more
- [Avoid MX Conflicts](/docs/guides/connect-domain/troubleshoot/mx-conflicts)
- [Domain not verifying](/docs/guides/connect-domain/troubleshoot/not-verifying)
## Deliverability
- [Managing the Suppression List](/docs/guides/suppression-list)
- [Receiving Emails](/docs/guides/receiving-emails)
- [Subdomain vs Root Domain](/docs/guides/subdomain-vs-root)
- [Delivered Email Not Arriving](/docs/guides/delivered-not-arriving)
- [Emails Going to Spam](/docs/guides/emails-going-to-spam)
- [Sending to Apple Private Relay](/docs/guides/apple-private-relay)
- [Open Rates Not Accurate](/docs/guides/open-rates-accuracy)
- [Audience Hygiene](/docs/guides/audience-hygiene)
- [Warm-up Guide](/docs/guides/warmup-guide)
- [What is Email Consent?](/docs/guides/email-consent)
- [DKIM Key Length](/docs/guides/dkim-key-length)
## Sending
- [Account Quotas and Limits](/docs/guides/account-quotas-limits)
- [What Sending Feature to Use?](/docs/guides/sending-feature-guide)
- [Why Use Topics?](/docs/guides/why-use-topics)
- [When to Add an Unsubscribe Link](/docs/guides/unsubscribe-link)
- [How Do Dedicated IPs Work?](/docs/guides/dedicated-ips)
- [Creating an Email Address](/docs/guides/creating-email-address)
- [Turn Off Message Storage](/docs/guides/turn-off-message-storage)
- [Unsupported Attachment Types](/docs/guides/unsupported-attachments)
## Tutorials
- [Supabase Quickstart](/docs/guides/supabase-quickstart)
- [Supabase Go-Live Checklist](/docs/guides/supabase-deliverability)
- [Set Up Your Logo on Apple Mail](/docs/guides/apple-branded-mail)
- [Send with an Avatar](/docs/guides/send-with-avatar)
- [Inbound: Forward Emails](/docs/guides/inbound-forward-emails)
## Troubleshooting
- [Error 1010](/docs/guides/error-1010)
- [Domain Mismatch](/docs/guides/error-domain-mismatch)
- [reloop.sh Domain Error](/docs/guides/error-reloop-dev-domain)
- [Domain Already Registered](/docs/guides/domain-already-registered)
- [Avoid Gmail's Spam Folder](/docs/guides/avoid-gmail-spam)
- [Avoid Outlook's Spam Folder](/docs/guides/avoid-outlook-spam)
- [CORS Issues](/docs/guides/fix-cors-issues)
## Automation Tools
- [n8n Integration](/docs/guides/n8n-integration)
## Account Management
- [Change Your Email Address](/docs/guides/change-email-address)
- [Delete Your Account](/docs/guides/delete-account)
- [Production Approval](/docs/guides/production-approval)
- [Pricing](/docs/guides/pricing)
- [Configuring TLS](/docs/guides/configuring-tls)
- [Handling API Keys](/docs/guides/handling-api-keys)
- [Multi-Tenant Setup](/docs/guides/multi-tenant-setup)
- [Downloading Documents](/docs/guides/downloading-documents)
## Testing
- [E2E Testing with Playwright](/docs/guides/e2e-testing-playwright)
- [Email Addresses for Testing](/docs/guides/testing-email-addresses)
---
# guides/multi-tenant-setup.mdx
Source: https://reloop.sh/docs/guides/multi-tenant-setup
Markdown: https://reloop.sh/docs/guides/multi-tenant-setup.md
How to configure Reloop for multi-tenant applications.
## Overview
Manage your Reloop account settings effectively to ensure smooth operation.
## Steps
Navigate to the [Account Settings](https://app.reloop.sh/settings) page in your Reloop dashboard.
Follow the on-screen instructions to update your account configuration.
Review and confirm your changes. Some changes may require email verification.
If you need assistance with account changes, contact [Reloop support](https://reloop.sh/help).
## Learn More
- [Handling API Keys](/docs/guides/handling-api-keys)
- [Account Quotas and Limits](/docs/guides/account-quotas-limits)
---
# guides/n8n-integration.mdx
Source: https://reloop.sh/docs/guides/n8n-integration
Markdown: https://reloop.sh/docs/guides/n8n-integration.md
[n8n](https://n8n.io) is an open-source workflow automation tool. Use the Reloop integration to send emails as part of your automated workflows.
## Setup
In your n8n instance, search for "Reloop" in the nodes panel and install the Reloop integration.
Add your Reloop API key in n8n's credentials settings:
1. Go to **Credentials** → **New Credential**
2. Search for "Reloop"
3. Enter your API key from [app.reloop.sh/api-keys](https://app.reloop.sh/api-keys)
Drag the Reloop node into your workflow and configure the email parameters (from, to, subject, body).
## Example Workflows
- **Form submission → Email notification**: Send an email when a form is submitted
- **CRM trigger → Welcome email**: Send a welcome email when a new contact is created
- **Scheduled reports**: Send daily/weekly reports via email
## Learn More
- [Reloop API Reference](/docs/api)
- [n8n Documentation](https://docs.n8n.io)
---
# guides/open-rates-accuracy.mdx
Source: https://reloop.sh/docs/guides/open-rates-accuracy
Markdown: https://reloop.sh/docs/guides/open-rates-accuracy.md
Why email open rates may not be accurate.
## Overview
Understanding this topic is important for maintaining good email deliverability with Reloop.
## Key Points
- Follow email sending best practices to maintain a strong sender reputation
- Monitor your delivery rates in the [Reloop dashboard](https://app.reloop.sh)
- Keep your email lists clean and up-to-date
## Best Practices
Regularly check your delivery, bounce, and complaint rates in the Reloop dashboard.
Ensure SPF, DKIM, and DMARC are properly configured for your domain.
Always include an unsubscribe mechanism in marketing emails and honor opt-out requests promptly.
For detailed guidance on email deliverability, see our [Email Best Practices](/docs/integrations/email-best-practices) skill documentation.
## Learn More
- [Emails Going to Spam](/docs/guides/emails-going-to-spam)
- [Warm-up Guide](/docs/guides/warmup-guide)
- [Audience Hygiene](/docs/guides/audience-hygiene)
- [Domains Guide](/docs/learn/domain)
---
# guides/pricing.mdx
Source: https://reloop.sh/docs/guides/pricing
Markdown: https://reloop.sh/docs/guides/pricing.md
Understanding Reloop pricing and plans.
## Overview
Manage your Reloop account settings effectively to ensure smooth operation.
## Steps
Navigate to the [Account Settings](https://app.reloop.sh/settings) page in your Reloop dashboard.
Follow the on-screen instructions to update your account configuration.
Review and confirm your changes. Some changes may require email verification.
If you need assistance with account changes, contact [Reloop support](https://reloop.sh/help).
## Learn More
- [Handling API Keys](/docs/guides/handling-api-keys)
- [Account Quotas and Limits](/docs/guides/account-quotas-limits)
---
# guides/production-approval.mdx
Source: https://reloop.sh/docs/guides/production-approval
Markdown: https://reloop.sh/docs/guides/production-approval.md
Does Reloop require production approval before sending.
## Overview
Manage your Reloop account settings effectively to ensure smooth operation.
## Steps
Navigate to the [Account Settings](https://app.reloop.sh/settings) page in your Reloop dashboard.
Follow the on-screen instructions to update your account configuration.
Review and confirm your changes. Some changes may require email verification.
If you need assistance with account changes, contact [Reloop support](https://reloop.sh/help).
## Learn More
- [Handling API Keys](/docs/guides/handling-api-keys)
- [Account Quotas and Limits](/docs/guides/account-quotas-limits)
---
# guides/receiving-emails.mdx
Source: https://reloop.sh/docs/guides/receiving-emails
Markdown: https://reloop.sh/docs/guides/receiving-emails.md
How to receive inbound emails with Reloop.
## Overview
Understanding this topic is important for maintaining good email deliverability with Reloop.
## Key Points
- Follow email sending best practices to maintain a strong sender reputation
- Monitor your delivery rates in the [Reloop dashboard](https://app.reloop.sh)
- Keep your email lists clean and up-to-date
## Best Practices
Regularly check your delivery, bounce, and complaint rates in the Reloop dashboard.
Ensure SPF, DKIM, and DMARC are properly configured for your domain.
Always include an unsubscribe mechanism in marketing emails and honor opt-out requests promptly.
For detailed guidance on email deliverability, see our [Email Best Practices](/docs/integrations/email-best-practices) skill documentation.
## Learn More
- [Emails Going to Spam](/docs/guides/emails-going-to-spam)
- [Warm-up Guide](/docs/guides/warmup-guide)
- [Audience Hygiene](/docs/guides/audience-hygiene)
- [Domains Guide](/docs/learn/domain)
---
# guides/send-with-avatar.mdx
Source: https://reloop.sh/docs/guides/send-with-avatar
Markdown: https://reloop.sh/docs/guides/send-with-avatar.md
Some email clients display a sender avatar next to emails. Here's how to set one up for your Reloop sending domain.
## Using Gravatar
The simplest approach is to register your sending email address with [Gravatar](https://gravatar.com):
1. Go to [gravatar.com](https://gravatar.com) and create an account using your sending email address
2. Upload your brand logo or avatar
3. Emails sent from that address will now show the Gravatar in supported clients
## Using Google Workspace
If you use Google Workspace, you can set a profile picture for your sending address:
1. Log in to Google Admin Console
2. Navigate to the user's account settings
3. Upload a profile photo
## Using BIMI
For a more universal approach, see our [Apple Branded Mail guide](/docs/guides/apple-branded-mail) which covers BIMI setup.
Not all email clients support avatars. Gravatar works in many clients, but BIMI provides the widest coverage.
---
# guides/sending-feature-guide.mdx
Source: https://reloop.sh/docs/guides/sending-feature-guide
Markdown: https://reloop.sh/docs/guides/sending-feature-guide.md
Choosing the right sending method for your use case.
## Overview
This guide helps you understand and configure this sending feature in Reloop.
## Details
Understanding your sending configuration is key to successful email delivery. Review the [Reloop dashboard](https://app.reloop.sh) for your current settings and limits.
## Configuration
Check your current plan and usage in the [Reloop dashboard](https://app.reloop.sh/settings).
Adjust your sending configuration based on your requirements and plan limits.
Keep track of your sending volume and adjust as needed to stay within limits.
## Learn More
- [Account Quotas and Limits](/docs/guides/account-quotas-limits)
- [Sending Emails](/docs/learn/sending)
- [Email Best Practices](/docs/integrations/email-best-practices)
---
# guides/subdomain-vs-root.mdx
Source: https://reloop.sh/docs/guides/subdomain-vs-root
Markdown: https://reloop.sh/docs/guides/subdomain-vs-root.md
This guide moved to **[What is a domain?](/docs/guides/connect-domain/what-is-a-domain)** under Connect a domain.
---
# guides/supabase-deliverability.mdx
Source: https://reloop.sh/docs/guides/supabase-deliverability
Markdown: https://reloop.sh/docs/guides/supabase-deliverability.md
Before going live with Supabase + Reloop, follow this checklist to ensure your auth emails reach every inbox.
## Checklist
- [ ] **Verify your domain** — Complete DNS verification in the [Reloop dashboard](https://app.reloop.sh/domains).
- [ ] **Use a subdomain** — Send auth emails from a subdomain like `auth.example.com` to protect your root domain reputation.
- [ ] **Set up DMARC** — Add a DMARC record to monitor and protect against spoofing.
- [ ] **Test deliverability** — Send test emails to Gmail, Outlook, and Yahoo to confirm inbox placement.
- [ ] **Warm up your domain** — If you're sending to a large audience, gradually increase volume. See our [Warm-up Guide](/docs/guides/warmup-guide).
- [ ] **Set appropriate rate limits** — Don't send more than your plan allows. See [Account Quotas](/docs/guides/account-quotas-limits).
## Learn More
- [Supabase Quickstart](/docs/guides/supabase-quickstart)
- [Emails Going to Spam](/docs/guides/emails-going-to-spam)
- [Warm-up Guide](/docs/guides/warmup-guide)
---
# guides/supabase-quickstart.mdx
Source: https://reloop.sh/docs/guides/supabase-quickstart
Markdown: https://reloop.sh/docs/guides/supabase-quickstart.md
Learn how to set up Reloop as the email provider for your Supabase project.
## Prerequisites
- A [Supabase](https://supabase.com) project
- A [Reloop API key](https://app.reloop.sh/api-keys)
- A [verified domain](https://app.reloop.sh/domains) in Reloop
## Setup
Go to [app.reloop.sh/api-keys](https://app.reloop.sh/api-keys) and create a new API key.
In your Supabase dashboard, go to **Settings → Auth → SMTP Settings** and enable the custom SMTP option.
Configure with the following values:
| Setting | Value |
|---------|-------|
| Host | `smtp.reloop.sh` |
| Port | `465` |
| Username | `reloop` |
| Password | Your Reloop API key |
| Sender email | An address from your verified domain |
Trigger a test email (e.g., a password reset) to confirm everything works.
## Learn More
- [Supabase Go-Live Checklist](/docs/guides/supabase-deliverability)
- [Sending Emails](/docs/learn/sending)
---
# guides/suppression-list.mdx
Source: https://reloop.sh/docs/guides/suppression-list
Markdown: https://reloop.sh/docs/guides/suppression-list.md
How to manage your email suppression list in Reloop.
## Overview
Understanding this topic is important for maintaining good email deliverability with Reloop.
## Key Points
- Follow email sending best practices to maintain a strong sender reputation
- Monitor your delivery rates in the [Reloop dashboard](https://app.reloop.sh)
- Keep your email lists clean and up-to-date
## Best Practices
Regularly check your delivery, bounce, and complaint rates in the Reloop dashboard.
Ensure SPF, DKIM, and DMARC are properly configured for your domain.
Always include an unsubscribe mechanism in marketing emails and honor opt-out requests promptly.
For detailed guidance on email deliverability, see our [Email Best Practices](/docs/integrations/email-best-practices) skill documentation.
## Learn More
- [Emails Going to Spam](/docs/guides/emails-going-to-spam)
- [Warm-up Guide](/docs/guides/warmup-guide)
- [Audience Hygiene](/docs/guides/audience-hygiene)
- [Domains Guide](/docs/learn/domain)
---
# guides/testing-email-addresses.mdx
Source: https://reloop.sh/docs/guides/testing-email-addresses
Markdown: https://reloop.sh/docs/guides/testing-email-addresses.md
When testing your Reloop integration, use these special email addresses to simulate different scenarios without sending real emails.
## First test after API key (onboarding domain)
During onboarding, after you generate an API key, use **Send email**. Reloop sends a message from the onboarding test domain:
| Field | Value |
|-------|--------|
| From | `onboarding@{ONBOARDING_TEST_DOMAIN}` (not `RELOOP_SENDER_DOMAIN`) |
| To | Your account email only |
You do **not** need a verified customer domain for this path. For production From addresses, add and verify your own domain.
## Simulated recipient addresses
| Address | Behavior |
|---------|----------|
| `delivered@reloop.sh` | Simulates a successful delivery |
| `bounced@reloop.sh` | Simulates a hard bounce |
| `complained@reloop.sh` | Simulates a spam complaint |
## Development tips
- Use the onboarding button or your own addresses for real inbox checks
- Use the simulated addresses above for automated tests that should not hit real inboxes
- Check the [Reloop dashboard](https://app.reloop.sh/emails) for send status
Never use real customer email addresses for automated load or bounce testing. Prefer the simulated addresses above, or a dedicated inbox you control.
## Learn More
- [E2E Testing with Playwright](/docs/guides/e2e-testing-playwright)
- [Account Quotas and Limits](/docs/guides/account-quotas-limits)
- [reloop.sh Domain Error](/docs/guides/error-reloop-dev-domain)
---
# guides/turn-off-message-storage.mdx
Source: https://reloop.sh/docs/guides/turn-off-message-storage
Markdown: https://reloop.sh/docs/guides/turn-off-message-storage.md
How to disable email content storage for sensitive data.
## Overview
This guide helps you understand and configure this sending feature in Reloop.
## Details
Understanding your sending configuration is key to successful email delivery. Review the [Reloop dashboard](https://app.reloop.sh) for your current settings and limits.
## Configuration
Check your current plan and usage in the [Reloop dashboard](https://app.reloop.sh/settings).
Adjust your sending configuration based on your requirements and plan limits.
Keep track of your sending volume and adjust as needed to stay within limits.
## Learn More
- [Account Quotas and Limits](/docs/guides/account-quotas-limits)
- [Sending Emails](/docs/learn/sending)
- [Email Best Practices](/docs/integrations/email-best-practices)
---
# guides/unsubscribe-link.mdx
Source: https://reloop.sh/docs/guides/unsubscribe-link
Markdown: https://reloop.sh/docs/guides/unsubscribe-link.md
Guidelines for including unsubscribe links in your emails.
## Overview
This guide helps you understand and configure this sending feature in Reloop.
## Details
Understanding your sending configuration is key to successful email delivery. Review the [Reloop dashboard](https://app.reloop.sh) for your current settings and limits.
## Configuration
Check your current plan and usage in the [Reloop dashboard](https://app.reloop.sh/settings).
Adjust your sending configuration based on your requirements and plan limits.
Keep track of your sending volume and adjust as needed to stay within limits.
## Learn More
- [Account Quotas and Limits](/docs/guides/account-quotas-limits)
- [Sending Emails](/docs/learn/sending)
- [Email Best Practices](/docs/integrations/email-best-practices)
---
# guides/unsupported-attachments.mdx
Source: https://reloop.sh/docs/guides/unsupported-attachments
Markdown: https://reloop.sh/docs/guides/unsupported-attachments.md
Which file types are not supported as email attachments.
## Overview
This guide helps you understand and configure this sending feature in Reloop.
## Details
Understanding your sending configuration is key to successful email delivery. Review the [Reloop dashboard](https://app.reloop.sh) for your current settings and limits.
## Configuration
Check your current plan and usage in the [Reloop dashboard](https://app.reloop.sh/settings).
Adjust your sending configuration based on your requirements and plan limits.
Keep track of your sending volume and adjust as needed to stay within limits.
## Learn More
- [Account Quotas and Limits](/docs/guides/account-quotas-limits)
- [Sending Emails](/docs/learn/sending)
- [Email Best Practices](/docs/integrations/email-best-practices)
---
# guides/warmup-guide.mdx
Source: https://reloop.sh/docs/guides/warmup-guide
Markdown: https://reloop.sh/docs/guides/warmup-guide.md
How to warm up a new sending domain for optimal deliverability.
## Overview
Understanding this topic is important for maintaining good email deliverability with Reloop.
## Key Points
- Follow email sending best practices to maintain a strong sender reputation
- Monitor your delivery rates in the [Reloop dashboard](https://app.reloop.sh)
- Keep your email lists clean and up-to-date
## Best Practices
Regularly check your delivery, bounce, and complaint rates in the Reloop dashboard.
Ensure SPF, DKIM, and DMARC are properly configured for your domain.
Always include an unsubscribe mechanism in marketing emails and honor opt-out requests promptly.
For detailed guidance on email deliverability, see our [Email Best Practices](/docs/integrations/email-best-practices) skill documentation.
## Learn More
- [Emails Going to Spam](/docs/guides/emails-going-to-spam)
- [Warm-up Guide](/docs/guides/warmup-guide)
- [Audience Hygiene](/docs/guides/audience-hygiene)
- [Domains Guide](/docs/learn/domain)
---
# guides/why-use-topics.mdx
Source: https://reloop.sh/docs/guides/why-use-topics
Markdown: https://reloop.sh/docs/guides/why-use-topics.md
Benefits of using topics to organize your email sending.
## Overview
This guide helps you understand and configure this sending feature in Reloop.
## Details
Understanding your sending configuration is key to successful email delivery. Review the [Reloop dashboard](https://app.reloop.sh) for your current settings and limits.
## Configuration
Check your current plan and usage in the [Reloop dashboard](https://app.reloop.sh/settings).
Adjust your sending configuration based on your requirements and plan limits.
Keep track of your sending volume and adjust as needed to stay within limits.
## Learn More
- [Account Quotas and Limits](/docs/guides/account-quotas-limits)
- [Sending Emails](/docs/learn/sending)
- [Email Best Practices](/docs/integrations/email-best-practices)
---
# integrations/bolt.mdx
Source: https://reloop.sh/docs/integrations/bolt
Markdown: https://reloop.sh/docs/integrations/bolt.md
[Bolt.new](https://bolt.new) allows you to edit, run, and deploy full-stack web applications entirely in your browser using AI. Adding Reloop support takes only two steps.
---
## Step 1: Set Environment Variables in Bolt.new
Inside your Bolt.new chat or the terminal panel:
1. Create or open the `.env` file at the root of the project.
2. Add your Reloop API key:
```env
RELOOP_API_KEY=rl_your_api_key_here
```
3. Alternatively, prompt the AI agent:
> "Configure my `.env` variables to include `RELOOP_API_KEY`."
---
## Step 2: Prompt Bolt.new for Email Dispatch
Ask the Bolt AI assistant to add the email logic:
> "Install `reloop-email` and create a server endpoint `api/send-email` that sends a transactional email when a user registers."
---
# integrations/cloudflare.mdx
Source: https://reloop.sh/docs/integrations/cloudflare
Markdown: https://reloop.sh/docs/integrations/cloudflare.md
[Cloudflare Workers](https://workers.cloudflare.com) allow you to run serverless code globally. Since standard TCP sockets can be limited in edge environments, routing emails through the Reloop HTTP API is the recommended approach.
---
## Step 1: Bind Secret in Wrangler
To add your Reloop API key to your Cloudflare Worker environment securely, run the following command in your terminal:
```bash
wrangler secret put RELOOP_API_KEY
```
When prompted, input your Reloop API key starting with `rl_`.
---
## Step 2: Send Email via Fetch in Cloudflare Workers
Send emails with a standard POST request inside your Worker:
```typescript
async fetch(request, env) {
const response = await fetch('https://api.reloop.sh/v1/emails', {
method: 'POST',
headers: {
'Authorization': `Bearer ${env.RELOOP_API_KEY}`,
'Content-Type': 'application/json',
},
body: JSON.stringify({
from: 'alerts@yourdomain.com',
to: 'user@example.com',
subject: 'Edge Alert',
html: 'Sent from the edge via Reloop!
',
}),
});
return response;
}
};
```
---
# integrations/coolify.mdx
Source: https://reloop.sh/docs/integrations/coolify
Markdown: https://reloop.sh/docs/integrations/coolify.md
[Coolify](https://coolify.io) is an open-source, self-hostable alternative to Heroku and Netlify. You can easily integrate Reloop into your Coolify applications or use Reloop SMTP as the global system transactional mail provider.
---
## Step 1: Set Reloop SMTP as System SMTP
To send system alerts and registration emails from Coolify itself via Reloop:
1. Open your **Coolify Dashboard**.
2. Navigate to **Settings** → **Transactional Email**.
3. Enable transactional emails and enter the following settings:
- **SMTP Server**: `smtp.reloop.sh`
- **SMTP Port**: `587`
- **SMTP User**: `reloop`
- **SMTP Password**: `rl_your_api_key`
- **From Address**: `noreply@yourdomain.com`
4. Click **Save**.
---
## Step 2: Configure Application Environment Variables
For apps hosted on Coolify:
1. Select your **Application** in Coolify.
2. Go to **Environment Variables**.
3. Add `RELOOP_API_KEY` as a secret variable.
4. Save and redeploy.
---
# integrations/cursor.mdx
Source: https://reloop.sh/docs/integrations/cursor
Markdown: https://reloop.sh/docs/integrations/cursor.md
[Cursor](https://cursor.com) is an AI-first code editor. By connecting Cursor to the Reloop Model Context Protocol (MCP) server, your Cursor agent can send test emails, check domain logs, and manage templates directly from the chat window.
---
## Step 1: Configure Reloop MCP in Cursor
1. Open Cursor and navigate to **Cursor Settings** (Gear icon on the top right) → **Features** → **MCP**.
2. Click **+ Add New MCP Server**.
3. Fill in the configuration:
- **Name**: `reloop`
- **Type**: `command`
- **Command**: `npx -y reloop-mcp`
4. Under environment variables in the dialog, add:
- **Key**: `RELOOP_API_KEY`
- **Value**: `rl_your_api_key_here`
5. Click **Save**.
Cursor will initialize the MCP server and list all available tools.
---
## Step 2: Use in Chat
In the Cursor chat panel, type:
> "Send a test email to customer@example.com saying 'Hello from Cursor Composer!' using the Reloop MCP tool."
---
# integrations/directus.mdx
Source: https://reloop.sh/docs/integrations/directus
Markdown: https://reloop.sh/docs/integrations/directus.md
[Directus](https://directus.io) is a highly flexible, open-source data platform and headless CMS. By default, Directus does not send system emails (like password resets, user invitations, or activity notifications) unless an email transport is configured.
Connecting Directus with Reloop takes less than two minutes and is configured entirely through your `.env` configuration file.
---
## Prerequisites
Before starting, make sure you have:
1. A verified sending domain in your [Reloop Dashboard](https://app.reloop.sh).
2. A Reloop API Key (starts with `rl_`).
---
## Step 1: Configure SMTP in `.env`
Open the `.env` file in the root of your Directus project and locate the email configuration variables. Add or update the values to match the Reloop SMTP credentials below:
```env
# Email General Settings
EMAIL_FROM="notifications@yourdomain.com"
EMAIL_TRANSPORT="smtp"
# Reloop SMTP Configuration
EMAIL_SMTP_HOST="smtp.reloop.sh"
EMAIL_SMTP_PORT=587
EMAIL_SMTP_USER="YOUR_RELOOP_API_KEY"
EMAIL_SMTP_PASSWORD="YOUR_RELOOP_API_KEY"
EMAIL_SMTP_SECURE="false"
EMAIL_SMTP_IGNORE_TLS="false"
```
> [!IMPORTANT]
> - Ensure `EMAIL_FROM` matches a verified email address from your Reloop sending domain.
> - `EMAIL_SMTP_SECURE` must be set to `false`. Reloop uses port `587` with standard `STARTTLS` encryption (which is initiated automatically after connection). Setting this to `true` forces SSL on connection (SMLTPS on port 465) and will fail.
---
## Step 2: Restart Directus
To apply the configuration changes, restart your Directus service.
If you are running Directus locally or via Node:
```bash
npx directus start
```
If you are using Docker/Docker Compose:
```bash
docker compose restart directus
```
---
## Step 3: Test Email Delivery
1. Log in to the Directus Admin Panel.
2. Go to **Settings** → **User Directory** and invite a new user.
3. Check the inbox of the invited user to confirm receipt of the invite email.
4. Verify the delivery metrics and logs inside the **Reloop Dashboard**.
---
# integrations/docker.mdx
Source: https://reloop.sh/docs/integrations/docker
Markdown: https://reloop.sh/docs/integrations/docker.md
[Docker](https://docker.com) simplifies shipping applications. Configure your containerized services to connect to Reloop's SMTP or API endpoints.
---
## Step 1: Add Credentials to Docker Compose
Add the credentials under the `environment` section in your `docker-compose.yml` file:
```yaml
version: '3.8'
services:
app:
image: node:18
environment:
- RELOOP_API_KEY=rl_your_api_key_here
- SMTP_HOST=smtp.reloop.sh
- SMTP_PORT=587
- SMTP_USER=reloop
- SMTP_PASS=rl_your_api_key_here
ports:
- "3000:3000"
command: npm start
```
---
## Step 2: Use credentials in your container
Your application inside the container can now access the environment variables naturally (e.g. `process.env.RELOOP_API_KEY` in Node.js or `os.environ.get('RELOOP_API_KEY')` in Python).
---
# integrations/ghost.mdx
Source: https://reloop.sh/docs/integrations/ghost
Markdown: https://reloop.sh/docs/integrations/ghost.md
[Ghost](https://ghost.org) is a popular open-source publishing platform. While Ghost uses Mailgun for sending bulk newsletters, it uses a standard SMTP configuration for **transactional emails** (such as member login links, password resets, signup notifications, and staff invitations).
Configuring Ghost to route these emails through Reloop ensures that your login links and administrative emails arrive in the inbox instantly.
---
## Prerequisites
Before starting, make sure you have:
1. A verified sending domain in your [Reloop Dashboard](https://app.reloop.sh).
2. A Reloop API Key (starts with `rl_`).
---
## Step 1: Locate your Ghost Configuration File
In self-hosted Ghost environments, the configuration is stored in a JSON file in the root of your Ghost installation directory.
- Production file: `config.production.json`
- Development/Local file: `config.development.json`
---
## Step 2: Edit Mail Configuration
Open your configuration file in a text editor and locate or add the `"mail"` block. Replace the default settings with your Reloop SMTP credentials:
```json
{
"url": "https://yourdomain.com",
"database": { ... },
"mail": {
"transport": "SMTP",
"options": {
"host": "smtp.reloop.sh",
"port": 587,
"auth": {
"user": "YOUR_RELOOP_API_KEY",
"pass": "YOUR_RELOOP_API_KEY"
}
}
}
}
```
> [!NOTE]
> Make sure to replace `YOUR_RELOOP_API_KEY` with your actual Reloop API Key. Both the `user` and `pass` values should be set to your Reloop API Key.
---
## Step 3: Restart Ghost
For the email changes to take effect, you need to restart the Ghost process:
```bash
ghost restart
```
If you are running Ghost in a Docker container, restart the container:
```bash
docker restart ghost_container_name
```
---
## Step 3: Verify the Integration
1. Go to your Ghost admin panel (`https://yourdomain.com/ghost/`).
2. Go to **Settings** → **Staff** and invite a new staff member or send a test email.
3. Check the inbox of the invited user to confirm receipt of the invitation link.
4. Verify the delivery status and headers in your **Reloop Dashboard Logs**.
---
# integrations/index.mdx
Source: https://reloop.sh/docs/integrations
Markdown: https://reloop.sh/docs/integrations.md
# Integrations
Reloop integrates seamlessly with the hosting platforms, databases, AI frameworks, and developer tools you already use.
## Hosting & Cloud Platforms
Deploy and run Reloop or route emails directly from your cloud providers.
Deploy frontend applications and route transactional emails.
Read Guide →
Host your Reloop instance or run your backends.
Read Guide →
Deliver emails globally using Cloudflare Workers and Pages.
Read Guide →
Connect your Netlify builds and serverless functions.
Read Guide →
Run Reloop services locally or in production containers.
Read Guide →
Self-host Reloop with simple open-source PaaS integrations.
Read Guide →
## AI App Builders
Integrate Reloop email sending and inbox automation into AI-generated applications.
Build full-stack apps with natural language using Reloop SMTP or REST APIs.
Read Guide →
Integrate Reloop into full-stack web applications generated in the browser.
Read Guide →
Integrate Reloop email templates and APIs into AI-generated React/Next.js components.
Read Guide →
Deploy Reloop-integrated apps and agent inboxes instantly on Replit Repls.
Read Guide →
## AI & Agent Developer Tools
Build intelligent agents that send and receive email autonomously.
Connect Model Context Protocol (MCP) clients like Claude Code or Cursor.
Read Guide →
Use Cursor composer or chat with Reloop's MCP server and agent-ready docs.
Read Guide →
Code alongside the Windsurf agent with full monorepo and API context.
Read Guide →
## No-Code & Automation Tools
Integrate Reloop email sending into your automated workflows, databases, and websites.
Automate workflows and send emails using Reloop SMTP or REST APIs.
Read Guide →
Integrate Reloop email sending into your Make scenarios.
Read Guide →
Connect Reloop with thousands of apps via Zapier Zaps.
Read Guide →
Route your WordPress site's emails through Reloop SMTP.
Read Guide →
Configure Ghost CMS to send newsletter signups and transactional emails.
Read Guide →
Configure the Strapi headless CMS to send emails via Reloop SMTP.
Read Guide →
Configure Directus CMS via environment variables to send system emails.
Read Guide →
Configure Supabase authentication and database emails via Reloop SMTP.
Read Guide →
---
# integrations/lovable.mdx
Source: https://reloop.sh/docs/integrations/lovable
Markdown: https://reloop.sh/docs/integrations/lovable.md
[Lovable](https://lovable.dev) is a powerful AI builder that generates full-stack web applications from natural language. You can easily prompt Lovable to integrate Reloop SMTP or REST APIs to handle email communications.
---
## Step 1: Provide Reloop Credentials to Lovable
To let your Lovable-generated backend send emails:
1. Copy your Reloop API key from the Reloop dashboard.
2. In the Lovable chat panel, configure the environment variables by prompting:
> "Add `RELOOP_API_KEY` to the environment variables with value `rl_your_key`."
3. Prompt Lovable to configure SMTP settings if using SMTP:
- Host: `smtp.reloop.sh`
- Port: `587`
- User: `reloop`
- Pass: `rl_your_key`
---
## Step 2: Prompt Lovable to write Reloop logic
You can ask Lovable to write code to send verification or transactional emails using the SDK or API:
> "Create a contact form submission handler that sends an email to admin@mydomain.com using the Reloop API key."
---
# integrations/make.mdx
Source: https://reloop.sh/docs/integrations/make
Markdown: https://reloop.sh/docs/integrations/make.md
[Make.com](https://make.com) (formerly Integromat) is a powerful visual automation platform. You can connect Reloop to any Make scenario using either:
1. **SMTP Connection** (using Make's built-in **Email** app)
2. **REST API Connection** (using Make's built-in **HTTP** app)
---
## Method 1: SMTP via Make's Email App
The standard **Email** app in Make allows you to send transactional messages instantly using Reloop SMTP.
### Step 1: Add the Email Module
1. In your Make scenario, click **Add module** (+).
2. Search for and select the **Email** app.
3. Select the **Send an email** module.
### Step 2: Create a Connection
1. Click **Add** next to the **Connection** drop-down.
2. Choose **Other SMTP server** as your connection type.
3. Configure the connection settings:
- **Connection name**: `Reloop SMTP`
- **SMTP server**: `smtp.reloop.sh`
- **Port**: `587`
- **Use secure connection**: `TLS` or `STARTTLS` (recommended)
- **Username**: *Your Reloop API Key* (starts with `rl_`)
- **Password**: *Your Reloop API Key* (starts with `rl_`)
4. Click **Save**.
### Step 3: Map Email Details
Configure the fields inside the Email module:
- **To**: Add recipients (use dynamic values from previous nodes, e.g., CRM contacts).
- **Subject**: Enter a subject line.
- **Content**: Choose `HTML` or `Plain Text` and compose your message body.
- **Sender**: Click **Show advanced settings** and enter a verified sender email address from your Reloop dashboard (e.g., `sales@yourdomain.com`).
---
## Method 2: REST API via Make's HTTP App
If you want to use advanced features like email templates, tagging, or attachment files from Google Drive or Dropbox, you can call the Reloop API directly.
### Step 1: Add the HTTP Module
1. In your Make scenario, click **Add module**.
2. Search for and select the **HTTP** app.
3. Select the **Make a request** module.
### Step 2: Configure the API Request
Configure the module fields as follows:
- **URL**: `https://reloop.sh/api/mail/v1/send`
- **Method**: `POST`
- **Headers**:
- Item 1:
- **Name**: `x-api-key`
- **Value**: *Your Reloop API Key* (starts with `rl_`)
- Item 2:
- **Name**: `Content-Type`
- **Value**: `application/json`
- **Body type**: `Raw`
- **Content type**: `JSON (application/json)`
- **Request content**: Compose the JSON payload. For example:
```json
{
"from": "Support Team ",
"to": "{{1.email}}",
"subject": "Ticket Resolved",
"html": "Hi {{1.name}}, your support ticket has been closed.
",
"tags": [
{
"name": "type",
"value": "transactional"
}
]
}
```
*Note: Replace `{{1.email}}` and `{{1.name}}` with mapping variables from previous nodes in your Make scenario.*
- **Parse response**: `Yes` (this allows subsequent nodes to easily reference the `messageId` and status).
---
## Step 3: Run the Scenario
Click **Run once** at the bottom left of the Make dashboard to test. Verify the execution bubbles show green checkboxes, check the recipient's inbox, and inspect the delivery logs in the **Reloop Dashboard**.
---
# integrations/n8n.mdx
Source: https://reloop.sh/docs/integrations/n8n
Markdown: https://reloop.sh/docs/integrations/n8n.md
[n8n](https://n8n.io) is a fair-code, extendable workflow automation tool. You can connect Reloop to your n8n workflows using either:
1. **SMTP Connection** (using n8n's built-in **Send Email** node)
2. **REST API Connection** (using n8n's built-in **HTTP Request** node)
---
## Method 1: SMTP via n8n's Send Email Node
You can route emails directly using n8n's native **Send Email** node configured with Reloop's SMTP credentials.
### Step 1: Add the Send Email Node
1. Inside your n8n workflow editor, click the **+** icon to add a node.
2. Search for and select the **Send Email** node.
### Step 2: Configure Credentials
1. Under **Credential for Send Email**, select **Create New Credential**.
2. Set the connection settings as follows:
| Parameter | Value |
| :--- | :--- |
| **Host** | `smtp.reloop.sh` |
| **Port** | `587` |
| **SSL/TLS** | `STARTTLS` (enabled via toggle / selection) |
| **User** | *Your Reloop API Key* (starts with `rl_`) |
| **Password** | *Your Reloop API Key* (starts with `rl_`) |
3. Save the credential.
### Step 3: Set Email Parameters
Configure the email body and headers:
- **From Email**: Enter a verified email address from your Reloop sending domain (e.g., `app@yourdomain.com`).
- **To Email**: Map the recipient's email address dynamically from prior nodes.
- **Subject**: Enter a subject line.
- **HTML / Text**: Choose your email body format and insert your content.
---
## Method 2: REST API via HTTP Request Node
Use n8n's **HTTP Request** node to access advanced API features such as templating, tag tracking, attachments, or scheduling.
### Step 1: Add the HTTP Request Node
1. Click the **+** icon to add a new node.
2. Search for and select **HTTP Request**.
### Step 2: Configure Node Parameters
Configure the node parameters for the Reloop Send Mail API:
- **Method**: `POST`
- **URL**: `https://reloop.sh/api/mail/v1/send`
- **Authentication**: `Header Auth` (or choose None and add it manually in Headers)
- **Headers**:
- Name: `x-api-key`
- Value: *Your Reloop API Key*
- Name: `Content-Type`
- Value: `application/json`
- **Specify Body**: `Using JSON`
- **Body Parameters**: Toggle to **JSON** format and enter the payload:
```json
{
"from": "Marketing ",
"to": "={{ $json.email }}",
"subject": "Thank you for subscribing!",
"html": "Welcome {{ $json.name }}!
We are glad to have you aboard.
",
"tags": [
{
"name": "campaign",
"value": "onboarding_n8n"
}
]
}
```
*Note: Use n8n's expression syntax `={{ ... }}` to pull data from your webhook or database triggers.*
---
## Step 3: Test and Verify
1. Click **Test step** or **Execute Node** in n8n.
2. Inspect the JSON response to ensure it returns a success confirmation:
```json
{
"success": true,
"messageId": "msg_8d8b9c2a1e...",
"status": "sent"
}
```
3. Check your recipient inbox and check the **Reloop Dashboard Logs** to confirm the email was delivered successfully.
---
# integrations/netlify.mdx
Source: https://reloop.sh/docs/integrations/netlify
Markdown: https://reloop.sh/docs/integrations/netlify.md
[Netlify](https://netlify.com) makes deploying frontends and serverless functions effortless. Follow these steps to route emails via Reloop from your Netlify-deployed applications.
---
## Step 1: Configure Environment Variables
1. Go to your **Netlify Team Dashboard**.
2. Select your project and navigate to **Site configuration** → **Environment variables**.
3. Click **Add a variable** and choose **Add single variable**.
4. Configure the variable:
- **Key**: `RELOOP_API_KEY`
- **Value**: `rl_your_api_key`
5. Click **Create variable**.
---
## Step 2: Use in Netlify Functions
Retrieve the variable inside a Netlify Serverless Function:
```typescript
const reloop = new Reloop(process.env.RELOOP_API_KEY);
const result = await reloop.mail.send({
from: 'hello@yourdomain.com',
to: 'customer@example.com',
subject: 'Netlify Alert',
html: 'Sent from a Netlify Serverless Function!
',
});
return {
statusCode: 200,
body: JSON.stringify(result),
};
};
```
---
# integrations/railway.mdx
Source: https://reloop.sh/docs/integrations/railway
Markdown: https://reloop.sh/docs/integrations/railway.md
[Railway](https://railway.app) simplifies hosting backends, databases, and cron jobs. Configure your Railway services to send emails via Reloop with environment variables.
---
## Step 1: Set Environment Variables in Railway
1. Go to your **Railway Project**.
2. Select the service that will send emails.
3. Click on the **Variables** tab.
4. Add the following variable:
- **Name**: `RELOOP_API_KEY`
- **Value**: `rl_your_api_key`
5. If using standard SMTP connections, also configure:
- **Name**: `SMTP_HOST` → `smtp.reloop.sh`
- **Name**: `SMTP_PORT` → `587`
- **Name**: `SMTP_USER` → `reloop`
- **Name**: `SMTP_PASS` → `rl_your_api_key`
Railway will automatically redeploy your service to apply the variables.
---
## Step 2: Code Integration
Retrieve the environment variables in your server code:
```typescript
const apiKey = process.env.RELOOP_API_KEY;
```
---
# integrations/replit.mdx
Source: https://reloop.sh/docs/integrations/replit
Markdown: https://reloop.sh/docs/integrations/replit.md
[Replit](https://replit.com) is an online IDE and hosting service. Follow these steps to configure your Replit Repl to send emails via Reloop.
---
## Step 1: Add API Key to Replit Secrets
1. Open your Repl workspace on **Replit**.
2. Click on the **Secrets** tool in the left sidebar (represented by a lock icon).
3. Add a new secret:
- **Key**: `RELOOP_API_KEY`
- **Value**: `rl_your_api_key_here`
4. Click **Add Secret**.
Replit automatically injects secrets as environment variables.
---
## Step 2: Write Email Dispatch Logic
Send an email in Node.js on Replit:
```javascript
const reloop = new Reloop(process.env.RELOOP_API_KEY);
reloop.mail.send({
from: 'hello@yourdomain.com',
to: 'friend@example.com',
subject: 'Greetings from Replit',
html: 'This was sent from my online Repl!
'
});
```
---
# integrations/strapi.mdx
Source: https://reloop.sh/docs/integrations/strapi
Markdown: https://reloop.sh/docs/integrations/strapi.md
[Strapi](https://strapi.io) is a leading open-source headless CMS. Out of the box, Strapi provides a mock email sender. To send real transactional emails (like user password resets, email address confirmations, or custom workflow triggers), you must configure an email provider.
Reloop SMTP integrates seamlessly with Strapi using the standard `@strapi/provider-email-nodemailer` package.
---
## Prerequisites
Before starting, make sure you have:
1. A verified sending domain in your [Reloop Dashboard](https://app.reloop.sh).
2. A Reloop API Key (starts with `rl_`).
---
## Step 1: Install Nodemailer Provider
Run the following command in your Strapi project root folder to install the official Nodemailer email provider:
```package-install
npm install @strapi/provider-email-nodemailer
```
---
## Step 2: Configure the Plugin
Create or edit your Strapi plugin configuration file.
- File path: `config/plugins.js` (or `config/plugins.ts` for TypeScript projects)
Add the `email` provider configuration block:
```javascript
module.exports = ({ env }) => ({
// ... existing plugins
email: {
config: {
provider: 'nodemailer',
providerOptions: {
host: 'smtp.reloop.sh',
port: 587,
auth: {
user: env('RELOOP_API_KEY'),
pass: env('RELOOP_API_KEY'),
},
},
settings: {
defaultFrom: env('RELOOP_FROM_EMAIL', 'hello@yourdomain.com'),
defaultReplyTo: env('RELOOP_REPLY_TO_EMAIL', 'hello@yourdomain.com'),
},
},
},
});
```
---
## Step 3: Set Environment Variables
Add the required environment variables to your `.env` file:
```env
RELOOP_API_KEY="your-reloop-api-key"
RELOOP_FROM_EMAIL="sender@yourdomain.com"
RELOOP_REPLY_TO_EMAIL="sender@yourdomain.com"
```
> [!IMPORTANT]
> Make sure `RELOOP_FROM_EMAIL` is a verified email address from your Reloop sending domain.
---
## Step 4: Verify the Integration
1. Restart your Strapi application (`npm run develop` or `npm run build && npm run start`).
2. Log in to the Strapi Admin Panel.
3. Trigger a password reset email or go to **Settings** → **Email Settings** to send a test message.
4. Verify receipt of the email and check delivery metrics in your **Reloop Dashboard**.
---
# integrations/v0.mdx
Source: https://reloop.sh/docs/integrations/v0
Markdown: https://reloop.sh/docs/integrations/v0.md
[v0 by Vercel](https://v0.dev) is a generative UI system that creates production-ready frontend code. To connect v0 components to a backend that sends emails with Reloop:
---
## Step 1: Prompt v0 for Frontend UI
Generate your components in v0:
> "Generate a beautiful contact form component that sends form data to a Next.js App Router API route at `/api/send`."
Copy the generated code into your Next.js project.
---
## Step 2: Build the API Route with Reloop
In your Next.js project, create `/app/api/send/route.ts` to process the form using Reloop:
```typescript
const reloop = new Reloop(process.env.RELOOP_API_KEY);
const { name, email, message } = await req.json();
const data = await reloop.mail.send({
from: 'support@yourdomain.com',
to: 'info@yourdomain.com',
subject: `New form submission from ${name}`,
html: `Name: ${name}
Email: ${email}
Message: ${message}
`,
});
return NextResponse.json(data);
}
```
---
# integrations/vercel.mdx
Source: https://reloop.sh/docs/integrations/vercel
Markdown: https://reloop.sh/docs/integrations/vercel.md
[Vercel](https://vercel.com) is the premier cloud platform for frontends and serverless functions. Integrating Reloop with your Vercel-deployed applications takes just a few steps.
---
## Step 1: Configure Vercel Environment Variables
To allow your serverless functions or Next.js API routes to authenticate with Reloop, configure your API key in the Vercel dashboard:
1. Go to your project on the **Vercel Dashboard**.
2. Navigate to **Settings** → **Environment Variables**.
3. Add a new variable:
- **Key**: `RELOOP_API_KEY`
- **Value**: `YOUR_RELOOP_API_KEY` (starts with `rl_`)
4. Click **Save**.
---
## Step 2: Deploy and Route Emails
Use the official Node.js SDK to send emails in your serverless code:
```typescript
const reloop = new Reloop(process.env.RELOOP_API_KEY);
const data = await reloop.mail.send({
from: 'onboarding@yourdomain.com',
to: 'user@example.com',
subject: 'Welcome!',
html: 'Thanks for signing up!
',
});
}
```
---
# integrations/windsurf.mdx
Source: https://reloop.sh/docs/integrations/windsurf
Markdown: https://reloop.sh/docs/integrations/windsurf.md
[Windsurf](https://codeium.com/windsurf) is an agentic IDE built by Codeium. You can register Reloop's MCP server to grant the Windsurf agent capability to dispatch emails and interact with the Reloop platform.
---
## Step 1: Add Reloop MCP to Windsurf Config
1. Open Windsurf and navigate to **Settings** → **Developer Tools** → **MCP**.
2. Click **Add Server**.
3. Input the following configurations:
- **Name**: `reloop`
- **Transport**: `STDIO`
- **Command**: `npx`
- **Arguments**: `-y`, `reloop-mcp`
4. Set the environment variable:
- `RELOOP_API_KEY`: `rl_your_api_key`
5. Save the configuration.
---
## Step 2: Query the Agent
In the Windsurf chat or agent panel, prompt the agent:
> "Send an onboarding email to contact@example.com using the Reloop MCP tool."
---
# integrations/wordpress.mdx
Source: https://reloop.sh/docs/integrations/wordpress
Markdown: https://reloop.sh/docs/integrations/wordpress.md
By default, WordPress sends transactional emails (like password resets, user registrations, and order notifications) using PHP's built-in `mail()` function. These emails often lack authentication and end up in the spam folder.
Using **Reloop SMTP** ensures your WordPress emails are fully authenticated with SPF, DKIM, and DMARC, leading to high inbox delivery rates.
---
## Prerequisites
Before starting, make sure you have:
1. A verified sending domain in your [Reloop Dashboard](https://app.reloop.sh).
2. A Reloop API Key (which acts as your SMTP username and password).
---
## Step 1: Install an SMTP Plugin
To route WordPress emails through Reloop, you need to install an SMTP plugin. We recommend **WP Mail SMTP** (the most popular free option), but any standard SMTP plugin will work.
1. Log in to your WordPress Admin Dashboard.
2. Go to **Plugins** → **Add New**.
3. Search for **WP Mail SMTP**.
4. Click **Install Now** and then **Activate**.
---
## Step 2: Configure SMTP Settings
1. In your WordPress dashboard, navigate to **WP Mail SMTP** → **Settings**.
2. Under the **General** tab, configure the following:
- **From Email**: Enter a verified email address from your Reloop sending domain (e.g., `info@yourdomain.com`). Check the **Force From Email** box to ensure consistency.
- **From Name**: The sender name you want your recipients to see.
3. Scroll down to the **Mailer** section and select **Other SMTP**.

4. Enter the Reloop SMTP credentials under the **Other SMTP** settings:
| Setting | Value |
| :--- | :--- |
| **SMTP Host** | `smtp.reloop.sh` |
| **Encryption** | `TLS` (or `STARTTLS` depending on the plugin) |
| **SMTP Port** | `587` |
| **Auto TLS** | **ON** |
| **Authentication** | **ON** |
| **SMTP Username** | *Your Reloop API Key* (starts with `rl_`) |
| **SMTP Password** | *Your Reloop API Key* (starts with `rl_`) |
5. Click **Save Settings**.
---
## Step 3: Send a Test Email
Verify that WordPress can successfully connect and send emails through Reloop.
1. In the WP Mail SMTP menu, go to the **Tools** tab (or **Email Test**).
2. In the **Send To** field, enter your personal email address.
3. Click **Send Email**.
4. Check your inbox (and spam folder) for the test message. Once received, check your **Reloop Dashboard Logs** to see the delivery metrics and headers.
---
## Troubleshooting
### Email Bounced with "Domain Verification Required"
Verify that the **From Email** configured in WP Mail SMTP belongs to a domain you have added and fully verified (with valid MX, TXT, and CNAME records) in the Reloop dashboard. Reloop will block emails sent from unverified domains.
### Connection Timeout (Port 587 Blocked)
Some shared hosting providers block outgoing port `587` to prevent spam. If the connection fails or times out:
1. Try changing the port to `2525` or `25` with `TLS` / `STARTTLS` encryption enabled.
2. If those are blocked, contact your hosting provider's support team to request that they open outbound connections on port `587` for `smtp.reloop.sh`.
---
# integrations/zapier.mdx
Source: https://reloop.sh/docs/integrations/zapier
Markdown: https://reloop.sh/docs/integrations/zapier.md
[Zapier](https://zapier.com) is the leading workflow automation platform. You can integrate Reloop with Zapier in two ways to send emails when triggers happen in other apps (like CRM updates, new form responses, or database inserts):
1. **SMTP Integration** (using Zapier's built-in **SMTP by Zapier** action)
2. **API Integration** (using Zapier's built-in **Webhooks by Zapier** action)
---
## Method 1: SMTP by Zapier
This is the easiest way to send plain text or HTML emails from any app trigger without writing API payloads.
### Step 1: Add a Trigger
Create a new Zap and configure the trigger app (e.g., Google Sheets, Typeform, Stripe).
### Step 2: Add the "SMTP by Zapier" Action
1. Search for and select **SMTP by Zapier** as your action step.
2. Select **Send Email** as the Event and click **Continue**.
### Step 3: Connect Reloop SMTP
In the **Choose Account** tab, set up the SMTP server configuration:
| Field | Value |
| :--- | :--- |
| **SMTP Host** | `smtp.reloop.sh` |
| **SMTP Port** | `587` |
| **Username** | *Your Reloop API Key* (starts with `rl_`) |
| **Password** | *Your Reloop API Key* (starts with `rl_`) |
| **Security/Encryption** | `TLS` or `STARTTLS` |
### Step 4: Configure Email Fields
Set up the message template by mapping dynamic fields from your trigger step:
- **From Email**: Enter a verified email address from your Reloop sending domain (e.g., `notification@yourdomain.com`).
- **To**: Select the recipient's email address from your trigger.
- **Subject**: Enter the subject line (you can mix static text and dynamic fields).
- **Body (HTML or Text)**: Enter the body of the email. Set **Format** to `html` if you want to send styled content.
---
## Method 2: Webhooks by Zapier (REST API)
Use this method if you need advanced features like email tagging, custom headers, scheduling emails to send later, or attachments.
### Step 1: Add a Trigger
Set up your Zap's trigger step.
### Step 2: Add Webhooks by Zapier
1. Add a new action step and select **Webhooks by Zapier**.
2. Select **Custom Request** or **POST** as the Event and click **Continue**.
### Step 3: Configure the API Request
Fill out the API endpoint details exactly as follows:
- **Method**: `POST`
- **URL**: `https://reloop.sh/api/mail/v1/send`
- **Data (Payload)**: Define your email parameters in JSON format. For example:
```json
{
"from": "Your Company ",
"to": "recipient@example.com",
"subject": "Hello from Zapier Webhook!",
"html": "Hi {{first_name}}, this email was sent automatically.
",
"tags": [
{
"name": "source",
"value": "zapier"
}
]
}
```
*Note: Replace `{{first_name}}` and `recipient@example.com` with dynamic values from your Zap trigger.*
- **Headers**: Add the following headers for authorization:
| Header Name | Value |
| :--- | :--- |
| **x-api-key** | *Your Reloop API Key* |
| **Content-Type** | `application/json` |
---
## Step 4: Test your Zap
Click **Test Step** in Zapier. You should receive a `200 OK` response with a `messageId`. Verify the message has arrived in the recipient's inbox and appears under the Logs tab in your **Reloop Dashboard**.
---
# learn/agent-inbox.mdx
Source: https://reloop.sh/docs/learn/agent-inbox
Markdown: https://reloop.sh/docs/learn/agent-inbox.md
The Reloop **Agent Inbox** turns static inbound email addresses into active, programmable endpoints. Instead of simply forwarding raw emails, Reloop routes inbound messages through our AI processing engine to extract structured data, classify intent, and trigger downstream handlers.
## Key capabilities
* **AI classification**: Automatically categorize inbound messages (e.g. Support, Billing, Sales, Spam) and extract sentiment.
* **Structured data extraction**: Parse variables out of the email body (like invoice numbers, customer names, or tracking codes) using JSON schemas.
* **Automated routing**: Forward parsed payloads directly to custom webhooks or enqueue them in NATS messaging topics.
* **Inline conversational replies**: Send automated AI-drafted replies or route them to human agents in the dashboard.
## How it works
1. **Inbound gateway**: Email is received via your verified sending domain (e.g. `support@yourdomain.com`).
2. **Parsing & normalization**: The HTML content, attachments, headers, and metadata are parsed.
3. **AI evaluation**: The inbox's custom prompt evaluates the content against defined rules.
4. **Action dispatch**: Webhooks are fired, database state is updated, or an automated reply is queued.
---
# learn/contacts/channels.mdx
Source: https://reloop.sh/docs/learn/contacts/channels
Markdown: https://reloop.sh/docs/learn/contacts/channels.md
## View all channels
The [Channels Dashboard](https://reloop.sh/dashboard/contacts/channels) shows every subscription channel in your organization, including subscriber count, visibility, and default enrollment.
Channels are topics contacts can opt in or out of — for example **Product Updates** or **Newsletter** — instead of a single global unsubscribe. Visibility and default subscription stay on the channel; enrollments live on each [contact](/docs/learn/contacts).
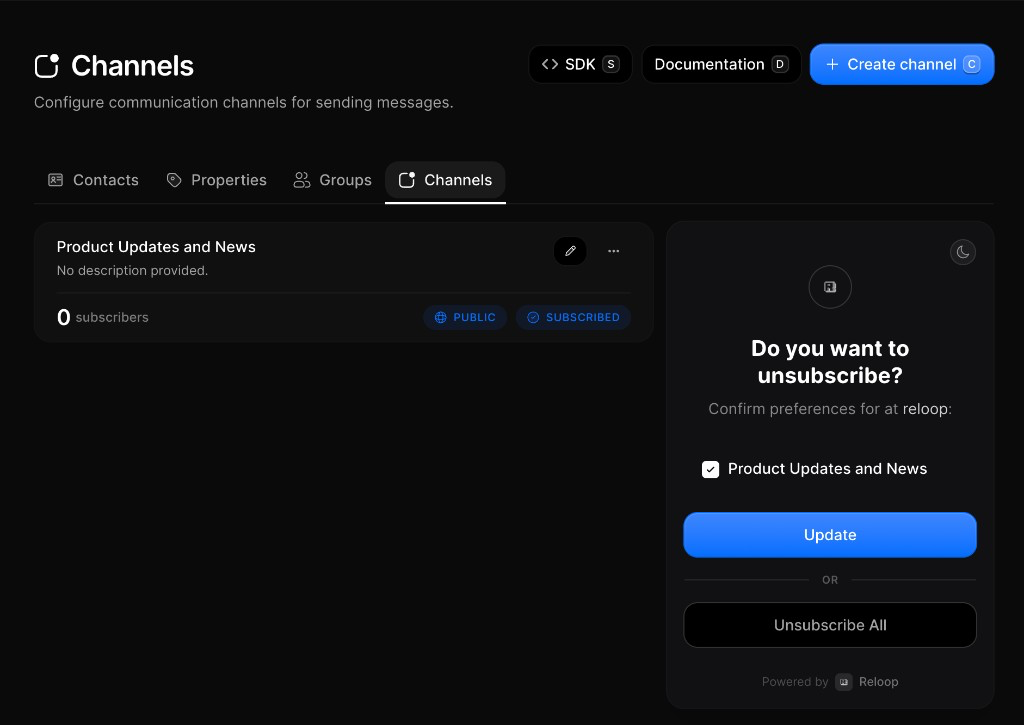
## Create a channel
1. Go to [Contacts → Channels](https://reloop.sh/dashboard/contacts/channels)
2. Click **Create channel** (or press `C`)
3. Enter a descriptive name (e.g. `Product Updates` or `Newsletter`)
4. Optionally add a description, set **Default Subscription**, and choose **Public Channel**
5. Click **Create Channel** (or press `Enter`)
**Default Subscription** controls whether new contacts are enrolled automatically (**opt-in**) or must be enrolled manually (**opt-out**). **Public** channels appear on the preference center; **private** channels stay hidden from subscribers.
## Edit a channel
You can update a channel’s name, description, default subscription, and public/private visibility. Editing does not remove existing enrollments.
1. Go to [Contacts → Channels](https://reloop.sh/dashboard/contacts/channels)
2. Click the edit icon (or row menu **···** → **Edit Channel**)
3. Update the fields you need
4. Click **Update Channel** (or press `Enter`)
## View channel subscribers
**View Subscribers** opens Contacts filtered to contacts enrolled in that channel. The subscriber count on the channel card matches this enrolled list — not every contact in your organization.
1. Open [Contacts → Channels](https://reloop.sh/dashboard/contacts/channels)
2. Click the row menu (**···**) → **View Subscribers**
3. Review the filtered contacts list (clear the channel filter chip to see everyone again)
## Remove a contact from a channel
Removing a contact from a channel only updates that topic preference. The contact stays in your organization and can remain enrolled in other channels.
1. Open [Contacts](https://reloop.sh/dashboard/contacts) (or open a contact detail)
2. Edit the contact and remove the channel (e.g. **Product Updates**)
3. Save the contact
## Delete a channel
Deleting removes the channel and its enrollment records. Contact profiles themselves remain in your organization.
1. Open [Contacts → Channels](https://reloop.sh/dashboard/contacts/channels)
2. Click the row menu (**···**) → **Delete Channel**
3. Confirm permanent removal
## View all channels
Fetch a paginated list of channels in your organization, or get a single channel by ID.
## Create a channel
Create a subscription channel with optional description, default subscription, and visibility.
## Edit a channel
## Enroll a contact in a channel
## Remove a contact from a channel
## Delete a channel
## FAQ
Subscription topics such as Product Updates or Newsletter. Contacts opt in or out per channel instead of a single global unsubscribe.
**Opt-in** enrolls new contacts automatically. **Opt-out** means contacts must be enrolled manually or choose to join themselves.
**Public** channels appear on the preference center so subscribers can manage them. **Private** channels are only visible in the Reloop dashboard.
No. Channel opt-out only affects that topic. The contact can remain subscribed overall and stay enrolled in other [channels](/docs/learn/contacts/channels).
Deleting removes the channel and its enrollment records. [Contact](/docs/learn/contacts) profiles themselves remain.
From the Channels page, open the row menu (**···**) and select **View Subscribers** to open Contacts filtered to that channel’s enrolled contacts.
## Related
Add, search, and manage people in your organization.
Lists you send to without changing subscription status.
Custom traits on each contact record.
## API reference
New channel.
All channels.
Channel details.
Change settings.
Add a contact to a channel.
Change channel enrollment.
Remove channel.
---
# learn/contacts/groups.mdx
Source: https://reloop.sh/docs/learn/contacts/groups
Markdown: https://reloop.sh/docs/learn/contacts/groups.md
## View all contact groups
The [Groups Dashboard](https://reloop.sh/dashboard/contacts/groups) shows every group in your organization. Open a group to see its members, rename it, or add and remove contacts.
Groups are lists you send to. One [contact](/docs/learn/contacts) can sit in many groups; the person stays a single record. Membership does not change subscription status — that stays on the contact.
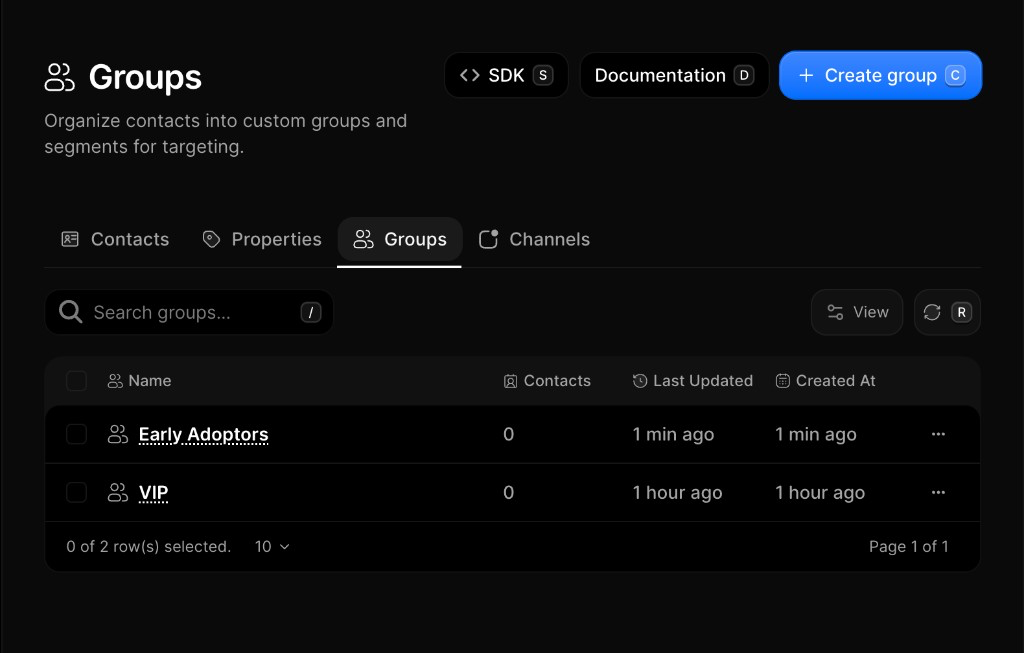
## Create a group
1. Go to [Contacts → Groups](https://reloop.sh/dashboard/contacts/groups)
2. Click **Create Group**
3. Enter a descriptive name (e.g. `VIP Customers` or `Free Trial`)
4. Click **Create Group** (or press `Enter`)
## Rename a group
Currently, only the **name** of a group can be edited. Renaming does not change members or how the group is targeted.
1. Go to [Contacts → Groups](https://reloop.sh/dashboard/contacts/groups)
2. Click a group to open its detail page
3. Edit the name in the header
4. Click **Save** (or press `Enter`)
## Add contacts to a group
Use groups to target campaigns without changing who someone is. For example, put trial users in **Free Trial** and paying customers in **VIP**, then send an upgrade campaign only to Free Trial.
1. Open a group from [Contacts → Groups](https://reloop.sh/dashboard/contacts/groups)
2. Click **Add Contacts to Group**
3. Search and select contacts (or **Select All**)
4. Click **Add Contacts**
## Remove contacts from a group
Removing a member leaves the contact in your organization — they only leave that list. Their profile, status, properties, and other group memberships are unchanged.
1. Open the group from [Contacts → Groups](https://reloop.sh/dashboard/contacts/groups)
2. Click the member row menu (**···**) → **Remove from Group**
3. Confirm removal
## Delete a group
Deleting soft-deletes the group. Contacts are not deleted — they stay in your organization and are no longer targeted via that group.
1. Open [Contacts → Groups](https://reloop.sh/dashboard/contacts/groups) (or open the group detail)
2. Click the row menu (**···**) → **Delete** (or delete from detail)
3. Confirm permanent removal
## View all contact groups
Fetch a paginated list of groups in your organization, or get a single group by ID.
## Create a group
Create a new group to segment contacts for targeted sends.
## Rename a group
## Add contacts to a group
## Remove contacts from a group
## Delete a group
## FAQ
Groups are lists you send to — for example VIP Customers or Free Trial. One contact can belong to many groups; the person stays a single [contact](/docs/learn/contacts) record.
No. Groups organize contacts for targeting. Subscription status and [channel](/docs/learn/contacts/channels) preferences stay on the contact itself.
Yes. Open the group in the dashboard and use **Add Contacts to Group**, or call the Groups API to add a member by contact ID or email.
The contact leaves that group only. Their profile, status, [properties](/docs/learn/contacts/properties), and other group memberships are unchanged.
Yes. Update changes the group **name** only — from the group detail header in the dashboard or via the Groups update API.
No. Deleting soft-deletes the group. Contacts stay in your organization; they are no longer targeted via that group.
No. There is no CSV import for group members today. Add members in the dashboard or via the API. **Export CSV** from a group detail includes email, status, and created-at only.
Reloop does not enforce a fixed maximum per organization. Create, add, and remove are rate-limited (**30** requests per **60** seconds per organization). List endpoints paginate (max page size **100**). See [Usage Limits](/docs/api/usage-limits).
## Related
Add, search, and manage people in your organization.
Custom traits on each contact record.
Subscription topics and channel preferences.
## API reference
New group.
All groups.
Group details.
List members.
Enroll a contact.
Unenroll a contact.
Rename group.
Delete group.
---
# learn/contacts/index.mdx
Source: https://reloop.sh/docs/learn/contacts
Markdown: https://reloop.sh/docs/learn/contacts.md
## View all contacts
The [Contacts Dashboard](https://reloop.sh/dashboard/contacts) shows you all the contacts in your organization along with their status, audience totals, and recent activity.
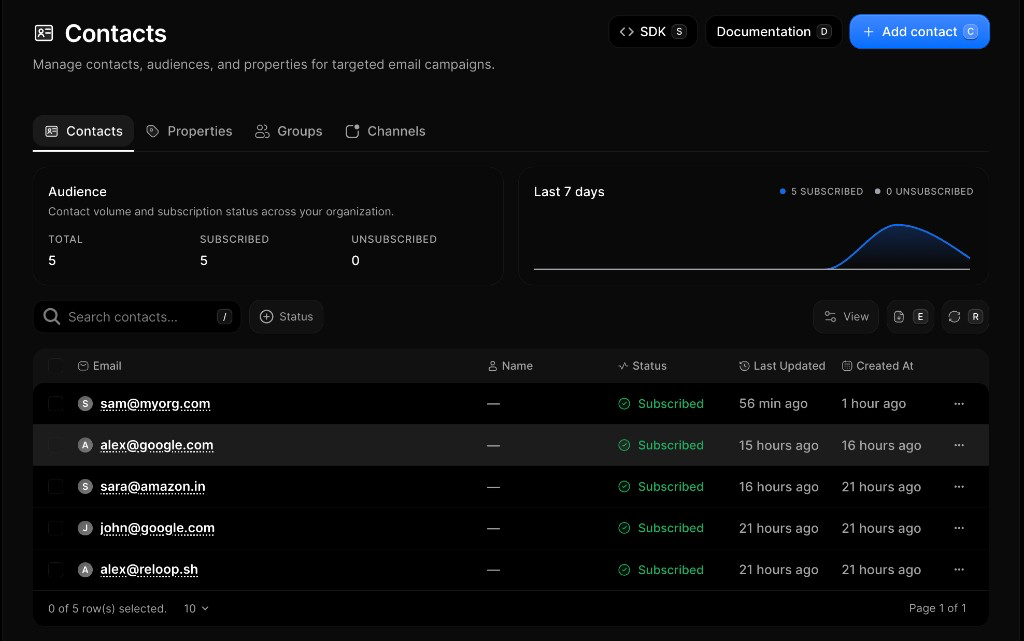
## Add a contact
1. Go to [Contacts](https://reloop.sh/dashboard/contacts)
2. Click **Add contact** (or press `C`)
3. Choose **Import CSV file**, **Copy paste**, or **Sync via SDK**
4. Finish that flow — map CSV columns, paste emails, or follow the SDK snippets
5. Confirm to add the contacts
Email is unique per organization. If the address already exists, Reloop returns an error — update that contact instead of creating another one.
## Search and filter contacts
1. Open [Contacts](https://reloop.sh/dashboard/contacts)
2. Use **Search contacts…** (or press `/`) to find by email
3. Optionally filter by **Status** (Subscribed, Unsubscribed, or Blocked)
4. Click a row to open detail — or use **Export CSV** (`E`) for an offline copy
## Edit a contact
You can update a contact’s name or [properties](/docs/learn/contacts/properties). Subscription status is changed separately with [Subscribe or unsubscribe](#subscribe-or-unsubscribe-a-contact).
1. Go to [Contacts](https://reloop.sh/dashboard/contacts)
2. Click the row menu (**···**) next to the contact you want to edit
3. Select **Edit**
4. Update the fields and click **Update** (or press `Enter`)
## Subscribe or unsubscribe a contact
Unsubscribing opts the contact out of your list without deleting them. Status can be `subscribed`, `unsubscribed`, or `blocked` (often from deliverability).
1. Open [Contacts](https://reloop.sh/dashboard/contacts)
2. Click the row menu (**···**) → **Subscribe** or **Unsubscribe**
3. The contact status updates on the row
## Delete a contact
Deleting permanently removes the contact record. Recreate the contact if you need them again.
1. Open [Contacts](https://reloop.sh/dashboard/contacts)
2. Click the row menu (**···**) → **Delete**
3. Confirm permanent removal
## View all contacts
Fetch a paginated list of contacts in your organization.
## Add a contact
Create a contact with email and optional name, status, properties, groups, or channels.
Email is unique per organization. A duplicate email returns an error — update the existing contact instead.
## Edit a contact
## Subscribe or unsubscribe a contact
## Delete a contact
## FAQ
Yes. A Reloop contact is one person record keyed by a unique email address in your organization. Subscription status, custom properties, groups, and channel preferences all live on that same record.
Email is unique per organization. Creating a contact with an email that already exists returns an error — [update](#edit-a-contact) the existing contact instead of creating another one.
**Unsubscribed** means the contact opted out of your list. **Blocked** usually comes from deliverability issues such as a hard bounce or spam complaint, with a suppression reason on the contact.
Yes. From the contacts list in the dashboard, use **Export CSV** to download email, status, and created-at for the current view.
Use the Reloop SDK or REST API to create, list, get, update, and delete contacts — same operations as the dashboard.
No built-in two-way CRM sync. Use the Contacts API and [webhooks](/docs/webhooks) to sync yourself, or connect [Zapier](/docs/integrations/zapier) / [n8n](/docs/integrations/n8n) between Reloop and your CRM.
Yes — `contact.create`, `contact.update`, `contact.delete`, `contact.subscribed`, `contact.unsubscribed`, and `contact.blocked`. See [Contact webhooks](/docs/webhooks/contacts/created) and [event types](/docs/webhooks/event-types).
Yes. Limits are per organization (e.g. create **200**/min, list/get **60**/min, update/delete **30**/min). Over the limit → `429` with `Retry-After`. Full table: [Usage Limits](/docs/api/usage-limits).
No fixed total-contact cap per plan. You can store as many contacts as you need; bulk create/update is still gated by [API rate limits](/docs/api/usage-limits).
## Related
Custom string and number fields.
Lists for targeted sends.
Per-topic subscription preferences.
## API reference
Add a new contact.
Paginated list of organization contacts.
Get a contact by ID.
Change name, status, or properties.
Permanently delete a contact.
---
# learn/contacts/properties.mdx
Source: https://reloop.sh/docs/learn/contacts/properties
Markdown: https://reloop.sh/docs/learn/contacts/properties.md
## View all contact properties
The [Properties Dashboard](https://reloop.sh/dashboard/contacts/properties) shows every custom field in your organization — name, type, default, and when it was last updated.
Properties are custom **String** or **Number** fields you attach to a [contact](/docs/learn/contacts). Use them for personalization and targeting (for example `company` or `plan_tier`). An optional default is used when a contact has no value set.
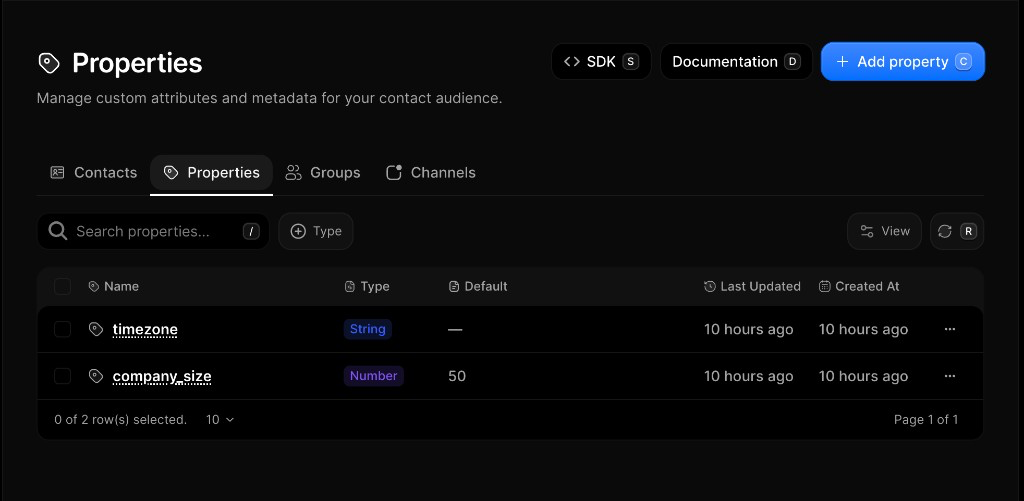
## Create a property
1. Go to [Contacts → Properties](https://reloop.sh/dashboard/contacts/properties)
2. Click **Add property** (or press `C`)
3. Enter a name (e.g. `plan_tier` or `company_size`) — letters, numbers, and underscores only
4. Choose type **String** or **Number**, and optionally set a default
5. Click **Add property** (or press `Enter`)
## Edit a property
After create, only the **default (fallback)** value can be changed. Name and type are fixed. To use a different name, create a new property and set values on contacts under that name.
1. Go to [Contacts → Properties](https://reloop.sh/dashboard/contacts/properties)
2. Click the row menu (**···**) next to the property you want to edit
3. Select **Edit**
4. Update the default value and click **Save** (or press `Enter`)
## Set values on a contact
The Properties page defines the **schema**. Values live on each contact — set them when you edit a contact in the dashboard or via the Contacts update API.
1. Open [Contacts](https://reloop.sh/dashboard/contacts)
2. Click the row menu (**···**) → **Edit** (or open the contact)
3. Fill the custom property fields (e.g. `plan_tier`, `timezone`, `company_size`)
4. Click **Update** (or press `Enter`)
## Delete a property
Deleting removes the schema definition. Existing contacts keep raw key-value data, but the field is no longer managed globally.
1. Open [Contacts → Properties](https://reloop.sh/dashboard/contacts/properties)
2. Click the row menu (**···**) → **Delete**
3. Confirm permanent removal
## View all contact properties
Fetch a paginated list of property definitions in your organization.
## Create a property
Create a new String or Number property schema for your contacts.
## Edit a property
## Set values on a contact
Set custom property values when you update a contact.
## Delete a property
## FAQ
Properties are small details you add to a contact — custom **String** or **Number** fields with an optional default. Use them for personalization and targeting (for example `company` or `plan_tier`).
**String** (free-form text) and **Number** (integer or decimal), plus an optional fallback when a contact has no value.
Deleting removes the schema definition. Existing contacts keep raw key-value data, but the field is no longer managed globally.
Use letters, numbers, and underscores only. Names must start with a letter or underscore. Spaces become underscores. When setting values on a contact, names must be lowercase (`a-z`, `0-9`, underscores).
No. After you create a property, you can only change its **default (fallback)** value — name and type stay fixed. To use a different name, create a new property and set values on contacts under that name.
No. Names are unique per organization by exact name. When setting values on a contact, names must be lowercase (`a-z`, `0-9`, underscores) — don’t rely on casing variants as separate fields.
Yes. The Properties page defines the shared field (schema). Each contact stores its own value. The optional default is only a fallback when a contact has no value set.
No. There is no CSV import for custom property values today. Set values when you [edit a contact](/docs/learn/contacts) in the dashboard or via the Contacts update API. **Export CSV** from the contacts list includes email, status, and created-at only.
Reloop does not enforce a fixed maximum per organization. Create is rate-limited (**30** requests per **60** seconds per organization). See [Usage Limits](/docs/api/usage-limits).
## Related
Add, search, and manage people in your organization.
Segment contacts for targeted sends.
Subscription topics and channel preferences.
## API reference
New property schema.
All properties.
Change default value.
Remove schema.
---
# learn/domain.mdx
Source: https://reloop.sh/docs/learn/domain
Markdown: https://reloop.sh/docs/learn/domain.md
## View all domains
The [Domains Dashboard](https://reloop.sh/dashboard/domain) lists every domain in your organization with status, search, and filters.

## Add a domain
1. Go to [Domains](https://reloop.sh/dashboard/domain)
2. Click **Add domain** (or press `C`)
3. Enter the hostname (e.g. `acme.com` or `mail.acme.com`)
4. Optionally open **Advanced options** to set click/open tracking defaults
5. Click **Add Domain**
Reloop creates the domain in `pending` status and opens the DNS setup page with the records you need to publish.
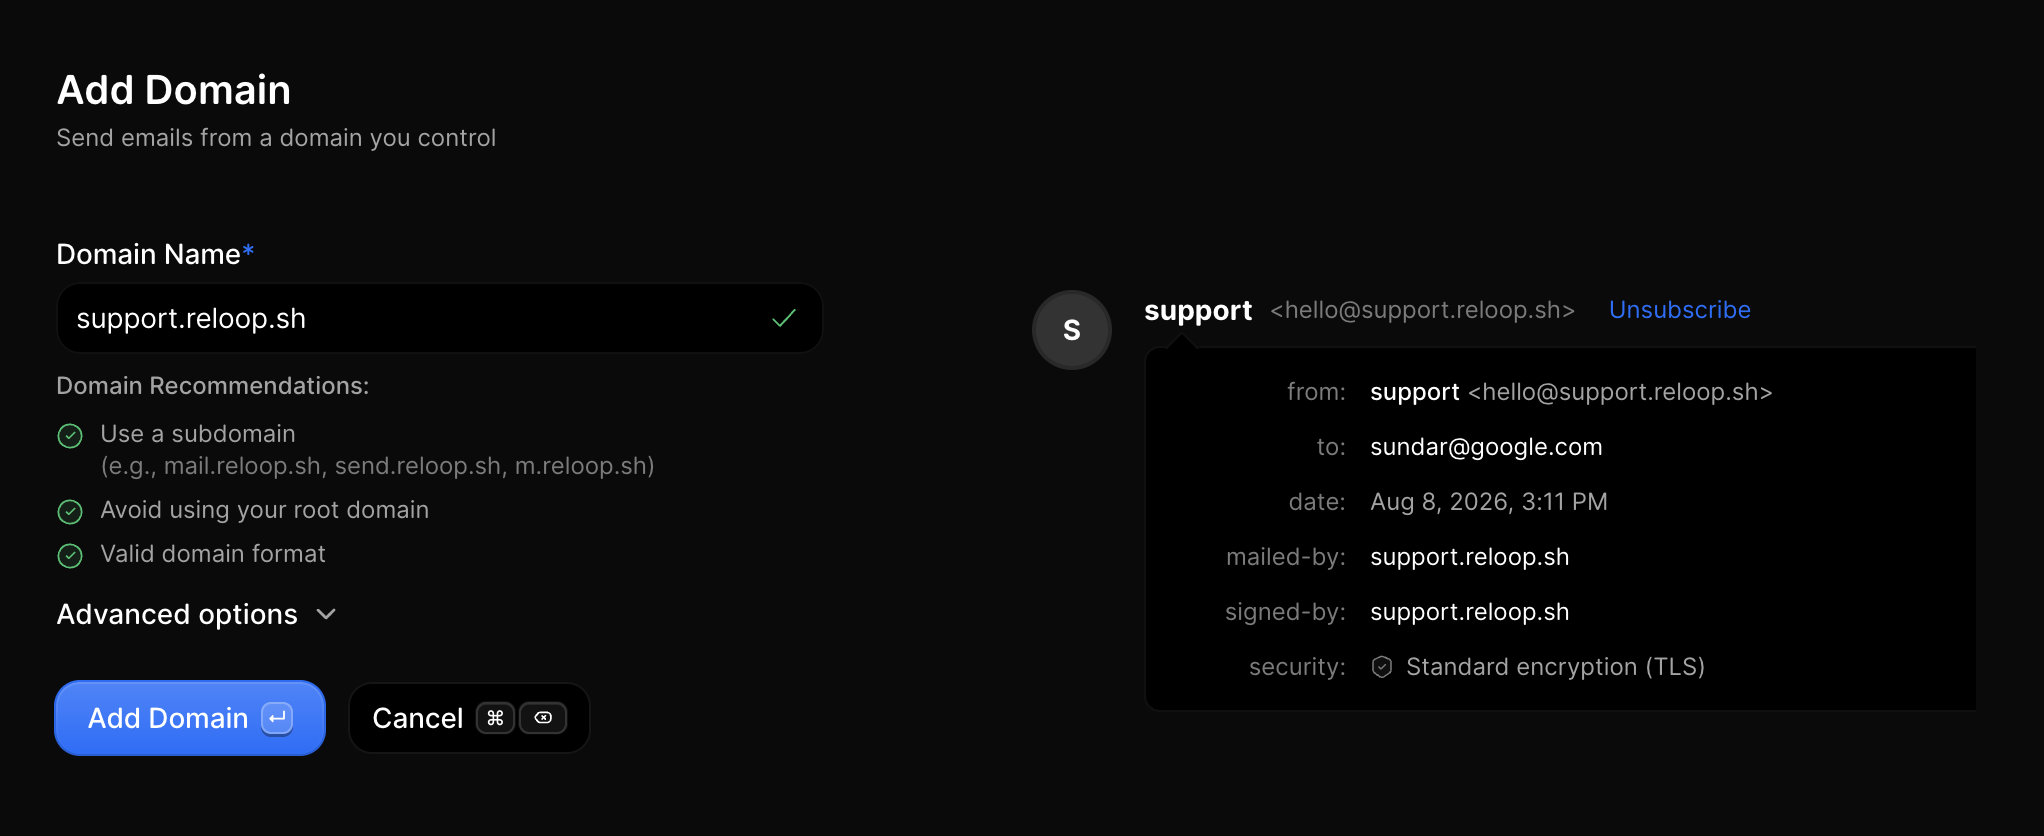
Prefer a guided path for beginners? See the full [Connect a domain](/docs/guides/connect-domain) guide — DNS basics, provider tutorials, and troubleshooting.
## Configure DNS
After you add a domain, Reloop shows the required DNS records (SPF, DKIM, DMARC, and MX/tracking when enabled).
**Auto-populate** (when available):
1. On the setup or domain page, click **Auto populate**
2. Approve Reloop’s Domain Connect template at your DNS host
3. Return to Reloop and [verify](#verify-a-domain)
**Manual setup:**
1. Copy each record from the Reloop DNS table
2. Add them at the host that manages your [nameservers](/docs/guides/connect-domain/find-dns-provider)
3. Merge SPF if you already have an SPF TXT — do not create a second SPF record
Deep dives: [Auto-populate](/docs/guides/connect-domain/auto-populate) · [Manual setup](/docs/guides/connect-domain/manual-setup) · [DNS records explained](/docs/guides/connect-domain/dns-records-explained) · [Provider guides](/docs/guides/connect-domain/providers)
## Verify a domain
1. Open the domain from [Domains](https://reloop.sh/dashboard/domain) (or stay on the post-add setup page)
2. Click **Verify** (or use the row/header menu → **Re-verify DNS**)
3. Wait for status to move through `pending` → `verifying` → `active`
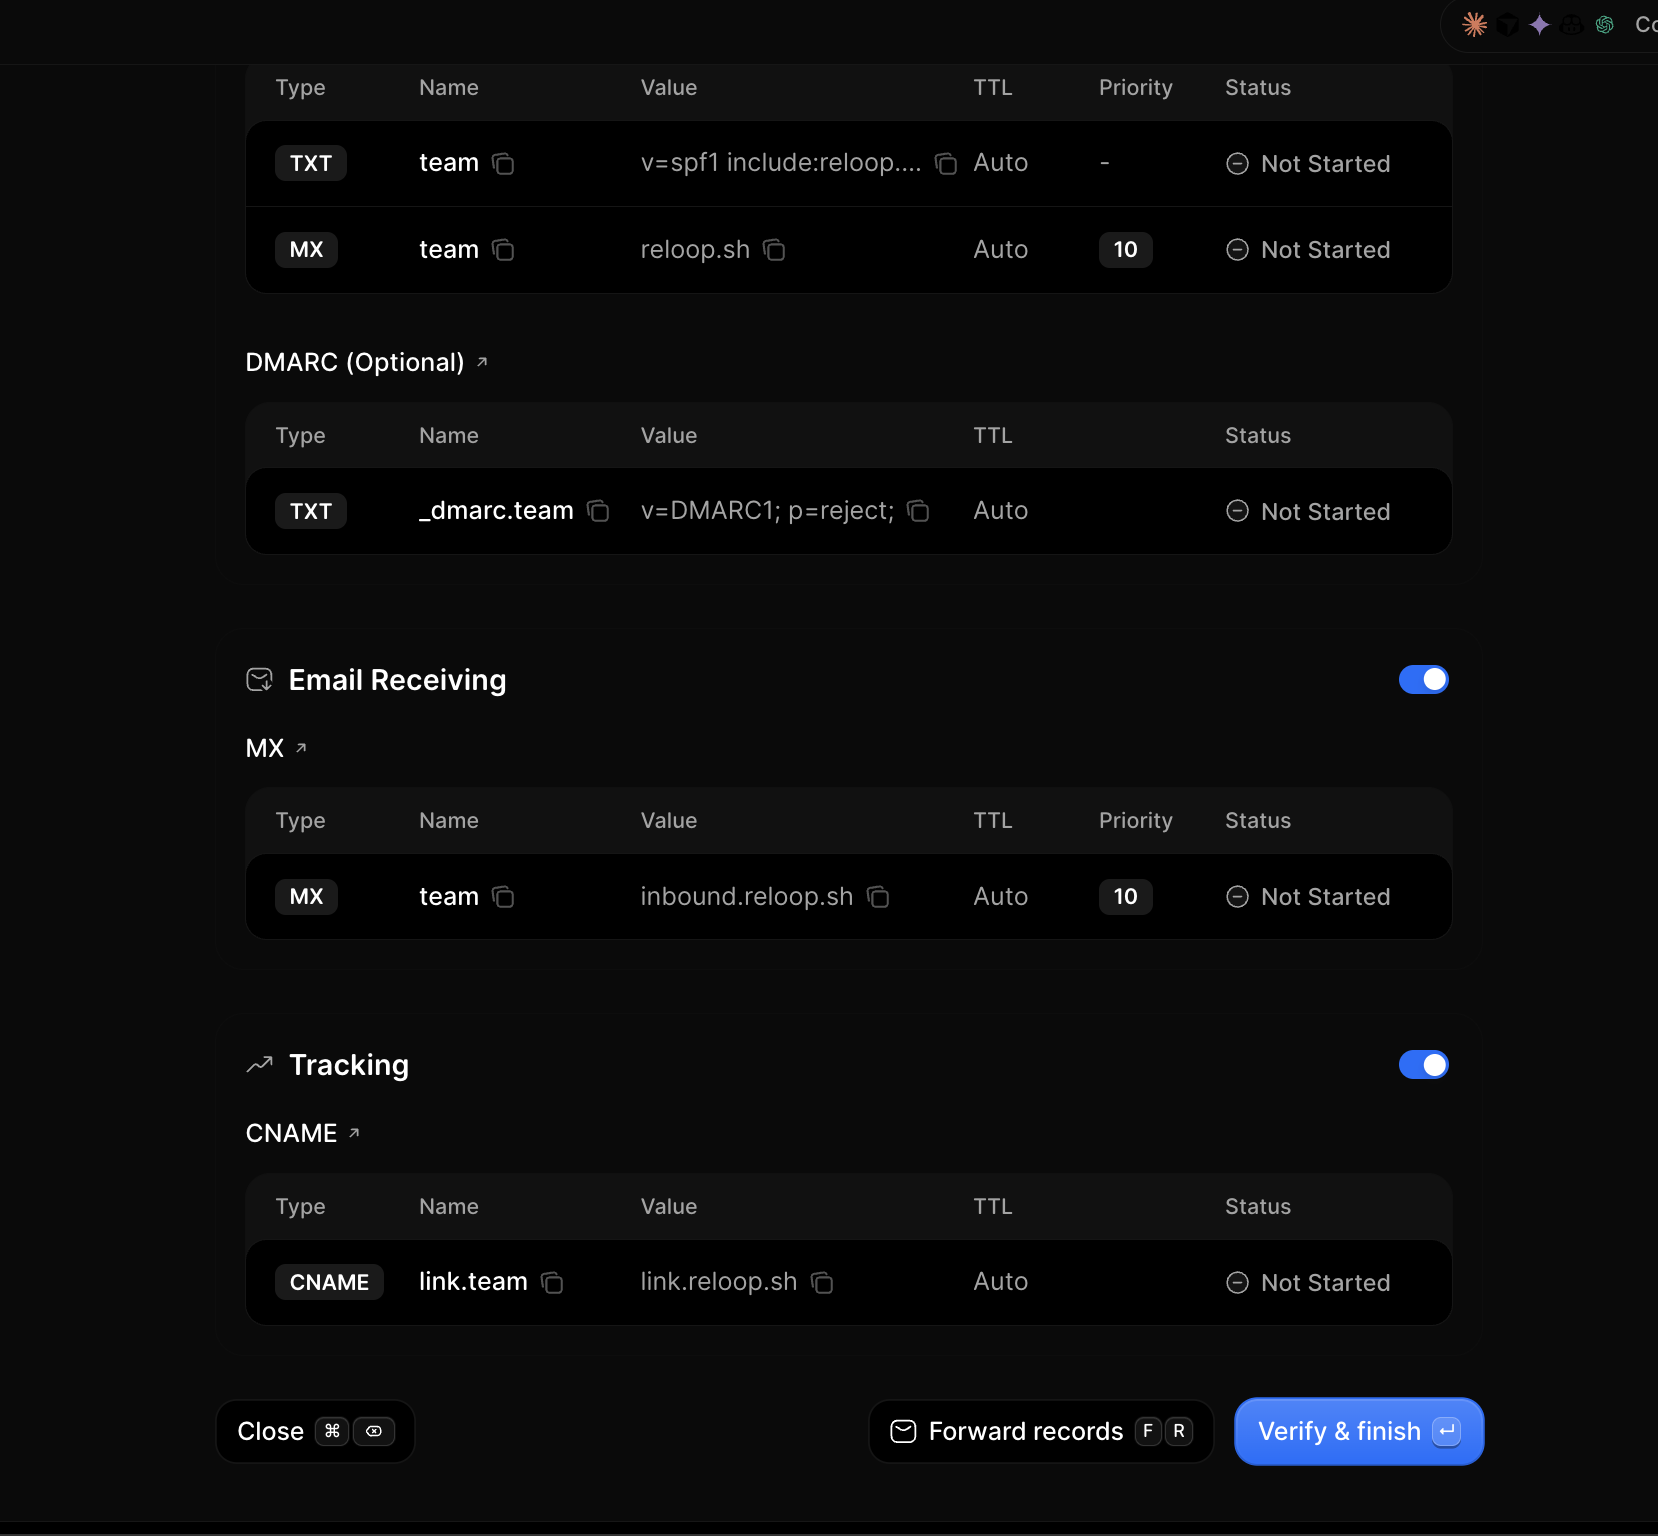
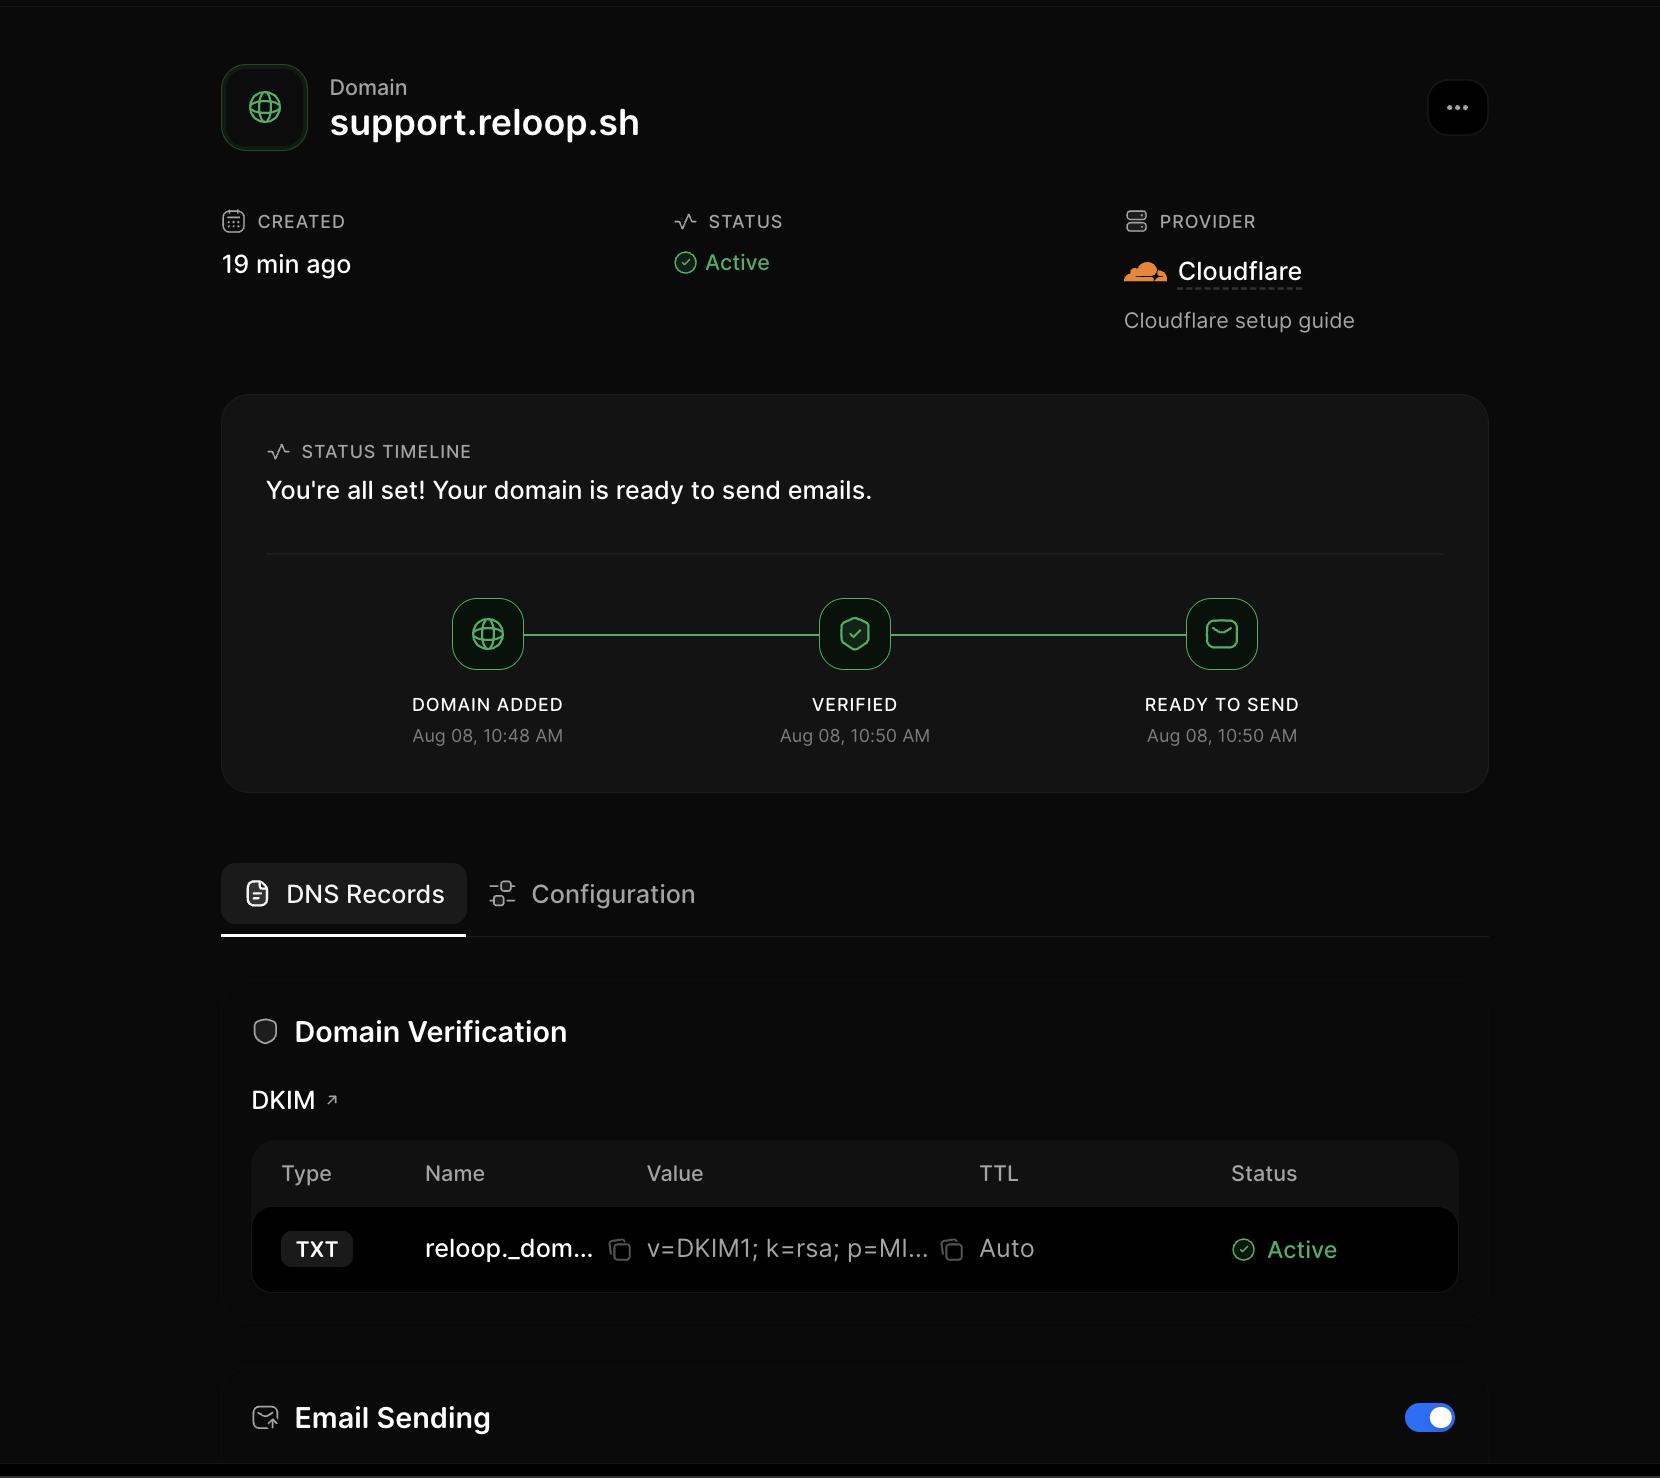
Status meanings and propagation tips: [Domain statuses](/docs/guides/connect-domain/verification/statuses) and [Propagation](/docs/guides/connect-domain/verification/propagation). Stuck? [Domain not verifying](/docs/guides/connect-domain/troubleshoot/not-verifying).
## Configure sending, receiving, and tracking
On the domain detail page you can toggle capabilities without deleting the domain:
1. Open [Domains](https://reloop.sh/dashboard/domain) and click a domain
2. On the **DNS** tab, toggle **Email Sending**, **Email Receiving**, or **Tracking** as needed
3. Open the **Configuration** tab for click tracking, open tracking, and TLS (`opportunistic` or `enforced`)
Receiving uses Reloop MX and can conflict with Google Workspace, Microsoft 365, or other inbox hosts. See [Sending vs receiving](/docs/guides/connect-domain/sending-vs-receiving) and [Avoid MX conflicts](/docs/guides/avoid-mx-conflicts).
## Forward DNS records
Share the Reloop DNS table with a teammate who manages DNS:
1. Open the domain detail or setup page
2. Click **Forward Records** (or use the row/header menu)
3. Enter the recipient email and send
## Delete a domain
Deleting permanently removes the domain from Reloop. You can no longer send with that hostname until you add and verify it again. Optionally remove Reloop DNS rows at your host afterward — see [Remove a domain](/docs/guides/connect-domain/after/remove-domain).
1. Open [Domains](https://reloop.sh/dashboard/domain)
2. Click the row menu (**···**) → **Delete Domain** (or open the domain and use the header menu)
3. Type the confirmation text and confirm permanent removal
You can also select multiple domains on the list and delete them in bulk.
## View all domains
Fetch a paginated list of domains in your organization.
## Add a domain
Create a domain and receive the DNS records Reloop expects you to publish.
Creating a domain does not verify it. Publish DNS (Auto-populate or manual), then call verify.
## Verify a domain
## Update domain configuration
Toggle sending, receiving, click/open tracking, or TLS.
## Delete a domain
## FAQ
Verification proves you control DNS for that hostname and publishes SPF, DKIM, and related records so mailbox providers can authenticate mail from Reloop. Unverified domains cannot send reliably.
**Auto-populate** uses [Domain Connect](/docs/guides/connect-domain/auto-populate) so your DNS host applies Reloop’s records after you approve a template. **Manual setup** means copying each TXT, MX, and CNAME into your DNS panel yourself.
Yes. Reloop supports root domains (e.g. `acme.com`) and subdomains (e.g. `mail.acme.com`). Subdomains are often easier when the root already has other email or DNS services. See [What is a domain?](/docs/guides/connect-domain/what-is-a-domain) and [Subdomain vs root](/docs/guides/subdomain-vs-root).
Toggles pause that capability without deleting the domain. Disabling **sending** blocks outbound From addresses on that domain; disabling **receiving** turns off Reloop inbound MX for that host. Re-enable either anytime from the domain detail page or the Update Domain API.
Often minutes after records publish, but propagation can take up to 48 hours depending on TTL and your DNS host. Click **Verify** / **Re-verify DNS** after changes. Details: [Propagation](/docs/guides/connect-domain/verification/propagation).
Confirm you edited DNS at the **nameserver** host, merge SPF instead of adding a second SPF TXT, check DKIM/DMARC hostnames for typos, then follow [Domain not verifying](/docs/guides/connect-domain/troubleshoot/not-verifying).
Yes — `domain.create`, `domain.updated`, and `domain.deleted`. See [Domain webhooks](/docs/webhooks/domains/created) and [event types](/docs/webhooks/event-types).
## Related
Full DNS setup guide for beginners and experts.
Send after your domain is active.
Authenticate REST and SMTP with API keys.
## API reference
Add a domain and get DNS records.
Paginated list of organization domains.
Get a domain by ID.
Toggle sending, receiving, tracking, or TLS.
Check public DNS against Reloop records.
Email DNS records to a teammate.
Permanently remove a domain.
---
# learn/emails/details.mdx
Source: https://reloop.sh/docs/learn/emails/details
Markdown: https://reloop.sh/docs/learn/emails/details.md
### Key Capabilities
* **REST API & SMTP Relay**: Integrate using our REST API or point your existing app configurations to our high-performance SMTP relay.
* **SDK Support**: First-class SDKs available for Node.js, Go, Python, and Rust.
* **Instant Delivery Verification**: Real-time status updates from delivery to click.
* **Rich Styling Support**: Render using raw HTML, Markdown, or React-Email templates.
---
# learn/emails/index.mdx
Source: https://reloop.sh/docs/learn/emails
Markdown: https://reloop.sh/docs/learn/emails.md
Reloop provides robust outbound transactional mailing infrastructure built for developers. Scale from a few emails a day to millions, with instant delivery tracking and optimized rendering across clients.
---
# learn/index.mdx
Source: https://reloop.sh/docs/learn
Markdown: https://reloop.sh/docs/learn.md
Reloop is designed to simplify and supercharge your email workflows, combining high-deliverability outbound transactional mailing with a smart AI-powered inbound Agent Inbox, real-time logging, and interactive workflow automation.
Explore the core features of the Reloop platform:
Receive, route, and reply to inbound emails dynamically with AI classification.
Send transactional emails at scale with guaranteed delivery and rich styling.
Track click rates, open rates, bounces, and delivery performance.
Manage lists, segments, custom traits, and email suppressions.
Build reusable and dynamic email layouts using Lexical or raw HTML.
Manage fine-grained API credentials and rotate tokens securely.
Stream and search through detailed dispatch logs in real-time.
Configure SPF, DKIM, DMARC, and custom sending subdomains.
Create visual automated flows, drip campaigns, and auto-responders.
---
# learn/logs.mdx
Source: https://reloop.sh/docs/learn/logs
Markdown: https://reloop.sh/docs/learn/logs.md
Debug and audit your transactional flows with Reloop's real-time **Logs** console. View full SMTP transaction records, headers, payloads, and delivery feedback loops instantly.
## Key capabilities
* **Live streaming console**: Watch outbound dispatches and incoming webhook responses in real-time.
* **Full header inspection**: Inspect DKIM signatures, custom headers, and envelope addresses.
* **Error tracing**: Instantly view SMTP error codes, response strings, and bounce details returned by receiving servers.
* **Search & filters**: Query logs by status (delivered, bounced, opened), recipient, domain, or API key.
---
# learn/metrics.mdx
Source: https://reloop.sh/docs/learn/metrics
Markdown: https://reloop.sh/docs/learn/metrics.md
Gain complete visibility into your email sender reputation and user engagement with Reloop's detailed **Metrics** and analytics engine.
## Key capabilities
* **Delivery funnel**: Track Delivery, Open, Click, Bounce, Complaint, and Unsubscribe counts.
* **Granular time filtering**: Filter reports by hour, day, week, or month.
* **Tag & metadata filtering**: Group and analyze metrics by custom metadata tags (e.g. campaign ID, user region, email type).
* **PostgreSQL backed**: Delivery metrics are stored and queried in PostgreSQL alongside the rest of your Reloop data.
---
# learn/templates.mdx
Source: https://reloop.sh/docs/learn/templates
Markdown: https://reloop.sh/docs/learn/templates.md
Create and maintain beautiful email templates within Reloop. Use our interactive editor or write raw code to deploy production-ready layouts that render flawlessly across all email clients.
## Key capabilities
* **Lexical editor**: An intuitive visual drag-and-drop builder for creating complex responsive email layouts without writing HTML.
* **Variable interpolation**: Embed variables (`{{ contact.first_name }}`) to personalize emails dynamically during execution.
* **Layout inheritance**: Design universal headers/footers and extend them for newsletter, marketing, or transactional templates.
* **Developer previews**: Instantly test how templates render in dark mode, light mode, or mobile screens.
---
# learn/workflows.mdx
Source: https://reloop.sh/docs/learn/workflows
Markdown: https://reloop.sh/docs/learn/workflows.md
Design complex, multi-step customer journeys with Reloop **Workflows**. Connect inbound triggers, branch logic, delays, and customized email dispatches using a clean drag-and-drop interface.
## Key capabilities
* **Triggers**: Start workflows automatically based on events (e.g. contact added, webhook received, email link clicked).
* **Time delays**: Pause workflows for a specified number of minutes, hours, or days before executing the next action.
* **Conditional branching**: Split customer paths based on user traits, email engagement, or geographic regions.
* **Auto-responders**: Automatically reply to inbound inquiries with dynamic, personalized templates.
---
# self-host/azure.mdx
Source: https://reloop.sh/docs/self-host/azure
Markdown: https://reloop.sh/docs/self-host/azure.md
# Deploy on Azure
Coming Soon
---
# self-host/cloudflare.mdx
Source: https://reloop.sh/docs/self-host/cloudflare
Markdown: https://reloop.sh/docs/self-host/cloudflare.md
Coming Soon
---
# self-host/coolify.mdx
Source: https://reloop.sh/docs/self-host/coolify
Markdown: https://reloop.sh/docs/self-host/coolify.md
Coming Soon
---
# self-host/dokploy.mdx
Source: https://reloop.sh/docs/self-host/dokploy
Markdown: https://reloop.sh/docs/self-host/dokploy.md
Coming Soon
---
# self-host/index.mdx
Source: https://reloop.sh/docs/self-host
Markdown: https://reloop.sh/docs/self-host.md
Reloop is fully open-source and designed to be easily self-hosted on your own servers or cloud providers. By hosting Reloop yourself, you maintain complete ownership of your email data, templates, and analytics logs.
---
## Deployment Options
You can self-host Reloop in production using several approaches:
- **Docker Compose**: Recommended for small to medium deployments, staging environments, and single-instance setups.
- **Kubernetes**: Recommended for high-availability, auto-scaling production deployments.
- **Bare Metal / Virtual Machines**: For running the services directly using Bun/Node.js.
---
## Platform Deployments
Deployment templates and guides for popular cloud providers and self-hosted PaaS solutions are coming soon.
Deploy with one-click on Coolify self-hosted PaaS. (Coming Soon)
Easily deploy on your self-hosted Dokploy instance. (Coming Soon)
Standard VPS deployment guides for Ubuntu, Debian, and more. (Coming Soon)
Deploy the frontend and serverless endpoints on Vercel. (Coming Soon)
Deploy the entire Reloop stack on Railway with one click. (Coming Soon)
Enterprise-grade cloud deployment on Microsoft Azure. (Coming Soon)
Run the frontend and edge worker endpoints on Cloudflare. (Coming Soon)
Deploy and host the web application on Netlify. (Coming Soon)
---
# self-host/netlify.mdx
Source: https://reloop.sh/docs/self-host/netlify
Markdown: https://reloop.sh/docs/self-host/netlify.md
Coming Soon
---
# self-host/railway.mdx
Source: https://reloop.sh/docs/self-host/railway
Markdown: https://reloop.sh/docs/self-host/railway.md
Coming Soon
---
# self-host/requirements.mdx
Source: https://reloop.sh/docs/self-host/requirements
Markdown: https://reloop.sh/docs/self-host/requirements.md
Before deploying the Reloop stack, ensure your server environment meets the hardware and software specifications outlined below.
## Hardware Requirements
Reloop's performance is highly dependent on database throughput and the speed of processing background queues.
| Resource | Minimum Requirement | Recommended (Production) |
| :--- | :--- | :--- |
| **CPU** | 2 vCPUs | 4+ vCPUs |
| **RAM** | 4 GB | 8 GB+ |
| **Storage** | 20 GB SSD | 50 GB+ NVMe SSD |
> [!NOTE]
> SSD/NVMe storage is highly recommended. PostgreSQL stores relational data and telemetry logs, which benefit from fast disk I/O speeds to prevent latency.
---
## Software Requirements
Verify the following software and runtimes are installed on your hosting server:
* **Docker**: Version `24.0.0+`
* **Docker Compose**: Version `2.20.0+`
* **Bun**: Version `1.3.0+` (Only required if you run the microservices natively outside of Docker containers, or during the initial environment variables setup).
* **Git**: For cloning the repository and checking out configurations.
---
# self-host/services.mdx
Source: https://reloop.sh/docs/self-host/services
Markdown: https://reloop.sh/docs/self-host/services.md
Reloop is built using a highly modular microservice architecture. This separation allows you to scale specific components (such as mail queues or logs processing) depending on your server workload.
## Component Breakdown
The Reloop stack consists of **19 application services** (3 frontends, 16 backends) and **9 external backing systems**.
### 1. Frontend Services (3)
* **`web`**: The main public landing page and landing website.
* **`dashboard`**: The developer console where users manage domains, write templates, view delivery metrics, configure webhooks, and generate API keys.
* **`docs`**: The documentation portal you are viewing right now.
### 2. Backend Services (16)
* **`auth`**: Handles user registrations, authentications, and organization-scoped permission checks.
* **`api-key`**: Validates developer API tokens for programmatic integrations.
* **`domain`**: Verifies and manages domain records configurations (SPF, DKIM, MX, DMARC).
* **`mail`**: Manages template assembly, parsing, queuing, and delivery job dispatching.
* **`webhook`**: Dispatches delivery events (delivered, bounced, opened, clicked) to external webhooks.
* **`contacts`**: Handles subscriber lists, contact profiles, segments, and unsubscribe requests.
* **`logs`**: Centralizes activity streams and debug logs.
* **`workflow`**: Manages campaign automation workflows, timing wait steps, and drip actions.
* **`upload`**: Manages file storage attachments and static image uploads.
* **`template`**: Compiles dynamic template variables before mailing dispatch.
* **`credits`**: Tracks account credit balances, billing cycles, and quotas.
* **`email`**: The core API service mapping outbound HTTP sending requests to the queue processor.
* **`inbox`**: Manages receiving inbox threads and incoming messages.
* **`smtp`**: Outbound SMTP submission server using KumoMTA.
* **`inbound`**: Inbound MX SMTP processing receiver using KumoMTA.
* **`spam`**: Anti-spam scoring backend using Rspamd (called by inbound over HTTP).
### 3. Supporting Infrastructure (6)
* **PostgreSQL**: Stores persistent relational data, email delivery logs, and activity logs.
* **Redis**: Coordinates task queues for BullMQ worker threads.
* **MinIO**: S3-compliant file storage.
* **NATS JetStream**: Real-time event broker.
* **Mailpit**: SMTP sandbox mail catcher.
* **Caddy**: High-performance reverse proxy and automatic SSL manager.
---
# self-host/vercel.mdx
Source: https://reloop.sh/docs/self-host/vercel
Markdown: https://reloop.sh/docs/self-host/vercel.md
Coming Soon
---
# self-host/vps.mdx
Source: https://reloop.sh/docs/self-host/vps
Markdown: https://reloop.sh/docs/self-host/vps.md
Coming Soon
---
# setup/backend/api-key.mdx
Source: https://reloop.sh/docs/setup/backend/api-key
Markdown: https://reloop.sh/docs/setup/backend/api-key.md
Generation, hashing, validation, and revocation of developer API keys.
Run [`bun setup`](/docs/setup) once from the monorepo root. Env files come from `bun setup` / `bun env:setup`.
## Overview
| Property | Value |
| :--- | :--- |
| **Directory** | `apps/backend/api-key` |
| **Port** | `8012` |
| **Local URL** | [https://local.reloop.sh/api/api-key](https://local.reloop.sh/api/api-key) |
| **Swagger UI** | [https://local.reloop.sh/api/api-key/openapi](https://local.reloop.sh/api/api-key/openapi) |
| **Stack** | ElysiaJS · Better Auth API Key · PostgreSQL · Redis · NATS |
## Quick start
```bash
bun be:api-key:dev
```
Or `bun backend:dev` / `bun dev`.
## Environment
`apps/backend/api-key/.env` — from `bun setup` / `bun env:setup`.
```bash
PG_URL=postgresql://reloop:reloop123@localhost:5432/reloop
REDIS_URL=redis://:reloop123@localhost:6379
PORT=8012
BASE_URL="https://local.reloop.sh"
NATS_URL=nats://localhost:4222
NODE_ENV=development
```
| Variable | Required | Default |
| :--- | :--- | :--- |
| `PG_URL` | **YES** | `postgresql://...` |
| `REDIS_URL` | **YES** | `redis://...` |
| `PORT` | **YES** | `8012` |
| `BASE_URL` | **YES** | `https://local.reloop.sh` |
| `NATS_URL` | **YES** | `nats://localhost:4222` |
## Commands
| Command | Description |
| :--- | :--- |
| `bun be:api-key:dev` | Start dev server with hot reloading |
| `bun run --filter=be-api-key build` | Compile production bundle |
| `bun run --filter=be-api-key start` | Run compiled production build |
| `bun run --filter=be-api-key check-types` | TypeScript type-check |
## Architecture
| Layer | Detail |
| :--- | :--- |
| **Auth** | `@better-auth/api-key` handles SHA-256 hashing and key formatting |
| **Caching** | Validated keys are cached in Redis for fast lookups |
| **Events** | Key lifecycle events published to NATS under `api-key.*` |
| **Schema** | `apikey` table in `packages/db/src/schema/api-key.ts` |
## Next
One-command local bootstrap
Gateway routes and ports
Sessions and organizations
API that validates keys on send
---
# setup/backend/auth.mdx
Source: https://reloop.sh/docs/setup/backend/auth
Markdown: https://reloop.sh/docs/setup/backend/auth.md
User signup, login, sessions, organizations, and workspace membership via **Better Auth**.
Run [`bun setup`](/docs/setup) once from the monorepo root (Postgres + Redis via Docker). Env files come from `bun setup` / `bun env:setup`.
## Overview
| Property | Value |
| :--- | :--- |
| **Directory** | `apps/backend/auth` |
| **Port** | `8000` |
| **Local URL** | [https://local.reloop.sh/api/auth](https://local.reloop.sh/api/auth) |
| **Swagger UI** | [https://local.reloop.sh/api/auth/openapi](https://local.reloop.sh/api/auth/openapi) |
| **Stack** | ElysiaJS · Better Auth · PostgreSQL · Redis · NATS |
## Quick start
```bash
bun be:auth:dev
```
Or start every backend: `bun backend:dev` / `bun dev`.
Open the dashboard at [https://local.reloop.sh/dashboard](https://local.reloop.sh/dashboard), not `localhost:3001`. Session cookies are scoped to `local.reloop.sh`. Local OTP is `888888`.
## Environment
`apps/backend/auth/.env` — created/merged by `bun setup` / `bun env:setup` from `.env.dev`.
```bash
# Database & Cache
PG_URL=postgresql://reloop:reloop123@localhost:5432/reloop
REDIS_URL=redis://:reloop123@localhost:6379
# Better Auth
BETTER_AUTH_SECRET=tENkVU4GrhckuRw4Bcfh93EWgXOFcszn
BASE_URL="https://local.reloop.sh"
PORT=8000
NODE_ENV=development
# Event Bus
NATS_URL=nats://localhost:4222
# Local dev helpers
DEFAULT_OTP=888888
DISABLE_SIGNUP=false
# OAuth (optional)
GOOGLE_CLIENT_ID=
GOOGLE_CLIENT_SECRET=
GITHUB_CLIENT_ID=
GITHUB_CLIENT_SECRET=
```
| Variable | Required | Default | Notes |
| :--- | :--- | :--- | :--- |
| `PG_URL` | **YES** | `postgresql://...` | Shared Postgres from Docker |
| `REDIS_URL` | **YES** | `redis://...` | Sessions and rate limits |
| `BETTER_AUTH_SECRET` | **YES** | — | Session encryption key |
| `BASE_URL` | **YES** | `https://local.reloop.sh` | Public origin for OAuth / invites |
| `PORT` | **YES** | `8000` | Host port |
| `NATS_URL` | **YES** | `nats://localhost:4222` | Event bus |
| `DEFAULT_OTP` | No | `888888` | Dev OTP bypass |
| `DISABLE_SIGNUP` | No | `false` | Set `true` after creating an admin |
## Commands
| Command | Description |
| :--- | :--- |
| `bun be:auth:dev` | Start dev server with hot reloading |
| `bun run --filter=be-auth build` | Compile production bundle |
| `bun run --filter=be-auth start` | Run compiled production build |
| `bun run --filter=be-auth check-types` | TypeScript type-check |
## Architecture
| Layer | Detail |
| :--- | :--- |
| **Sessions** | Better Auth manages login, OAuth, and cookie sessions via Redis + Postgres |
| **Multi-tenancy** | Users belong to organizations through `member` (`packages/db/src/schema/auth.ts`) |
| **Events** | Auth lifecycle events published to NATS under `auth.*` |
| **First login** | Use OTP `888888` locally when `DEFAULT_OTP` is set |
## Next
One-command local bootstrap
Gateway routes and ports
Product UI that consumes auth
Developer API keys
---
# setup/backend/contacts.mdx
Source: https://reloop.sh/docs/setup/backend/contacts
Markdown: https://reloop.sh/docs/setup/backend/contacts.md
Subscriber profiles, groups, channels, custom properties, and suppression lists.
Run [`bun setup`](/docs/setup) once from the monorepo root. Env files come from `bun setup` / `bun env:setup`.
## Overview
| Property | Value |
| :--- | :--- |
| **Directory** | `apps/backend/contacts` |
| **Port** | `8014` |
| **Local URL** | [https://local.reloop.sh/api/contacts](https://local.reloop.sh/api/contacts) |
| **Swagger UI** | [https://local.reloop.sh/api/contacts/openapi](https://local.reloop.sh/api/contacts/openapi) |
| **Stack** | ElysiaJS · PostgreSQL · Redis · NATS |
## Quick start
```bash
bun be:contacts:dev
```
Or `bun backend:dev` / `bun dev`.
## Environment
`apps/backend/contacts/.env` — from `bun setup` / `bun env:setup`.
```bash
PG_URL=postgresql://reloop:reloop123@localhost:5432/reloop
REDIS_URL=redis://:reloop123@localhost:6379
PORT=8014
BASE_URL="https://local.reloop.sh"
NATS_URL=nats://localhost:4222
PREFERENCES_SECRET="reloop-preferences-secret-key-change-in-prod"
NODE_ENV=development
```
`PREFERENCES_SECRET` signs preference-center tokens for [Links](/docs/setup/frontend/links). The service **refuses to start in production** if left at the default.
| Variable | Required | Default |
| :--- | :--- | :--- |
| `PG_URL` | **YES** | `postgresql://...` |
| `REDIS_URL` | **YES** | `redis://...` |
| `PORT` | **YES** | `8014` |
| `BASE_URL` | **YES** | `https://local.reloop.sh` |
| `NATS_URL` | **YES** | `nats://localhost:4222` |
| `PREFERENCES_SECRET` | Prod only | Dev default in `.env.dev` |
## Commands
| Command | Description |
| :--- | :--- |
| `bun be:contacts:dev` | Start dev server with hot reloading |
| `bun run --filter=be-contacts build` | Compile production bundle |
| `bun run --filter=be-contacts start` | Run compiled production build |
| `bun run --filter=be-contacts check-types` | TypeScript type-check |
## Architecture
| Layer | Detail |
| :--- | :--- |
| **Audience** | Contacts, groups, channels, and custom properties per organization |
| **Preferences** | Powers the [Links](/docs/setup/frontend/links) preference center |
| **Events** | Lifecycle events published to NATS under `contacts.*` |
| **Schema** | `contact`, `channel`, `group` in `packages/db/src/schema/` |
## Next
One-command local bootstrap
Gateway routes and ports
Preference center UI
Automations triggered by contacts
---
# setup/backend/credits.mdx
Source: https://reloop.sh/docs/setup/backend/credits
Markdown: https://reloop.sh/docs/setup/backend/credits.md
Subscription tiers, credit balances, usage tracking, and Stripe billing integration.
Run [`bun setup`](/docs/setup) once from the monorepo root. Env files come from `bun setup` / `bun env:setup`.
## Overview
| Property | Value |
| :--- | :--- |
| **Directory** | `apps/backend/credits` |
| **Port** | `8023` |
| **Local URL** | [https://local.reloop.sh/api/credits](https://local.reloop.sh/api/credits) |
| **Swagger UI** | [https://local.reloop.sh/api/credits/openapi](https://local.reloop.sh/api/credits/openapi) |
| **Stack** | ElysiaJS · PostgreSQL · NATS |
## Quick start
```bash
bun be:credits:dev
```
Or `bun backend:dev` / `bun dev`.
## Environment
`apps/backend/credits/.env` — from `bun setup` / `bun env:setup`.
```bash
PORT=8023
NODE_ENV=development
INITIAL_CREDITS=100
NATS_URL=nats://localhost:4222
```
| Variable | Required | Default |
| :--- | :--- | :--- |
| `PORT` | **YES** | `8023` |
| `INITIAL_CREDITS` | **YES** | `100` |
| `NATS_URL` | **YES** | `nats://localhost:4222` |
## Commands
| Command | Description |
| :--- | :--- |
| `bun be:credits:dev` | Start dev server with hot reloading |
| `bun run --filter=be-credits build` | Compile production bundle |
| `bun run --filter=be-credits start` | Run compiled production build |
| `bun run --filter=be-credits check-types` | TypeScript type-check |
## Architecture
| Layer | Detail |
| :--- | :--- |
| **Credits** | Tracks balances and blocks sends when credits reach zero |
| **Stripe** | Manages subscriptions, invoices, and billing webhooks |
| **Events** | Publishes `billing.quota-warning` and related NATS subjects |
| **Schema** | `plan`, `subscription`, `credit_ledger` in `packages/db/src/schema/billing.ts` |
## Next
One-command local bootstrap
Gateway routes and ports
Sends that consume credits
Platform billing notifications
---
# setup/backend/domain.mdx
Source: https://reloop.sh/docs/setup/backend/domain
Markdown: https://reloop.sh/docs/setup/backend/domain.md
Custom sending domains, DKIM keys, DNS verification, and tracking subdomain setup.
Run [`bun setup`](/docs/setup) once from the monorepo root. Env files come from `bun setup` / `bun env:setup`.
## Overview
| Property | Value |
| :--- | :--- |
| **Directory** | `apps/backend/domain` |
| **Port** | `8011` |
| **Local URL** | [https://local.reloop.sh/api/domain](https://local.reloop.sh/api/domain) |
| **Swagger UI** | [https://local.reloop.sh/api/domain/openapi](https://local.reloop.sh/api/domain/openapi) |
| **Stack** | ElysiaJS · PostgreSQL · Redis · NATS |
## Quick start
```bash
bun be:domain:dev
```
Or `bun backend:dev` / `bun dev`.
## Environment
`apps/backend/domain/.env` — from `bun setup` / `bun env:setup`.
```bash
PG_URL=postgresql://reloop:reloop123@localhost:5432/reloop
REDIS_URL=redis://:reloop123@localhost:6379
PORT=8011
BASE_URL="https://local.reloop.sh"
HOST_DOMAIN=reloop.sh
DKIM_SELECTOR=reloop
NATS_URL=nats://localhost:4222
NODE_ENV=development
```
| Variable | Required | Default |
| :--- | :--- | :--- |
| `PG_URL` | **YES** | `postgresql://...` |
| `REDIS_URL` | **YES** | `redis://...` |
| `PORT` | **YES** | `8011` |
| `BASE_URL` | **YES** | `https://local.reloop.sh` |
| `HOST_DOMAIN` | **YES** | `reloop.sh` |
| `DKIM_SELECTOR` | **YES** | `reloop` |
| `NATS_URL` | **YES** | `nats://localhost:4222` |
## Commands
| Command | Description |
| :--- | :--- |
| `bun be:domain:dev` | Start dev server with hot reloading |
| `bun run --filter=be-domain build` | Compile production bundle |
| `bun run --filter=be-domain start` | Run compiled production build |
| `bun run --filter=be-domain check-types` | TypeScript type-check |
## Architecture
| Layer | Detail |
| :--- | :--- |
| **DNS verification** | Validates DKIM, SPF, DMARC, MX, and CNAME records per domain capability |
| **Inbound validation** | Used by [inbound](/docs/setup/backend/inbound) to verify recipient addresses |
| **Schema** | `domain` and `domain_dns_record` in `packages/db/src/schema/domain.ts` |
| **Events** | Publishes domain lifecycle events to NATS |
## Next
One-command local bootstrap
Gateway routes and ports
MX receiver that checks recipients
Outbound send API
---
# setup/backend/email.mdx
Source: https://reloop.sh/docs/setup/backend/email
Markdown: https://reloop.sh/docs/setup/backend/email.md
Platform transactional emails triggered by NATS events (invites, OTPs, billing alerts).
Run [`bun setup`](/docs/setup) once from the monorepo root. Env files come from `bun setup` / `bun env:setup`.
**Email** ≠ **Mail**. Email sends platform notifications to Reloop users (invites, password resets). [Mail](/docs/setup/backend/mail) is the customer-facing send API for their audiences.
## Overview
| Property | Value |
| :--- | :--- |
| **Directory** | `apps/backend/email` |
| **Port** | `8022` |
| **Local URL** | [https://local.reloop.sh/api/email](https://local.reloop.sh/api/email) |
| **Swagger UI** | [https://local.reloop.sh/api/email/openapi](https://local.reloop.sh/api/email/openapi) |
| **Stack** | ElysiaJS · Redis · NATS |
## Quick start
```bash
bun be:email:dev
```
Or `bun backend:dev` / `bun dev`. Locally, when `RELOOP_API_KEY` is unset, mail falls back to Mailpit SMTP (`localhost:1025`).
## Environment
`apps/backend/email/.env` — from `bun setup` / `bun env:setup`.
```bash
EMAIL_PORT=8022
PORT=8022
BASE_URL="https://local.reloop.sh"
NATS_URL=nats://localhost:4222
RELOOP_API_KEY=
RELOOP_SENDER_DOMAIN=
ONBOARDING_TEST_DOMAIN=
NODE_ENV=development
```
| Variable | Required | Default | Notes |
| :--- | :--- | :--- | :--- |
| `EMAIL_PORT` / `PORT` | **YES** | `8022` | Listening port |
| `BASE_URL` | **YES** | `https://local.reloop.sh` | Platform base URL |
| `NATS_URL` | **YES** | `nats://localhost:4222` | Event subscriptions |
| `RELOOP_API_KEY` | Prod | — | API key for the org that owns the sender domain(s); used by `reloop-email` |
| `RELOOP_SENDER_DOMAIN` | Prod | — | System product mail From domain (auth, billing, invites) |
| `ONBOARDING_TEST_DOMAIN` | Prod | — | Onboarding “Send email” From domain only (can differ) |
## Commands
| Command | Description |
| :--- | :--- |
| `bun be:email:dev` | Start dev server with hot reloading |
| `bun run --filter=be-email build` | Compile production bundle |
| `bun run --filter=be-email start` | Run compiled production build |
| `bun run --filter=be-email check-types` | TypeScript type-check |
## Architecture
| Layer | Detail |
| :--- | :--- |
| **Triggers** | Subscribes to NATS subjects (`auth.*`, `billing.*`, etc.) |
| **Delivery** | Sends via the [mail](/docs/setup/backend/mail) pipeline using `RELOOP_API_KEY` when set |
| **Schema** | `email_log` in `packages/db/src/schema/email.ts` |
## Next
One-command local bootstrap
Customer send API (different service)
Triggers invites and OTP emails
Gateway routes and ports
---
# setup/backend/inbound.mdx
Source: https://reloop.sh/docs/setup/backend/inbound
Markdown: https://reloop.sh/docs/setup/backend/inbound.md
Inbound KumoMTA MX receiver — accepts external mail, scans with [spam](/docs/setup/backend/spam) (Rspamd), forwards to [inbox](/docs/setup/backend/inbox) via NATS.
Run [`bun setup`](/docs/setup) or `bun docker:up` from the monorepo root. Inbound needs free port `25`.
## Overview
| Property | Value |
| :--- | :--- |
| **Directory** | `apps/backend/inbound` |
| **Docker service** | `inbound` (container `reloop-inbound`) |
| **SMTP port** | `25` |
| **HTTP port** | `8030` (health check) |
| **Stack** | KumoMTA · Lua · [spam](/docs/setup/backend/spam) |
## Quick start
```bash
bun docker:up
```
Health check: [http://localhost:8030/health](http://localhost:8030/health).
## Configuration
Key variables in `local/docker-compose.yml`:
| Variable | Default |
| :--- | :--- |
| `INBOUND_HOSTNAME` | `inbound.reloop.sh` |
| `NATS_URL` | `reloop-nats:4222` |
| `KUMOMTA_RSPAMD_URL` | `http://reloop-spam:11333/checkv2` |
| `KUMOMTA_CHECK_RECIPIENT_URL` | `http://host.docker.internal:8011/api/domain` |
## Commands
| Command | Description |
| :--- | :--- |
| `bun docker:up` | Start full Docker stack (includes inbound) |
| `docker compose -f local/docker-compose.yml up -d inbound` | Start inbound only |
| `docker logs -f reloop-inbound` | Stream logs |
| `curl http://localhost:8030/health` | Health check |
## Architecture
```
External Sender → Port 25 → Recipient Check → Spam (Rspamd) → NATS → Inbox
↘ discard (no SMTP egress)
```
| Layer | Detail |
| :--- | :--- |
| **MX reception** | Accepts inbound mail on port `25` |
| **Validation** | [domain](/docs/setup/backend/domain) service verifies recipients |
| **Spam scan** | [spam](/docs/setup/backend/spam) backend scores mail via `/checkv2` |
| **Forwarding** | Accepted messages published to NATS for inbox, then assigned to the `null` queue |
| **Receive-only** | No SMTP AUTH, no HTTP inject, no outbound delivery — submission is [smtp](/docs/setup/backend/smtp) only |
## Next
One-command local bootstrap
Port `25` and edge conflicts
Persists messages from NATS
Recipient validation API
Rspamd scan backend for inbound
---
# setup/backend/inbox.mdx
Source: https://reloop.sh/docs/setup/backend/inbox
Markdown: https://reloop.sh/docs/setup/backend/inbox.md
Agent Inbox API — mailboxes, threads, and messages from inbound email via NATS.
Run [`bun setup`](/docs/setup) once from the monorepo root. That starts Docker including [inbound](/docs/setup/backend/inbound) for live MX on port `25`.
## Overview
| Property | Value |
| :--- | :--- |
| **Directory** | `apps/backend/inbox` |
| **Port** | `8021` |
| **Local URL** | [https://local.reloop.sh/api/inbox](https://local.reloop.sh/api/inbox) |
| **Swagger UI** | [https://local.reloop.sh/api/inbox/openapi](https://local.reloop.sh/api/inbox/openapi) |
| **Stack** | ElysiaJS · PostgreSQL · Redis · NATS |
## Quick start
```bash
bun be:inbox:dev
```
Or `bun backend:dev` / `bun dev`.
## Environment
`apps/backend/inbox/.env` — from `bun setup` / `bun env:setup`.
```bash
PG_URL=postgresql://reloop:reloop123@localhost:5432/reloop
REDIS_URL=redis://:reloop123@localhost:6379
PORT=8021
BASE_URL="https://local.reloop.sh"
NATS_URL=nats://localhost:4222
NODE_ENV=development
```
| Variable | Required | Default |
| :--- | :--- | :--- |
| `PG_URL` | **YES** | `postgresql://...` |
| `REDIS_URL` | **YES** | `redis://...` |
| `PORT` | **YES** | `8021` |
| `NATS_URL` | **YES** | `nats://localhost:4222` |
## Commands
| Command | Description |
| :--- | :--- |
| `bun be:inbox:dev` | Start dev server with hot reloading |
| `bun run --filter=be-inbox build` | Compile production bundle |
| `bun run --filter=be-inbox start` | Run compiled production build |
| `bun run --filter=be-inbox check-types` | TypeScript type-check |
## Architecture
| Layer | Detail |
| :--- | :--- |
| **Inbound flow** | [inbound](/docs/setup/backend/inbound) MTA → NATS → inbox persistence |
| **Attachments** | File storage via [upload](/docs/setup/backend/upload) (no direct S3 config on inbox) |
| **Dashboard API** | Mailboxes, threads, and messages at `/api/inbox` |
## Next
One-command local bootstrap
MX edge that feeds this service
Attachment storage
Agent Inbox UI
---
# setup/backend/logs.mdx
Source: https://reloop.sh/docs/setup/backend/logs
Markdown: https://reloop.sh/docs/setup/backend/logs.md
Event logging and analytics — activity logs and email delivery data in PostgreSQL.
Run [`bun setup`](/docs/setup) once so Postgres is up (`bun docker:up`). Env files come from `bun setup` / `bun env:setup`.
## Overview
| Property | Value |
| :--- | :--- |
| **Directory** | `apps/backend/logs` |
| **Port** | `8016` |
| **Local URL** | [https://local.reloop.sh/api/logs](https://local.reloop.sh/api/logs) |
| **Swagger UI** | [https://local.reloop.sh/api/logs/openapi](https://local.reloop.sh/api/logs/openapi) |
| **Stack** | ElysiaJS · PostgreSQL · Redis · NATS |
## Quick start
```bash
bun run --filter=be-logs dev
```
Or `bun backend:dev` / `bun dev`.
## Environment
`apps/backend/logs/.env` — from `bun setup` / `bun env:setup`.
```bash
PG_URL=postgresql://reloop:reloop123@localhost:5432/reloop
REDIS_URL=redis://:reloop123@localhost:6379
PORT=8016
BASE_URL="https://local.reloop.sh"
NATS_URL=nats://localhost:4222
NODE_ENV=development
```
| Variable | Required | Default |
| :--- | :--- | :--- |
| `PG_URL` | **YES** | `postgresql://reloop:reloop123@localhost:5432/reloop` |
| `REDIS_URL` | **YES** | `redis://...` |
| `PORT` | **YES** | `8016` |
| `NATS_URL` | **YES** | `nats://localhost:4222` |
## Commands
| Command | Description |
| :--- | :--- |
| `bun run --filter=be-logs dev` | Start dev server with hot reloading |
| `bun run --filter=be-logs build` | Compile production bundle |
| `bun run --filter=be-logs start` | Run compiled production build |
| `bun run --filter=be-logs check-types` | TypeScript type-check |
## Architecture
| Layer | Detail |
| :--- | :--- |
| **Ingestion** | Subscribes to NATS delivery and activity events |
| **Storage** | Writes activity logs to Postgres `activity_log`; email delivery to `email_log` |
| **Query API** | Powers dashboard activity logs and email delivery analytics |
| **Schema** | Defined in `packages/db/src/schema/activity-log.ts` |
## Next
One-command local bootstrap
Postgres and gateway ports
Source of delivery events
Parallel event delivery path
---
# setup/backend/mail.mdx
Source: https://reloop.sh/docs/setup/backend/mail
Markdown: https://reloop.sh/docs/setup/backend/mail.md
Outbound transactional email API — send requests, template compilation, tracking, and SMTP handoff.
Run [`bun setup`](/docs/setup) once from the monorepo root. That starts Docker including [SMTP](/docs/setup/backend/smtp). Mailpit captures local outbound mail at [http://localhost:8025](http://localhost:8025).
## Overview
| Property | Value |
| :--- | :--- |
| **Directory** | `apps/backend/mail` |
| **Port** | `8015` |
| **Local URL** | [https://local.reloop.sh/api/mail](https://local.reloop.sh/api/mail) |
| **Swagger UI** | [https://local.reloop.sh/api/mail/openapi](https://local.reloop.sh/api/mail/openapi) |
| **Stack** | ElysiaJS · PostgreSQL · Redis · NATS · BullMQ |
## Quick start
```bash
bun be:mail:dev
```
Or `bun backend:dev` / `bun dev`.
## Environment
`apps/backend/mail/.env` — from `bun setup` / `bun env:setup`.
```bash
PG_URL=postgresql://reloop:reloop123@localhost:5432/reloop
REDIS_URL=redis://:reloop123@localhost:6379
PORT=8015
BASE_URL="https://local.reloop.sh"
NATS_URL=nats://localhost:4222
KUMOMTA_HTTP_URL=http://localhost:8020
TRACKING_SECRET=reloop_tracking_secret_default_123
NODE_ENV=development
```
| Variable | Required | Default |
| :--- | :--- | :--- |
| `PG_URL` | **YES** | `postgresql://...` |
| `REDIS_URL` | **YES** | `redis://...` |
| `PORT` | **YES** | `8015` |
| `KUMOMTA_HTTP_URL` | **YES** | `http://localhost:8020` |
| `TRACKING_SECRET` | No | Signs tracked link and open-pixel tokens |
| `NATS_URL` | **YES** | `nats://localhost:4222` |
## Commands
| Command | Description |
| :--- | :--- |
| `bun be:mail:dev` | Start dev server with hot reloading |
| `bun run --filter=be-mail build` | Compile production bundle |
| `bun run --filter=be-mail start` | Run compiled production build |
| `bun run --filter=be-mail check-types` | TypeScript type-check |
## Architecture
| Layer | Detail |
| :--- | :--- |
| **Send pipeline** | Validates API keys, compiles templates, injects tracking links |
| **Queues** | BullMQ workers dispatch via Redis (`mail-queue`, `mail-retry-queue`) |
| **MTA handoff** | Delivers to the [SMTP](/docs/setup/backend/smtp) engine on port `8020` |
| **Schema** | `email_log` in `packages/db/src/schema/email.ts` |
## Next
One-command local bootstrap
Outbound KumoMTA edge
HTML compilation source
Click and open tracking
---
# setup/backend/smtp.mdx
Source: https://reloop.sh/docs/setup/backend/smtp
Markdown: https://reloop.sh/docs/setup/backend/smtp.md
Outbound KumoMTA engine — accepts mail from [mail](/docs/setup/backend/mail) and delivers via SMTP (Mailpit locally).
Run [`bun setup`](/docs/setup) or `bun docker:up` from the monorepo root. SMTP needs free ports `465` / `587`.
## Overview
| Property | Value |
| :--- | :--- |
| **Directory** | `apps/backend/smtp` |
| **Docker service** | `smtp` (container `reloop-smtp`) |
| **SMTP ports** | `465`, `587`, `2025`, `2465`, `2587` |
| **HTTP port** | `8020` |
| **Stack** | KumoMTA · Lua |
## Quick start
```bash
bun docker:up
```
View captured mail at [http://localhost:8025](http://localhost:8025) (Mailpit).
## Configuration
Key variables in `local/docker-compose.yml`:
| Variable | Default |
| :--- | :--- |
| `BASE_URL` | `https://local.reloop.sh` |
| `NATS_URL` | `reloop-nats:4222` |
## Commands
| Command | Description |
| :--- | :--- |
| `bun docker:up` | Start full Docker stack (includes SMTP) |
| `docker compose -f local/docker-compose.yml up -d smtp` | Start SMTP only |
| `docker logs -f reloop-smtp` | Stream logs |
| `docker compose -f local/docker-compose.yml stop smtp` | Stop container |
## Architecture
| Layer | Detail |
| :--- | :--- |
| **Submission** | Accepts outbound mail on ports `465` / `587` / `2025` / `2465` / `2587` |
| **Policies** | Lua scripts in `apps/backend/smtp/policy/` handle routing and DKIM |
| **Local delivery** | Captured by Mailpit at [http://localhost:8025](http://localhost:8025) |
| **Inbound** | Port `25` MX is handled by [inbound](/docs/setup/backend/inbound), not this service |
## Next
One-command local bootstrap
Edge ports and conflicts
HTTP send API that hands off here
MX receiver on port `25`
---
# setup/backend/spam.mdx
Source: https://reloop.sh/docs/setup/backend/spam
Markdown: https://reloop.sh/docs/setup/backend/spam.md
Rspamd spam scanner — scores inbound mail for the [inbound](/docs/setup/backend/inbound) MX receiver via HTTP `/checkv2`.
Run [`bun setup`](/docs/setup) or `bun docker:up` from the monorepo root. Spam starts with the Compose stack because inbound depends on it.
## Overview
| Property | Value |
| :--- | :--- |
| **Directory** | `apps/backend/spam` |
| **Docker service** | `reloop-spam` (container `reloop-spam`) |
| **Scan ports** | `11332`, `11333` |
| **Web UI** | `11334` |
| **Stack** | Rspamd · Redis |
## Quick start
```bash
bun docker:up
```
Or rebuild after config changes:
```bash
docker compose -f local/docker-compose.yml up -d --build reloop-spam
```
Controller / scan endpoint: [http://localhost:11333](http://localhost:11333).
## Configuration
Local overrides live in `apps/backend/spam/local.d/` (mounted into the container).
Spam Redis (set on the **spam** container — native Rspamd `RSPAMD_*` env):
| Variable | Default |
| :--- | :--- |
| `RSPAMD_REDIS_SERVERS` | `reloop-redis:6379` |
| `RSPAMD_REDIS_PASSWORD` | `reloop123` |
Inbound wires to this service with:
| Variable | Default |
| :--- | :--- |
| `KUMOMTA_RSPAMD_URL` | `http://reloop-spam:11333/checkv2` |
## Commands
| Command | Description |
| :--- | :--- |
| `bun docker:up` | Start core stack including spam |
| `docker compose -f local/docker-compose.yml up -d --build reloop-spam` | Rebuild and start spam only |
| `docker logs -f reloop-spam` | Stream logs |
| `docker compose -f local/docker-compose.yml stop reloop-spam` | Stop container |
## Architecture
```
Inbound (KumoMTA) → HTTP POST /checkv2 → Spam (Rspamd) → score / action / symbols
```
| Layer | Detail |
| :--- | :--- |
| **Scan API** | Accepts raw message bodies on `/checkv2` (port `11333`) |
| **Headers** | Inbound injects `X-Spam-*` from the response for [inbox](/docs/setup/backend/inbox) |
| **State** | Uses [Redis](/docs/setup) (`reloop-redis`) for learning / fuzzy storage |
| **Separate deploy** | Not baked into the inbound image — own Dockerfile and CI (`be-spam`) |
## Next
One-command local bootstrap
Scan ports and conflicts
MX receiver that calls this service
Persists `X-Spam-*` scores from NATS
---
# setup/backend/template.mdx
Source: https://reloop.sh/docs/setup/backend/template
Markdown: https://reloop.sh/docs/setup/backend/template.md
Email template CRUD, visual builder storage, and HTML compilation for outbound sends.
Run [`bun setup`](/docs/setup) once from the monorepo root. Env files come from `bun setup` / `bun env:setup`.
## Overview
| Property | Value |
| :--- | :--- |
| **Directory** | `apps/backend/template` |
| **Port** | `8019` |
| **Local URL** | [https://local.reloop.sh/api/template](https://local.reloop.sh/api/template) |
| **Swagger UI** | [https://local.reloop.sh/api/template/openapi](https://local.reloop.sh/api/template/openapi) |
| **Stack** | ElysiaJS · PostgreSQL · Redis · NATS |
## Quick start
```bash
bun be:template:dev
```
Or `bun backend:dev` / `bun dev`.
## Environment
`apps/backend/template/.env` — from `bun setup` / `bun env:setup`.
```bash
PG_URL=postgresql://reloop:reloop123@localhost:5432/reloop
REDIS_URL=redis://:reloop123@localhost:6379
PORT=8019
BASE_URL="https://local.reloop.sh"
NATS_URL=nats://localhost:4222
NODE_ENV=development
```
| Variable | Required | Default |
| :--- | :--- | :--- |
| `PG_URL` | **YES** | `postgresql://...` |
| `REDIS_URL` | **YES** | `redis://...` |
| `PORT` | **YES** | `8019` |
| `BASE_URL` | **YES** | `https://local.reloop.sh` |
| `NATS_URL` | **YES** | `nats://localhost:4222` |
## Commands
| Command | Description |
| :--- | :--- |
| `bun be:template:dev` | Start dev server with hot reloading |
| `bun run --filter=be-template build` | Compile production bundle |
| `bun run --filter=be-template start` | Run compiled production build |
| `bun run --filter=be-template check-types` | TypeScript type-check |
## Architecture
| Layer | Detail |
| :--- | :--- |
| **Builder** | Stores drag-and-drop block JSON from the dashboard editor |
| **Compilation** | Renders HTML with merge tags for the [mail](/docs/setup/backend/mail) service |
| **Schema** | `template` and revisions in `packages/db/src/schema/template.ts` |
## Next
One-command local bootstrap
Gateway routes and ports
Consumes compiled HTML
Template editor UI
---
# setup/backend/upload.mdx
Source: https://reloop.sh/docs/setup/backend/upload
Markdown: https://reloop.sh/docs/setup/backend/upload.md
File uploads — logos, attachments, and assets stored in MinIO/S3.
Run [`bun setup`](/docs/setup) once so MinIO is up (`bun docker:up`). Env files come from `bun setup` / `bun env:setup`. Console: [http://localhost:9001](http://localhost:9001) (`reloop` / `reloop123`).
## Overview
| Property | Value |
| :--- | :--- |
| **Directory** | `apps/backend/upload` |
| **Port** | `8018` |
| **Local URL** | [https://local.reloop.sh/api/upload](https://local.reloop.sh/api/upload) |
| **Swagger UI** | [https://local.reloop.sh/api/upload/openapi](https://local.reloop.sh/api/upload/openapi) |
| **Stack** | ElysiaJS · PostgreSQL · MinIO/S3 · NATS |
## Quick start
```bash
bun be:upload:dev
```
Or `bun backend:dev` / `bun dev`.
## Environment
`apps/backend/upload/.env` — from `bun setup` / `bun env:setup`.
```bash
PG_URL=postgresql://reloop:reloop123@localhost:5432/reloop
REDIS_URL=redis://:reloop123@localhost:6379
PORT=8018
BASE_URL="https://local.reloop.sh"
S3_ENDPOINT=http://localhost:9010
S3_ACCESS_KEY=reloop
S3_SECRET_KEY=reloop123
S3_BUCKET=reloop-uploads
S3_REGION=us-east-1
S3_FORCE_PATH_STYLE=true
NATS_URL=nats://localhost:4222
NODE_ENV=development
```
| Variable | Required | Default |
| :--- | :--- | :--- |
| `PG_URL` | **YES** | `postgresql://...` |
| `S3_ENDPOINT` | **YES** | `http://localhost:9010` |
| `S3_ACCESS_KEY` | **YES** | `reloop` |
| `S3_SECRET_KEY` | **YES** | `reloop123` |
| `S3_BUCKET` | **YES** | `reloop-uploads` |
| `PORT` | **YES** | `8018` |
## Commands
| Command | Description |
| :--- | :--- |
| `bun be:upload:dev` | Start dev server with hot reloading |
| `bun run --filter=be-upload build` | Compile production bundle |
| `bun run --filter=be-upload start` | Run compiled production build |
| `bun run --filter=be-upload check-types` | TypeScript type-check |
## Architecture
| Layer | Detail |
| :--- | :--- |
| **Storage** | Files uploaded to MinIO locally (`localhost:9010`), S3 in production |
| **Metadata** | File index stored in Postgres (`upload` table) |
| **Signed URLs** | Generates presigned upload/download URLs for the dashboard |
## Next
One-command local bootstrap
MinIO ports `9010` / `9001`
Attachments via upload
Assets used in templates
---
# setup/backend/webhook.mdx
Source: https://reloop.sh/docs/setup/backend/webhook
Markdown: https://reloop.sh/docs/setup/backend/webhook.md
Outbound event webhooks — subscription management, HMAC signing, delivery, and retries via BullMQ.
Run [`bun setup`](/docs/setup) once from the monorepo root. Env files come from `bun setup` / `bun env:setup`.
## Overview
| Property | Value |
| :--- | :--- |
| **Directory** | `apps/backend/webhook` |
| **Port** | `8013` |
| **Local URL** | [https://local.reloop.sh/api/webhook](https://local.reloop.sh/api/webhook) |
| **Swagger UI** | [https://local.reloop.sh/api/webhook/openapi](https://local.reloop.sh/api/webhook/openapi) |
| **Stack** | ElysiaJS · PostgreSQL · Redis · NATS · BullMQ |
## Quick start
```bash
bun be:webhook:dev
```
Or `bun backend:dev` / `bun dev`.
## Environment
`apps/backend/webhook/.env` — from `bun setup` / `bun env:setup`.
```bash
PG_URL=postgresql://reloop:reloop123@localhost:5432/reloop
REDIS_URL=redis://:reloop123@localhost:6379
WEBHOOK_ENCRYPTION_KEY=your-64-char-hex-key
PORT=8013
BASE_URL="https://local.reloop.sh"
NATS_URL=nats://localhost:4222
NODE_ENV=development
```
`WEBHOOK_ENCRYPTION_KEY` encrypts stored webhook signing secrets. If unset, secrets are stored in plaintext (local only).
| Variable | Required | Default |
| :--- | :--- | :--- |
| `PG_URL` | **YES** | `postgresql://...` |
| `REDIS_URL` | **YES** | `redis://...` |
| `WEBHOOK_ENCRYPTION_KEY` | Prod only | Dev key in `.env.dev` |
| `PORT` | **YES** | `8013` |
| `BASE_URL` | **YES** | `https://local.reloop.sh` |
| `NATS_URL` | **YES** | `nats://localhost:4222` |
## Commands
| Command | Description |
| :--- | :--- |
| `bun be:webhook:dev` | Start dev server with hot reloading |
| `bun run --filter=be-webhook build` | Compile production bundle |
| `bun run --filter=be-webhook start` | Run compiled production build |
| `bun run --filter=be-webhook check-types` | TypeScript type-check |
## Architecture
| Layer | Detail |
| :--- | :--- |
| **Control plane** | This service — CRUD endpoints, list deliveries, manual replay |
| **Dispatcher** | `be-workflow` NATS queue group `webhook-dispatcher` (email lifecycle + manual trigger) |
| **Delivery** | Dedicated BullMQ queue `webhook-delivery-queue`; signs with `Reloop-Signature` |
| **Retries** | Fixed 7-attempt schedule (5s → 5m → 30m → 2h → 5h → 10h) |
| **Helpers** | `@reloop/webhook-delivery` (envelope, HMAC, SSRF client) |
| **Schema** | `packages/db/src/schema/webhook.ts` |
## Next
One-command local bootstrap
Gateway routes and ports
Source of delivery events
Analytics event sink
---
# setup/backend/workflow.mdx
Source: https://reloop.sh/docs/setup/backend/workflow
Markdown: https://reloop.sh/docs/setup/backend/workflow.md
Marketing automation — drip campaigns, delays, and multi-step journeys via BullMQ.
Run [`bun setup`](/docs/setup) once from the monorepo root. Env files come from `bun setup` / `bun env:setup`.
## Overview
| Property | Value |
| :--- | :--- |
| **Directory** | `apps/backend/workflow` |
| **Port** | `8017` |
| **Local URL** | [https://local.reloop.sh/api/workflow](https://local.reloop.sh/api/workflow) |
| **Swagger UI** | [https://local.reloop.sh/api/workflow/openapi](https://local.reloop.sh/api/workflow/openapi) |
| **Workbench** | [https://local.reloop.sh/api/workflow/jobs](https://local.reloop.sh/api/workflow/jobs) |
| **Stack** | ElysiaJS · PostgreSQL · Redis · NATS · BullMQ |
## Quick start
```bash
bun be:workflow:dev
```
Or `bun backend:dev` / `bun dev`.
## Environment
`apps/backend/workflow/.env` — from `bun setup` / `bun env:setup`.
```bash
PG_URL=postgresql://reloop:reloop123@localhost:5432/reloop
REDIS_URL=redis://:reloop123@localhost:6379
PORT=8017
BASE_URL="https://local.reloop.sh"
NATS_URL=nats://localhost:4222
NODE_ENV=development
# Optional basic-auth for Workbench (/api/workflow/jobs)
# WORKBENCH_USER=admin
# WORKBENCH_PASS=secret
```
| Variable | Required | Default |
| :--- | :--- | :--- |
| `PG_URL` | **YES** | `postgresql://...` |
| `REDIS_URL` | **YES** | `redis://...` |
| `PORT` | **YES** | `8017` |
| `BASE_URL` | **YES** | `https://local.reloop.sh` |
| `NATS_URL` | **YES** | `nats://localhost:4222` |
| `WORKBENCH_USER` | No | empty (open in dev) |
| `WORKBENCH_PASS` | No | empty (open in dev) |
## Commands
| Command | Description |
| :--- | :--- |
| `bun be:workflow:dev` | Start dev server with hot reloading |
| `bun run --filter=be-workflow build` | Compile production bundle |
| `bun run --filter=be-workflow start` | Run compiled production build |
| `bun run --filter=be-workflow check-types` | TypeScript type-check |
## Architecture
| Layer | Detail |
| :--- | :--- |
| **Triggers** | NATS events (e.g. `contacts.created`) start automation journeys |
| **Execution** | BullMQ `workflow-queue` handles delayed steps and transitions |
| **Integrations** | Reads contacts/templates and triggers sends via [mail](/docs/setup/backend/mail) |
| **Monitoring** | [Workbench](https://getworkbench.dev) UI at `/api/workflow/jobs` |
## Next
One-command local bootstrap
Gateway routes and ports
Trigger source for journeys
Sends from workflow steps
---
# setup/frontend/dashboard.mdx
Source: https://reloop.sh/docs/setup/frontend/dashboard
Markdown: https://reloop.sh/docs/setup/frontend/dashboard.md
Main workspace app — campaigns, contacts, templates, analytics, and settings.
Run [`bun setup`](/docs/setup) once from the monorepo root before starting individual apps. The dashboard needs [auth](/docs/setup/backend/auth) (and usually the rest of `bun backend:dev` or `bun dev`).
## Overview
| Property | Value |
| :--- | :--- |
| **Directory** | `apps/frontend/dashboard` |
| **Port** | `3001` |
| **Local URL** | [https://local.reloop.sh/dashboard](https://local.reloop.sh/dashboard) |
| **Direct URL** | [http://localhost:3001/dashboard](http://localhost:3001/dashboard) |
| **Stack** | TanStack Start · Vite · React 19 · Tailwind CSS |
## Quick start
From the monorepo root (after [`bun setup`](/docs/setup)):
```bash
bun fe:dashboard:dev
```
Or start every frontend together:
```bash
bun frontend:dev
```
Vite HMR serves the app on port `3001` with base path `/dashboard`.
Open [https://local.reloop.sh/dashboard](https://local.reloop.sh/dashboard), not `localhost:3001`, so session cookies work with [auth](/docs/setup/backend/auth). Local OTP is `888888`.
## Environment
No committed `.env` is required for local same-origin use via Caddy. The auth client falls back to the browser origin when public URL vars are unset.
Optional overrides:
```bash
# Optional locally — browser origin is used when unset (via Caddy at local.reloop.sh).
# Required at Docker/image *build* time for production if you cannot rely on same-origin.
# NEXT_PUBLIC_URL=https://local.reloop.sh
# VITE_PUBLIC_URL=https://local.reloop.sh
NEXT_PUBLIC_WS_URL="wss://local.reloop.sh"
```
API calls use relative paths (`/api/*`) through Caddy, so no public API URL is required.
Auth (`@reloop/auth/client`) resolves the public origin as: `NEXT_PUBLIC_URL` / `VITE_PUBLIC_URL` → `window.location.origin`. For production Docker images you can pass `--build-arg NEXT_PUBLIC_URL=https://your-domain.com`; if omitted, the browser origin is used so same-host reverse-proxy deploys work without a rebuild.
| Variable | Required | Default |
| :--- | :--- | :--- |
| `NEXT_PUBLIC_URL` / `VITE_PUBLIC_URL` | No | Browser origin (`window.location.origin`) |
| `NEXT_PUBLIC_WS_URL` | No | Current host (template collaboration WebSocket) |
## Commands
| Command | Description |
| :--- | :--- |
| `bun fe:dashboard:dev` | Start Vite + TanStack Start dev server |
| `bun run --filter=fe-dashboard build` | Compile production bundle (Nitro) |
| `bun run --filter=fe-dashboard preview` | Preview production build |
| `bun run --filter=fe-dashboard typecheck` | Run TypeScript checks |
| `bun run --filter=fe-dashboard test` | Run Vitest |
## Next
One-command local bootstrap
Gateway routes and ports
Sessions and local OTP
Marketing site setup
---
# setup/frontend/docs.mdx
Source: https://reloop.sh/docs/setup/frontend/docs
Markdown: https://reloop.sh/docs/setup/frontend/docs.md
This documentation site — MDX guides, API reference, and local setup docs.
Run [`bun setup`](/docs/setup) once from the monorepo root before starting individual apps.
## Overview
| Property | Value |
| :--- | :--- |
| **Directory** | `apps/frontend/docs` |
| **Port** | `3003` |
| **Local URL** | [https://local.reloop.sh/docs](https://local.reloop.sh/docs) |
| **Direct URL** | [http://localhost:3003](http://localhost:3003) |
| **Stack** | Next.js · MDX · Tailwind CSS |
## Quick start
From the monorepo root (after [`bun setup`](/docs/setup)):
```bash
bun fe:docs:dev
```
Or start every frontend together:
```bash
bun frontend:dev
```
Turbopack serves the app on port `3003`. Prefer [https://local.reloop.sh/docs](https://local.reloop.sh/docs) when Caddy is running.
## Environment
Committed local defaults live in `apps/frontend/docs/.env` (and `.env.dev`). Fresh clones already have them; `bun env:setup` / `bun setup` recreate or merge missing keys.
```bash
NEXT_PUBLIC_URL=https://local.reloop.sh
# Rybbit analytics (optional)
NEXT_PUBLIC_RYBBIT_HOST=https://app.rybbit.io
NEXT_PUBLIC_RYBBIT_SITE_ID=reloop-docs
```
| Variable | Required | Default |
| :--- | :--- | :--- |
| `NEXT_PUBLIC_URL` | No | `https://reloop.sh` — canonical URLs, OG metadata, and public origin |
| `NEXT_PUBLIC_RYBBIT_HOST` | No | Rybbit analytics host |
| `NEXT_PUBLIC_RYBBIT_SITE_ID` | No | Rybbit site identifier |
## Content structure
| Path | Purpose |
| :--- | :--- |
| `content/docs/setup/` | Local development setup guides (this section) |
| `content/docs/api/` | Auto-generated API reference |
| `content/docs/**/meta.json` | Sidebar navigation and ordering |
## Commands
| Command | Description |
| :--- | :--- |
| `bun fe:docs:dev` | Start dev server with Turbopack |
| `bun run --filter=fe-docs build` | Build and validate all MDX pages |
| `bun run --filter=fe-docs start` | Run production build |
| `bun run --filter=fe-docs generate:api-docs` | Regenerate API docs from OpenAPI specs |
## Next
One-command local bootstrap
Gateway routes and ports
Monorepo layout and stack
Marketing site setup
---
# setup/frontend/links.mdx
Source: https://reloop.sh/docs/setup/frontend/links
Markdown: https://reloop.sh/docs/setup/frontend/links.md
Contact preference center, tracked link redirects, and open-tracking pixel proxy for outbound email.
Run [`bun setup`](/docs/setup) once from the monorepo root before starting individual apps. Preferences need [contacts](/docs/setup/backend/contacts) and [mail](/docs/setup/backend/mail) running (`bun dev` or `bun backend:dev`).
## Overview
| Property | Value |
| :--- | :--- |
| **Directory** | `apps/frontend/links` |
| **Port** | `3005` |
| **Preferences** | [https://local.reloop.sh/preferences](https://local.reloop.sh/preferences) |
| **Redirect** | [https://local.reloop.sh/redirect](https://local.reloop.sh/redirect) |
| **Open tracking** | [https://local.reloop.sh/api/mail/v1/track/open](https://local.reloop.sh/api/mail/v1/track/open) |
| **Stack** | Next.js · React 19 · Tailwind CSS |
## Quick start
From the monorepo root (after [`bun setup`](/docs/setup)):
```bash
bun fe:links:dev
```
Or start every frontend together:
```bash
bun frontend:dev
```
Turbopack serves the app on port `3005`. Prefer the `local.reloop.sh` URLs above when Caddy is running.
Use `https://local.reloop.sh/...`, not `localhost:3005`, so redirects and cookies match production-style hosts.
## Environment
Committed local defaults live in `apps/frontend/links/.env` (and `.env.dev`). Fresh clones already have them; `bun env:setup` / `bun setup` recreate or merge missing keys.
```bash
NEXT_PUBLIC_URL=https://local.reloop.sh
# Must match TRACKING_SECRET in the mail backend and REDIRECT_SECRET in auth/email backends
REDIRECT_SECRET=reloop_tracking_secret_default_123
# Server-side contacts API (preferences page)
INTERNAL_API_URL=http://localhost:8014/api/contacts
# Server-side mail API (open-tracking pixel proxy)
INTERNAL_MAIL_API_URL=http://localhost:8015/api/mail
# Rybbit analytics (optional)
NEXT_PUBLIC_RYBBIT_HOST=https://app.rybbit.io
NEXT_PUBLIC_RYBBIT_SITE_ID=reloop-web
```
Preferences call [contacts](/docs/setup/backend/contacts) via `INTERNAL_API_URL`. Open-tracking proxies to [mail](/docs/setup/backend/mail) via `INTERNAL_MAIL_API_URL` (or `NEXT_PUBLIC_URL` as a fallback).
| Variable | Required | Default |
| :--- | :--- | :--- |
| `NEXT_PUBLIC_URL` | No | `https://link.reloop.sh` — base URL for redirect and preference links |
| `REDIRECT_SECRET` | No | Shared secret with mail / auth / email backends |
| `INTERNAL_API_URL` | No | `http://localhost:8014/api/contacts` |
| `INTERNAL_MAIL_API_URL` | No | Falls back to `{NEXT_PUBLIC_URL}/api/mail` |
| `NEXT_PUBLIC_RYBBIT_HOST` | No | Rybbit analytics host |
| `NEXT_PUBLIC_RYBBIT_SITE_ID` | No | Rybbit site identifier |
## Routes
| Route | Purpose |
| :--- | :--- |
| `/preferences/[token]` | Manage subscription topics and unsubscribe |
| `/redirect/[token]` | Track clicks and redirect to destination URL |
| `/api/mail/v1/track/open/[token]` | Proxy open-tracking pixels to the mail service |
## Architecture
| Layer | Detail |
| :--- | :--- |
| **[Mail](/docs/setup/backend/mail)** | Injects `/redirect/[token]` click links and open pixels in outbound HTML |
| **[Contacts](/docs/setup/backend/contacts)** | Powers preference page data |
| **Open-tracking proxy** | Custom tracking domains CNAME here; pixels proxy to mail when `/api/mail` is not on the tracking host |
| **Caddy** | Routes `/preferences*` and `/redirect*` to port `3005` |
## Commands
| Command | Description |
| :--- | :--- |
| `bun fe:links:dev` | Start dev server with Turbopack |
| `bun run --filter=fe-links build` | Compile production bundle |
| `bun run --filter=fe-links start` | Run production build |
| `bun run --filter=fe-links lint` | Run ESLint checks |
## Next
One-command local bootstrap
Gateway routes and ports
Preferences data API
Tracking links and open pixels
---
# setup/frontend/web.mdx
Source: https://reloop.sh/docs/setup/frontend/web
Markdown: https://reloop.sh/docs/setup/frontend/web.md
Public marketing site — landing pages, pricing, and product content.
Run [`bun setup`](/docs/setup) once from the monorepo root before starting individual apps.
## Overview
| Property | Value |
| :--- | :--- |
| **Directory** | `apps/frontend/web` |
| **Port** | `3000` |
| **Local URL** | [https://local.reloop.sh](https://local.reloop.sh) |
| **Direct URL** | [http://localhost:3000](http://localhost:3000) |
| **Stack** | Next.js · React 19 · Tailwind CSS |
## Quick start
From the monorepo root (after [`bun setup`](/docs/setup)):
```bash
bun fe:web:dev
```
Or start every frontend together:
```bash
bun frontend:dev
```
Turbopack serves the app on port `3000`. Prefer [https://local.reloop.sh](https://local.reloop.sh) when Caddy is running.
Use `https://local.reloop.sh`, not `localhost:3000`, when testing flows that share cookies or link into the dashboard.
## Environment
Committed local defaults live in `apps/frontend/web/.env` (and `.env.dev`). Fresh clones already have them; `bun env:setup` / `bun setup` recreate or merge missing keys.
```bash
NEXT_PUBLIC_URL=https://local.reloop.sh
# Must match TRACKING_SECRET in the mail backend and REDIRECT_SECRET in auth/email backends
REDIRECT_SECRET=reloop_tracking_secret_default_123
# Rybbit analytics (optional)
NEXT_PUBLIC_RYBBIT_HOST=https://app.rybbit.io
NEXT_PUBLIC_RYBBIT_SITE_ID=reloop-web
```
| Variable | Required | Default |
| :--- | :--- | :--- |
| `NEXT_PUBLIC_URL` | No | `https://reloop.sh` — canonical site URL for metadata and OG tags |
| `REDIRECT_SECRET` | No | Shared redirect/tracking secret for local mail links |
| `NEXT_PUBLIC_RYBBIT_HOST` | No | Rybbit analytics host |
| `NEXT_PUBLIC_RYBBIT_SITE_ID` | No | Rybbit site identifier |
## Commands
| Command | Description |
| :--- | :--- |
| `bun fe:web:dev` | Start dev server with Turbopack |
| `bun run --filter=fe-web build` | Compile production bundle |
| `bun run --filter=fe-web start` | Run production build |
| `bun run --filter=fe-web lint` | Run ESLint checks |
## Next
One-command local bootstrap
Gateway routes and ports
---
# setup/index.mdx
Source: https://reloop.sh/docs/setup
Markdown: https://reloop.sh/docs/setup.md
One command from the monorepo root. Full stack at [https://local.reloop.sh](https://local.reloop.sh).
## Prerequisites
| Tool | Notes |
| :--- | :--- |
| [Bun](https://bun.sh/get) | v1.3.0+ |
| [Docker Desktop](https://www.docker.com/products/docker-desktop/) | Postgres, Redis, Caddy, NATS, Mailpit |
| [mkcert](https://github.com/FiloSottile/mkcert) | Local TLS (`brew install mkcert` on macOS) |
| Git | Clone the repository |
## Quick start
```bash
git clone git@github.com:reloop-labs/reloop.git
cd reloop
bun setup --start
```
```bash
git clone git@github.com:reloop-labs/reloop.git
cd reloop
bun setup
bun dev
```
`bun setup` only pauses for sudo (hosts / mkcert trust) or a missing tool.
## After setup
Marketing site and entry point
Product UI — use this URL, not `localhost:3001`
This documentation, served locally
Captured outbound email for local testing
Sign up with any email. Local OTP is always `888888`.
Open `https://local.reloop.sh` (not `localhost`) so auth cookies work across services.
## What `bun setup` does
Verifies Bun v1.3+, Docker CLI, and a running daemon. Checks mkcert unless you pass `--skip-tls`.
Adds `127.0.0.1 local.reloop.sh` to `/etc/hosts` (sudo once if needed).
Creates trusted PEMs in `local/certs/` with mkcert for Caddy HTTPS.
Runs `bun install` when `node_modules` is missing (or always with `--force`).
Copies `.env.dev` → `.env` for backends, `packages/db`, and frontends.
Brings up core infra, then waits until Postgres is healthy.
Runs `bun db:push`.
## Flags
| Flag | Effect |
| :--- | :--- |
| `--start` | Run `bun dev` when setup finishes |
| `--force` | Re-run `bun install` even if `node_modules` exists |
| `--skip-docker` | Skip Docker and `db:push` |
| `--skip-hosts` | Skip the `/etc/hosts` entry |
| `--skip-tls` | Skip cert generation (existing PEMs required) |
## Manual setup
Use this only when debugging a specific stage. Run steps in order from the monorepo root.
Skipping or reordering steps can cause database connection errors or broken routing.
```bash
git clone git@github.com:reloop-labs/reloop.git
cd reloop
bun install
```
```bash
echo "127.0.0.1 local.reloop.sh" | sudo tee -a /etc/hosts
```
Windows (PowerShell as Administrator):
```powershell
Add-Content -Path $env:windir\System32\drivers\etc\hosts -Value "127.0.0.1`tlocal.reloop.sh"
```
Caddy serves HTTPS from `local/certs/` (gitignored). Generate once:
```bash
brew install mkcert # macOS
mkcert -install
mkdir -p local/certs
mkcert -cert-file local/certs/local.reloop.sh.pem \
-key-file local/certs/local.reloop.sh-key.pem \
local.reloop.sh "*.local.reloop.sh"
```
```bash
bun docker:up
```
Free **80**, **443**, **5432**, **6379**, **25**, **465**, and **587** first. See [Port](/docs/setup/port).
Wait for Postgres, then:
```bash
bun db:push
```
```bash
bun env:setup
```
Copies `.env.dev` → `.env` for backends, `packages/db`, and `web` / `docs` / `links`. Frontends also ship committed `.env` files with local defaults.
One service manually:
```bash
cp apps/backend/auth/.env.dev apps/backend/auth/.env
```
```bash
bun dev
```
Or a subset:
```bash
bun frontend:dev # frontends only
bun backend:dev # backends only
```
## Commands
| Command | Description |
| :--- | :--- |
| `bun setup` | One-command local bootstrap |
| `bun setup --start` | Bootstrap, then `bun dev` |
| `bun dev` | All frontend and backend dev servers |
| `bun frontend:dev` | Frontends only |
| `bun backend:dev` | Backends only |
| `bun docker:up` | Start Docker infra (including SMTP/inbound) |
| `bun docker:down` | Stop containers |
| `bun env:setup` | Generate `.env` files |
| `bun db:push` | Apply Drizzle schema |
| `bun db:studio` | Open Drizzle Studio |
| `bun run check` | Lint and format |
## Next
Local ports and Caddy gateway routes
Monorepo layout and tech stack
Per-service setup guides
Web, dashboard, docs, links
---
# setup/overview.mdx
Source: https://reloop.sh/docs/setup/overview
Markdown: https://reloop.sh/docs/setup/overview.md
Reloop is a Bun monorepo — Next.js frontends, ElysiaJS microservices, shared packages, and Docker infrastructure.
Local URL: [https://local.reloop.sh](https://local.reloop.sh). Bootstrap with [`bun setup`](/docs/setup).
## Structure
```
reloop/
├── apps/
│ ├── backend/ # ElysiaJS APIs + KumoMTA (smtp, inbound)
│ └── frontend/ # web, dashboard, docs, links, console
├── packages/ # @reloop/ui, @reloop/db, @reloop/bus, …
└── local/ # Docker Compose, Caddy, TLS, bun setup
```
| Path | Role |
| :--- | :--- |
| `apps/frontend/*` | Product UI and docs sites |
| `apps/backend/*` | HTTP APIs and mail edge |
| `packages/*` | Shared libraries |
| `local/` | Compose stack, Caddy, [`bun setup`](/docs/setup) |
## Frontend apps
Marketing site — port `3000`
Product UI — port `3001`
This documentation — port `3003`
Preferences and redirects — port `3005`
Stack: [Next.js](https://nextjs.org/), [Tailwind CSS](https://tailwindcss.com/), [Radix UI](https://www.radix-ui.com/) via `@reloop/ui`, [SWR](https://swr.vercel.app/).
## Backend services
Sessions and orgs — `8000`
Sending domains — `8011`
API keys — `8012`
Event delivery — `8013`
Audience — `8014`
Send API — `8015`
Analytics — `8016`
Automations — `8017`
Attachments — `8018`
Templates — `8019`
Inbound mail — `8021`
Platform email — `8022`
Usage / billing — `8023`
Outbound edge — Docker
MX edge — Docker
Stack: [ElysiaJS](https://elysiajs.com/), [Better Auth](https://www.better-auth.com/), [KumoMTA](https://kumomta.com/) for smtp/inbound.
## Data & infrastructure
Started by `bun docker:up` (Postgres, Redis, Caddy, Mailpit, MinIO, NATS, spam, SMTP, inbound).
Primary DB — port `5432`
Schema in `@reloop/db`
Sessions and cache — `6379`
Object storage — `9010` / console `9001`
Event bus — `4222`
TLS proxy for `local.reloop.sh`
Captured mail UI — `8025`
## Tooling
Runtime and package manager
Task runner and build cache
Local infra via `local/docker-compose.yml`
Lint and format
## Shared packages
| Package | Purpose |
| :--- | :--- |
| `@reloop/ui` | Design system and components |
| `@reloop/db` | Drizzle schema and Postgres client |
| `@reloop/auth` | Shared auth client utilities |
| `@reloop/bus` | NATS messaging wrapper |
| `@reloop/cache` | Redis caching helpers |
| `@reloop/apikey` | API key hashing and verification |
| `@reloop/webhook-events` | Webhook event types |
| `@reloop/tailwind` | Shared Tailwind config |
| `@reloop/tsconfig` | Shared TypeScript config |
## Next
One-command local bootstrap with `bun setup`
Gateway routes and every local port
---
# setup/port.mdx
Source: https://reloop.sh/docs/setup/port
Markdown: https://reloop.sh/docs/setup/port.md
Use [https://local.reloop.sh](https://local.reloop.sh) for day-to-day work. Caddy routes traffic and keeps auth cookies scoped correctly.
## Free these ports first
Stop anything already bound before `bun docker:up`.
| Required for | Ports | Service |
| :--- | :--- | :--- |
| `bun docker:up` | `80`, `443` | Caddy |
| | `5432` | PostgreSQL |
| | `6379` | Redis |
| | `9010` | MinIO (API) |
| | `25`, `465`, `587` | SMTP / inbound |
Free mail ports (`25`, `465`, `587`) if host mail or another MTA is already bound there.
## Unified Gateway
| Route | Service | Port |
| :--- | :--- | :--- |
| [https://local.reloop.sh/](https://local.reloop.sh/) | [Web](/docs/setup/frontend/web) | `3000` |
| [https://local.reloop.sh/dashboard](https://local.reloop.sh/dashboard) | [Dashboard](/docs/setup/frontend/dashboard) | `3001` |
| [https://local.reloop.sh/console](https://local.reloop.sh/console) | Console | `3002` |
| [https://local.reloop.sh/docs](https://local.reloop.sh/docs) | [Docs](/docs/setup/frontend/docs) | `3003` |
| [https://local.reloop.sh/preferences](https://local.reloop.sh/preferences) | [Links](/docs/setup/frontend/links) | `3005` |
| [https://local.reloop.sh/api/auth](https://local.reloop.sh/api/auth) | [Auth](/docs/setup/backend/auth) | `8000` |
| [https://local.reloop.sh/api/domain](https://local.reloop.sh/api/domain) | [Domain](/docs/setup/backend/domain) | `8011` |
| [https://local.reloop.sh/api/api-key](https://local.reloop.sh/api/api-key) | [API Key](/docs/setup/backend/api-key) | `8012` |
| [https://local.reloop.sh/api/webhook](https://local.reloop.sh/api/webhook) | [Webhook](/docs/setup/backend/webhook) | `8013` |
| [https://local.reloop.sh/api/contacts](https://local.reloop.sh/api/contacts) | [Contacts](/docs/setup/backend/contacts) | `8014` |
| [https://local.reloop.sh/api/mail](https://local.reloop.sh/api/mail) | [Mail](/docs/setup/backend/mail) | `8015` |
| [https://local.reloop.sh/api/logs](https://local.reloop.sh/api/logs) | [Logs](/docs/setup/backend/logs) | `8016` |
| [https://local.reloop.sh/api/workflow](https://local.reloop.sh/api/workflow) | [Workflow](/docs/setup/backend/workflow) | `8017` |
| [https://local.reloop.sh/api/upload](https://local.reloop.sh/api/upload) | [Upload](/docs/setup/backend/upload) | `8018` |
| [https://local.reloop.sh/api/template](https://local.reloop.sh/api/template) | [Template](/docs/setup/backend/template) | `8019` |
| [https://local.reloop.sh/api/inbox](https://local.reloop.sh/api/inbox) | [Inbox](/docs/setup/backend/inbox) | `8021` |
| [https://local.reloop.sh/api/email](https://local.reloop.sh/api/email) | [Email](/docs/setup/backend/email) | `8022` |
| [https://local.reloop.sh/api/credits](https://local.reloop.sh/api/credits) | [Credits](/docs/setup/backend/credits) | `8023` |
| [https://local.reloop.sh/api/admin](https://local.reloop.sh/api/admin) | Admin | `8024` |
## Frontend
| App | Direct URL | Port |
| :--- | :--- | :--- |
| [Web](/docs/setup/frontend/web) | [http://localhost:3000](http://localhost:3000) | `3000` |
| [Dashboard](/docs/setup/frontend/dashboard) | [http://localhost:3001](http://localhost:3001) | `3001` |
| Console | [http://localhost:3002](http://localhost:3002) | `3002` |
| [Docs](/docs/setup/frontend/docs) | [http://localhost:3003](http://localhost:3003) | `3003` |
| [Links](/docs/setup/frontend/links) | [http://localhost:3005](http://localhost:3005) | `3005` |
## Backend APIs
| Service | Caddy route | Port |
| :--- | :--- | :--- |
| [Auth](/docs/setup/backend/auth) | [`/api/auth`](https://local.reloop.sh/api/auth) | `8000` |
| [Domain](/docs/setup/backend/domain) | [`/api/domain`](https://local.reloop.sh/api/domain) | `8011` |
| [API Key](/docs/setup/backend/api-key) | [`/api/api-key`](https://local.reloop.sh/api/api-key) | `8012` |
| [Webhook](/docs/setup/backend/webhook) | [`/api/webhook`](https://local.reloop.sh/api/webhook) | `8013` |
| [Contacts](/docs/setup/backend/contacts) | [`/api/contacts`](https://local.reloop.sh/api/contacts) | `8014` |
| [Mail](/docs/setup/backend/mail) | [`/api/mail`](https://local.reloop.sh/api/mail) | `8015` |
| [Logs](/docs/setup/backend/logs) | [`/api/logs`](https://local.reloop.sh/api/logs) | `8016` |
| [Workflow](/docs/setup/backend/workflow) | [`/api/workflow`](https://local.reloop.sh/api/workflow) | `8017` |
| [Upload](/docs/setup/backend/upload) | [`/api/upload`](https://local.reloop.sh/api/upload) | `8018` |
| [Template](/docs/setup/backend/template) | [`/api/template`](https://local.reloop.sh/api/template) | `8019` |
| [Inbox](/docs/setup/backend/inbox) | [`/api/inbox`](https://local.reloop.sh/api/inbox) | `8021` |
| [Email](/docs/setup/backend/email) | [`/api/email`](https://local.reloop.sh/api/email) | `8022` |
| [Credits](/docs/setup/backend/credits) | [`/api/credits`](https://local.reloop.sh/api/credits) | `8023` |
| Admin | [`/api/admin`](https://local.reloop.sh/api/admin) | `8024` |
## Docker & Mail
| Service | Port | Notes |
| :--- | :--- | :--- |
| Caddy | `80`, `443` | Reverse proxy / TLS |
| Mailpit | `8025` | [http://localhost:8025](http://localhost:8025) — captured outbound mail |
| [SMTP](/docs/setup/backend/smtp) (outbound) | `465`, `587`, `2025`, `2465`, `2587`, `8020` | KumoMTA |
| [Inbound](/docs/setup/backend/inbound) (MX) | `25`, `8030` | KumoMTA |
## Infrastructure
| Service | Port | Notes |
| :--- | :--- | :--- |
| PostgreSQL | `5432` | Shared DB for all backends (including activity logs) |
| Redis | `6379` | Sessions, OTP, caches |
| NATS | `4222` | Event bus between services |
| MinIO | `9010` (API), `9001` (console) | [Upload](/docs/setup/backend/upload) object storage — [console](http://localhost:9001) |
| Spam (Rspamd) | `11332` / `11333` / `11334` | [spam](/docs/setup/backend/spam) scan + UI for [inbound](/docs/setup/backend/inbound) |