Domain
Learn how to add, verify, configure, and delete Reloop sending domains from the dashboard or API.
View all domains
The Domains Dashboard lists every domain in your organization with status, search, and filters.
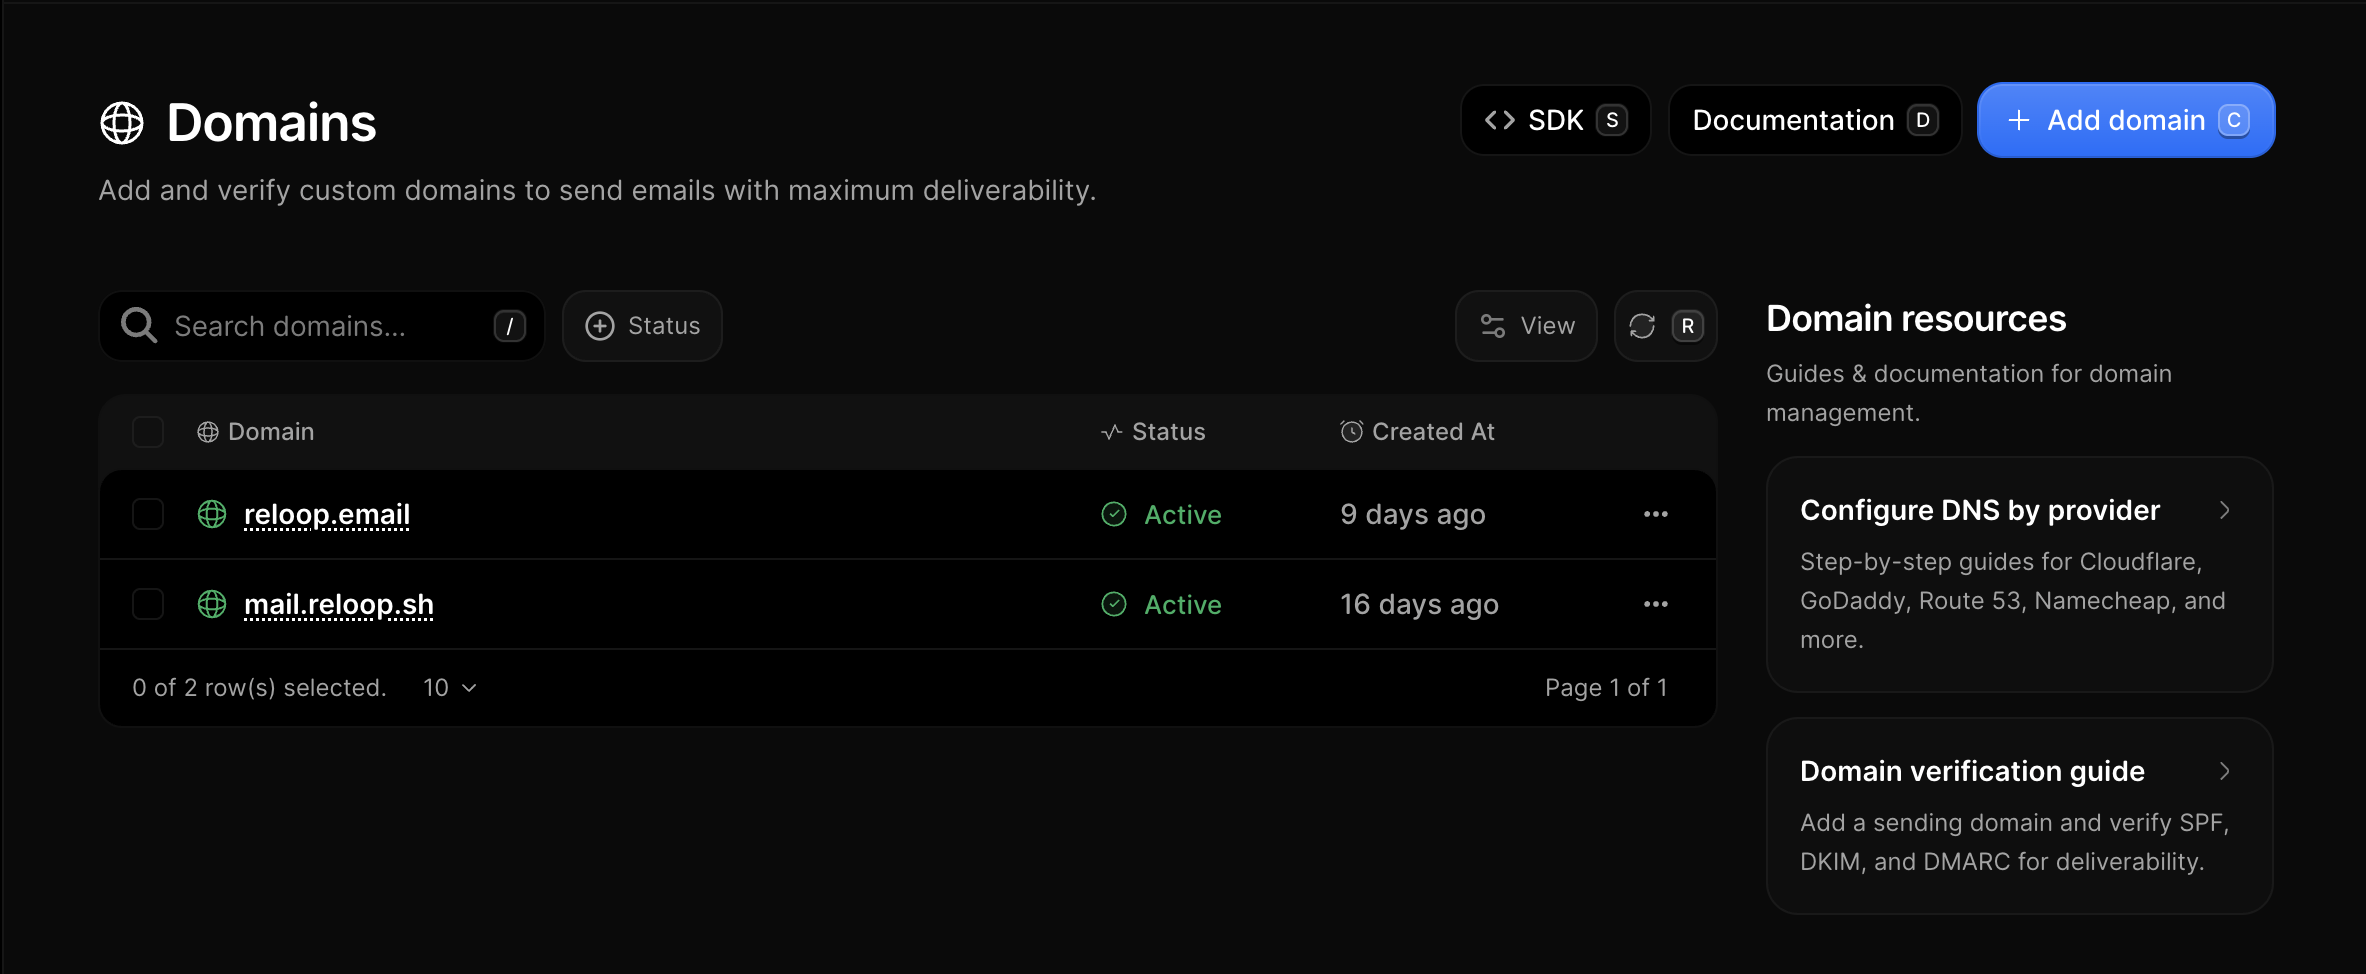
Add a domain
- Go to Domains
- Click Add domain (or press
C) - Enter the hostname (e.g.
acme.comormail.acme.com) - Optionally open Advanced options to set click/open tracking defaults
- Click Add Domain
Reloop creates the domain in pending status and opens the DNS setup page with the records you need to publish.
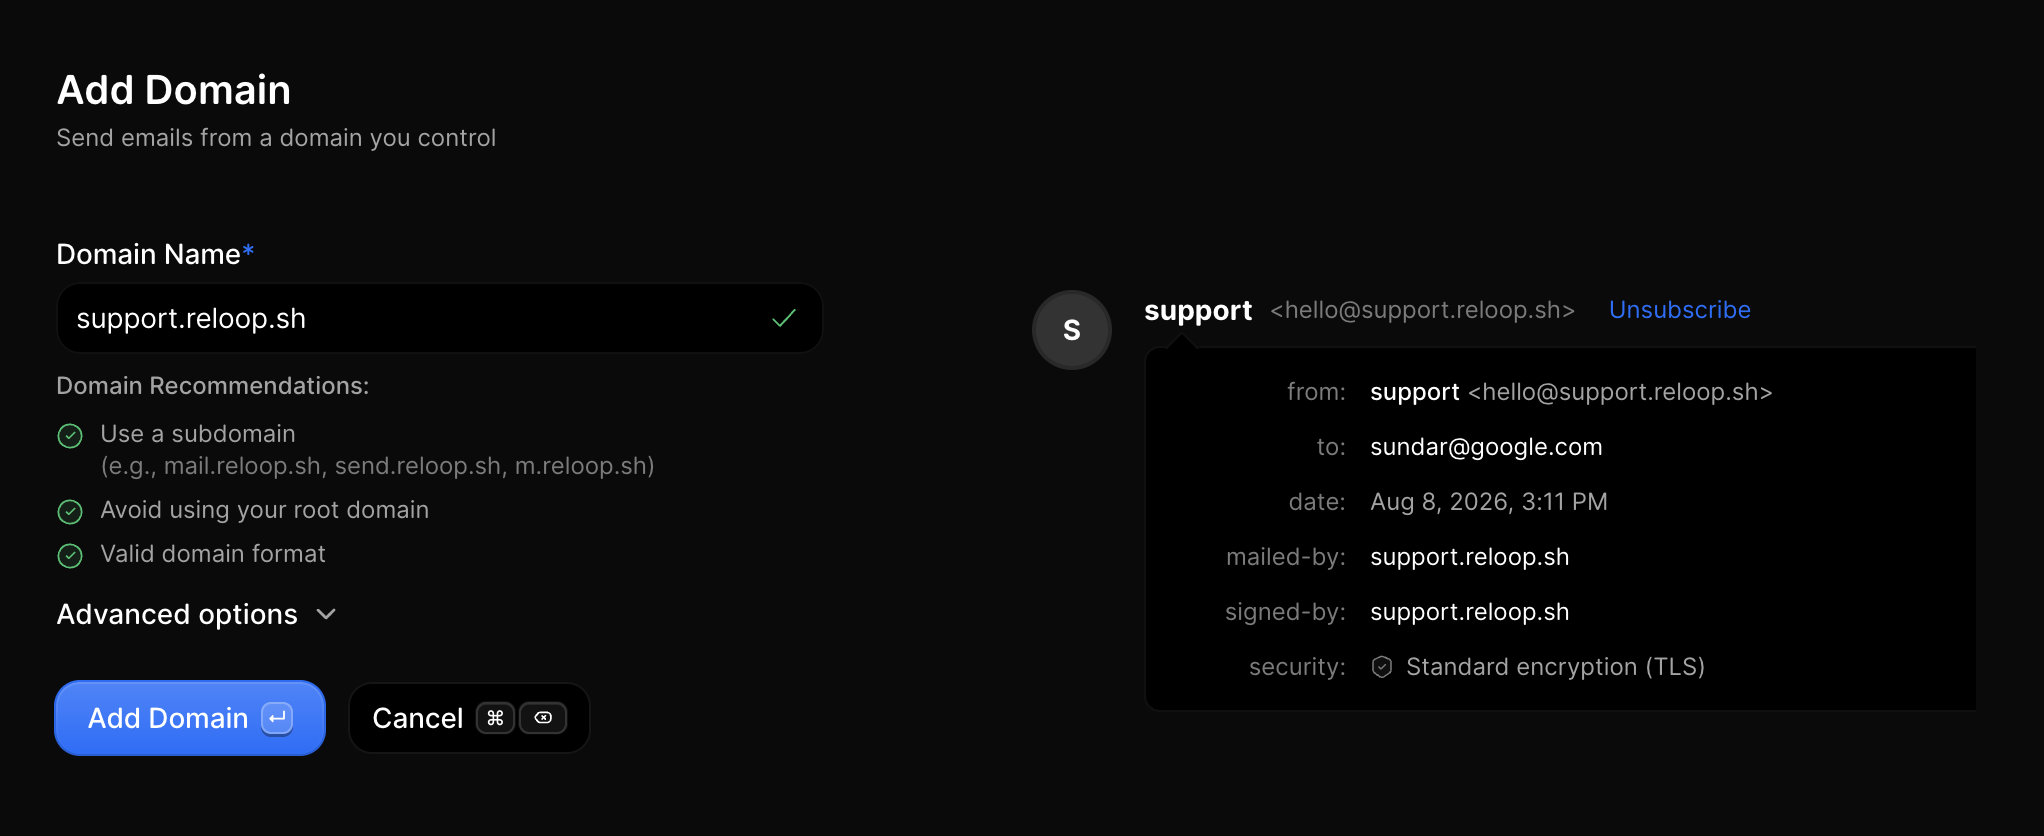
Prefer a guided path for beginners? See the full Connect a domain guide — DNS basics, provider tutorials, and troubleshooting.
Configure DNS
After you add a domain, Reloop shows the required DNS records (SPF, DKIM, DMARC, and MX/tracking when enabled).
Auto-populate (when available):
- On the setup or domain page, click Auto populate
- Approve Reloop’s Domain Connect template at your DNS host
- Return to Reloop and verify
Manual setup:
- Copy each record from the Reloop DNS table
- Add them at the host that manages your nameservers
- Merge SPF if you already have an SPF TXT — do not create a second SPF record
Deep dives: Auto-populate · Manual setup · DNS records explained · Provider guides
Verify a domain
- Open the domain from Domains (or stay on the post-add setup page)
- Click Verify (or use the row/header menu → Re-verify DNS)
- Wait for status to move through
pending→verifying→active
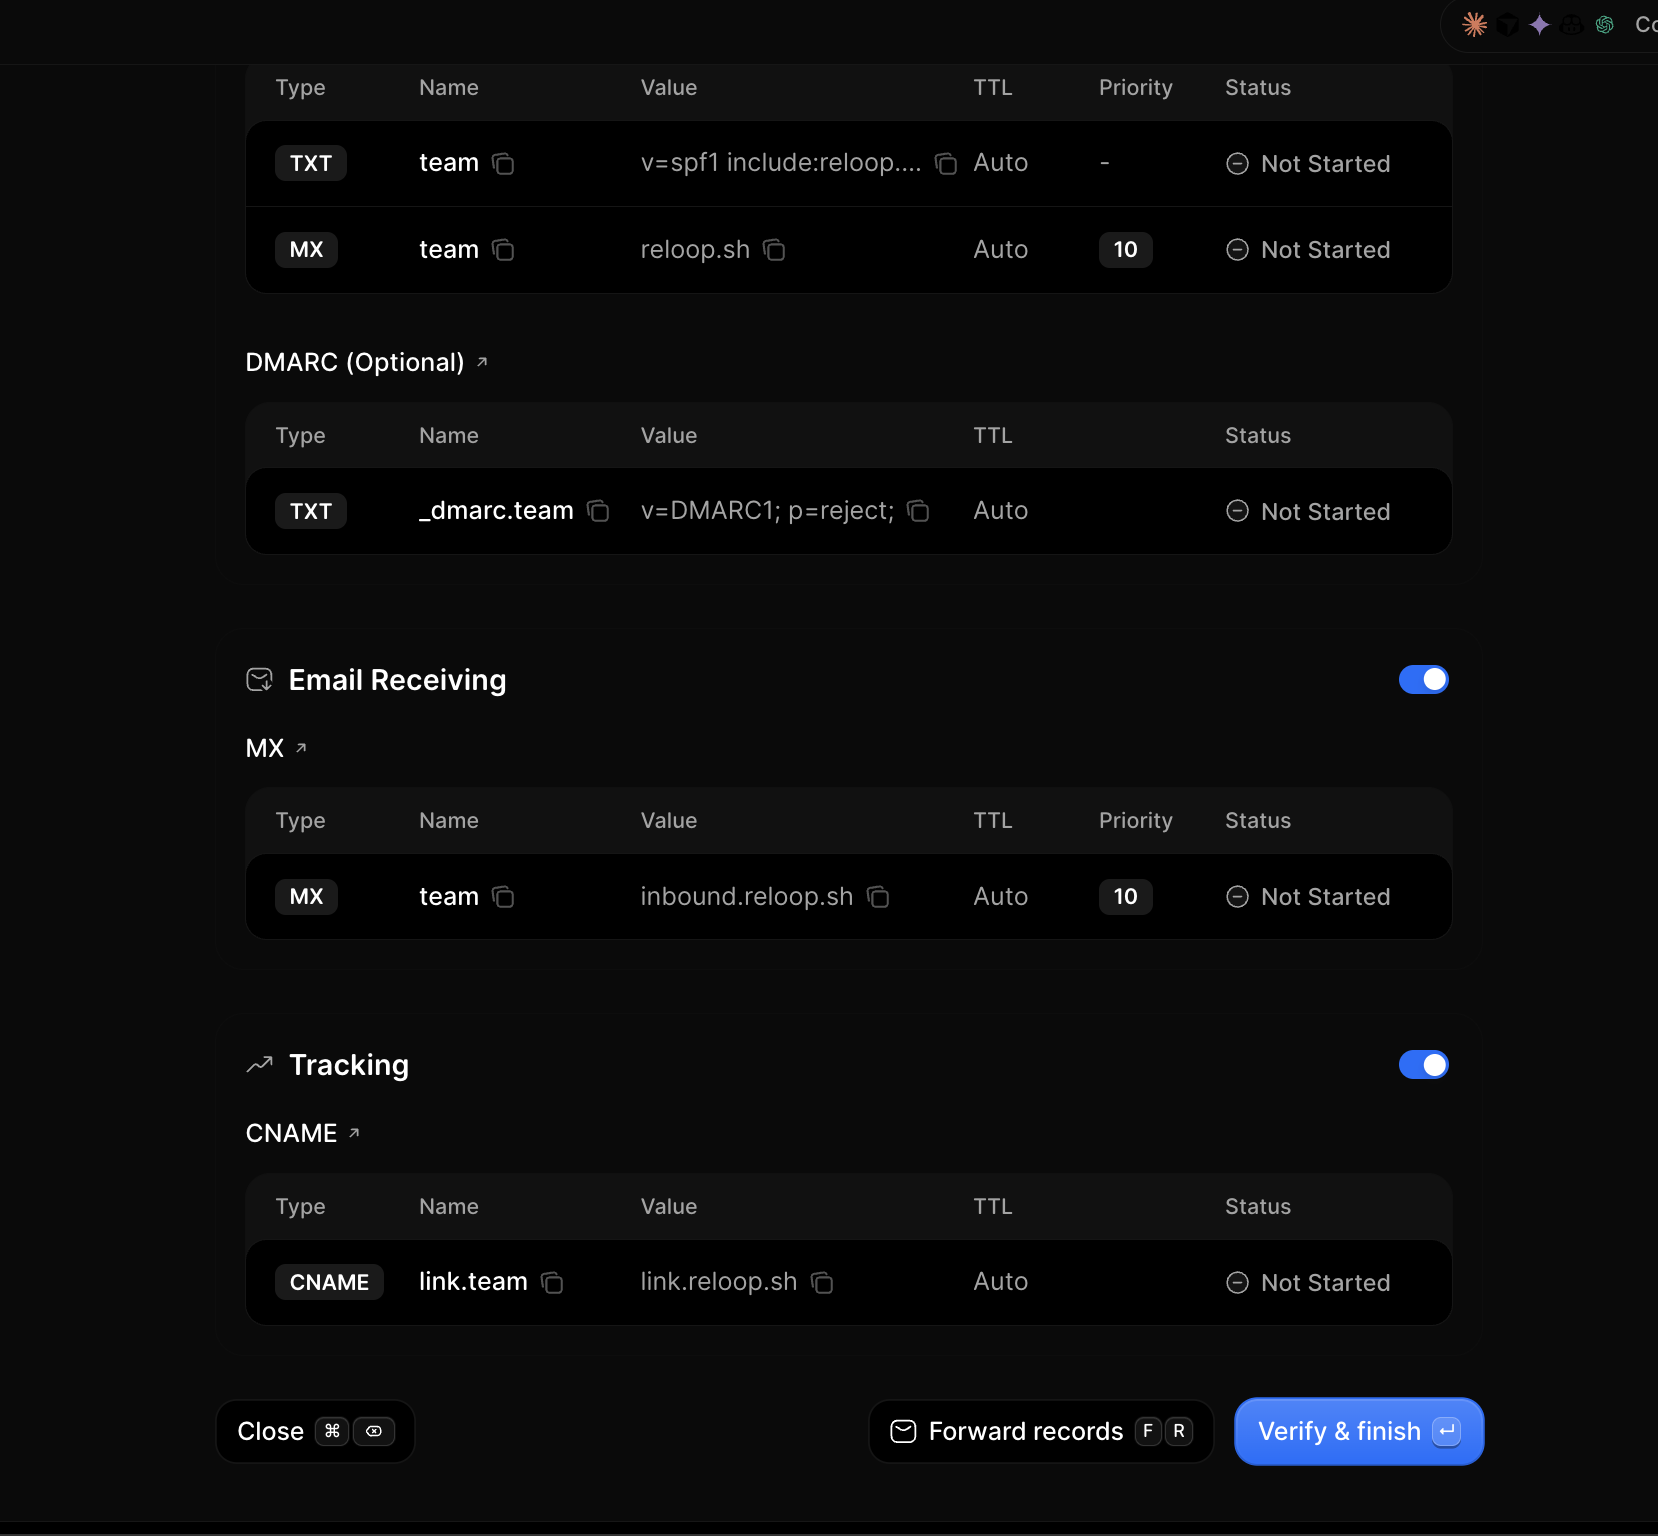
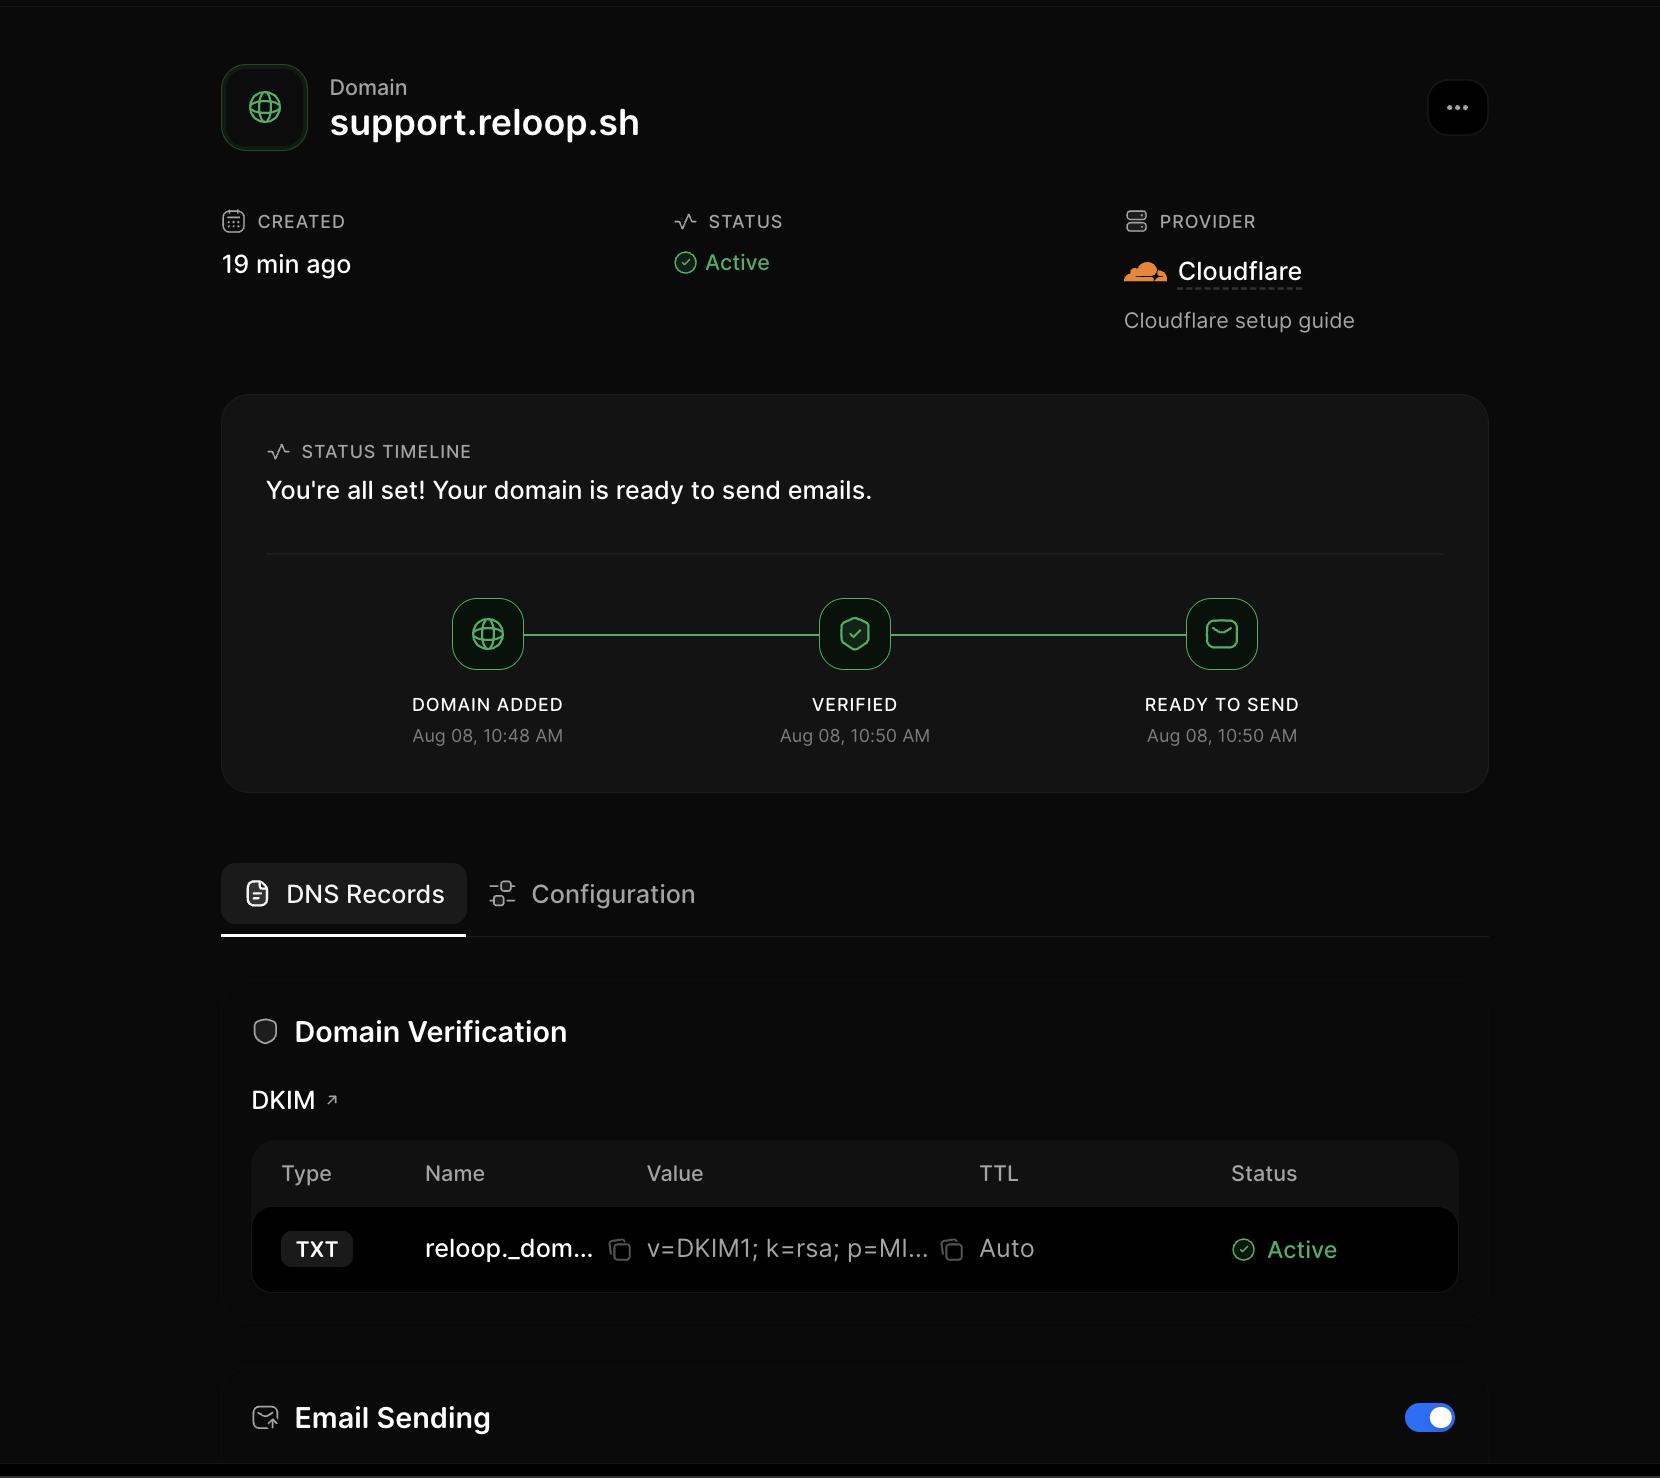
Status meanings and propagation tips: Domain statuses and Propagation. Stuck? Domain not verifying.
Configure sending, receiving, and tracking
On the domain detail page you can toggle capabilities without deleting the domain:
- Open Domains and click a domain
- On the DNS tab, toggle Email Sending, Email Receiving, or Tracking as needed
- Open the Configuration tab for click tracking, open tracking, and TLS (
opportunisticorenforced)
Receiving uses Reloop MX and can conflict with Google Workspace, Microsoft 365, or other inbox hosts. See Sending vs receiving and Avoid MX conflicts.
Forward DNS records
Share the Reloop DNS table with a teammate who manages DNS:
- Open the domain detail or setup page
- Click Forward Records (or use the row/header menu)
- Enter the recipient email and send
Delete a domain
Deleting permanently removes the domain from Reloop. You can no longer send with that hostname until you add and verify it again. Optionally remove Reloop DNS rows at your host afterward — see Remove a domain.
- Open Domains
- Click the row menu (···) → Delete Domain (or open the domain and use the header menu)
- Type the confirmation text and confirm permanent removal
You can also select multiple domains on the list and delete them in bulk.
FAQ
Related
API reference
Was this page helpful?
- Need help? Contact Support.
- Chat with Reloop developers on Discord.
- Check out our changelog.
- Questions? Contact Sales.
- LLM? Read llms.txt.