Contact Properties
Learn how to create, edit, and delete Reloop contact properties, and set values on contacts from the dashboard or API.
View all contact properties
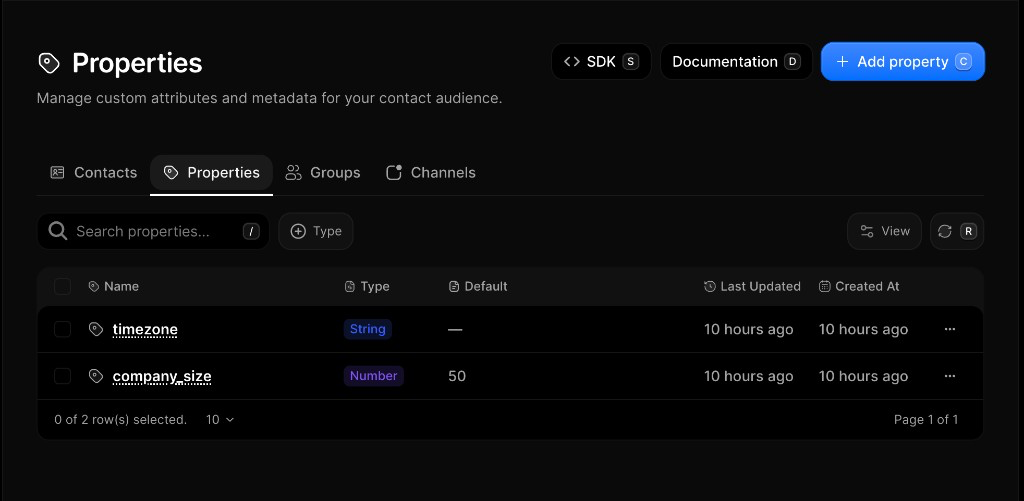
The Properties Dashboard shows every custom field in your organization — name, type, default, and when it was last updated.
Properties are custom String or Number fields you attach to a contact. Use them for personalization and targeting (for example company or plan_tier). An optional default is used when a contact has no value set.
Create a property
- Go to Contacts → Properties
- Click Add property (or press
C) - Enter a name (e.g.
plan_tierorcompany_size) — letters, numbers, and underscores only - Choose type String or Number, and optionally set a default
- Click Add property (or press
Enter)
Edit a property
After create, only the default (fallback) value can be changed. Name and type are fixed. To use a different name, create a new property and set values on contacts under that name.
- Go to Contacts → Properties
- Click the row menu (···) next to the property you want to edit
- Select Edit
- Update the default value and click Save (or press
Enter)
Set values on a contact
The Properties page defines the schema. Values live on each contact — set them when you edit a contact in the dashboard or via the Contacts update API.
- Open Contacts
- Click the row menu (···) → Edit (or open the contact)
- Fill the custom property fields (e.g.
plan_tier,timezone,company_size) - Click Update (or press
Enter)
Delete a property
Deleting removes the schema definition. Existing contacts keep raw key-value data, but the field is no longer managed globally.
- Open Contacts → Properties
- Click the row menu (···) → Delete
- Confirm permanent removal
FAQ
Related
API reference
Was this page helpful?
- Need help? Contact Support.
- Chat with Reloop developers on Discord.
- Check out our changelog.
- Questions? Contact Sales.
- LLM? Read llms.txt.